
Road and Gravel Bike Buying Guide for Better Fit
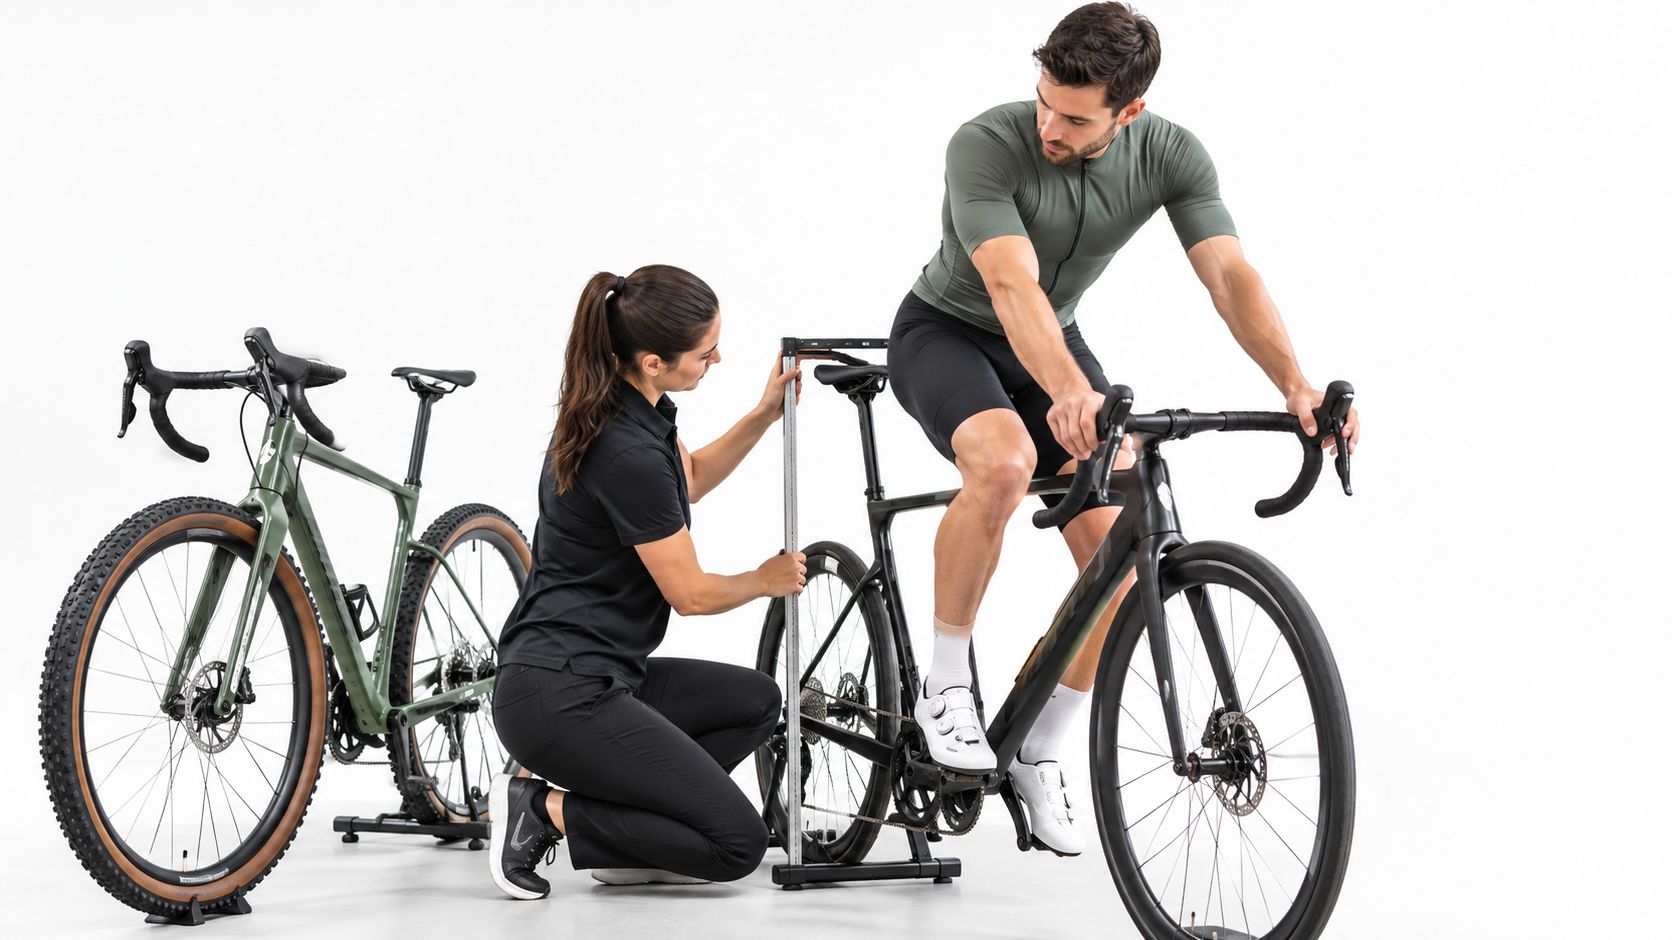
You've found a discounted road bike, a newer gravel bike, and a used carbon model with better components. They're all within budget, but they aren't equally good buys. Choose a bike that plausibly fits your body and riding first, then compare model year, condition, ownership costs, and seller transparency. This bike buying guide puts those decisions in the order that matters, so a tempting price doesn't distract you from an unsuitable frame.
Table of Contents
- Start With Fit Not Price
- Choose Between Road and Gravel
- Translate Baseline Numbers Into Geometry
- Inspect the Frame Before You Price It
- Build a Realistic Offer Range
- Compare Listings Across Sources
- Test Ride, Verify, and Decide With SYCLR
- Frequently Asked Questions About Buying Road and Gravel Bikes
Start With Fit Not Price
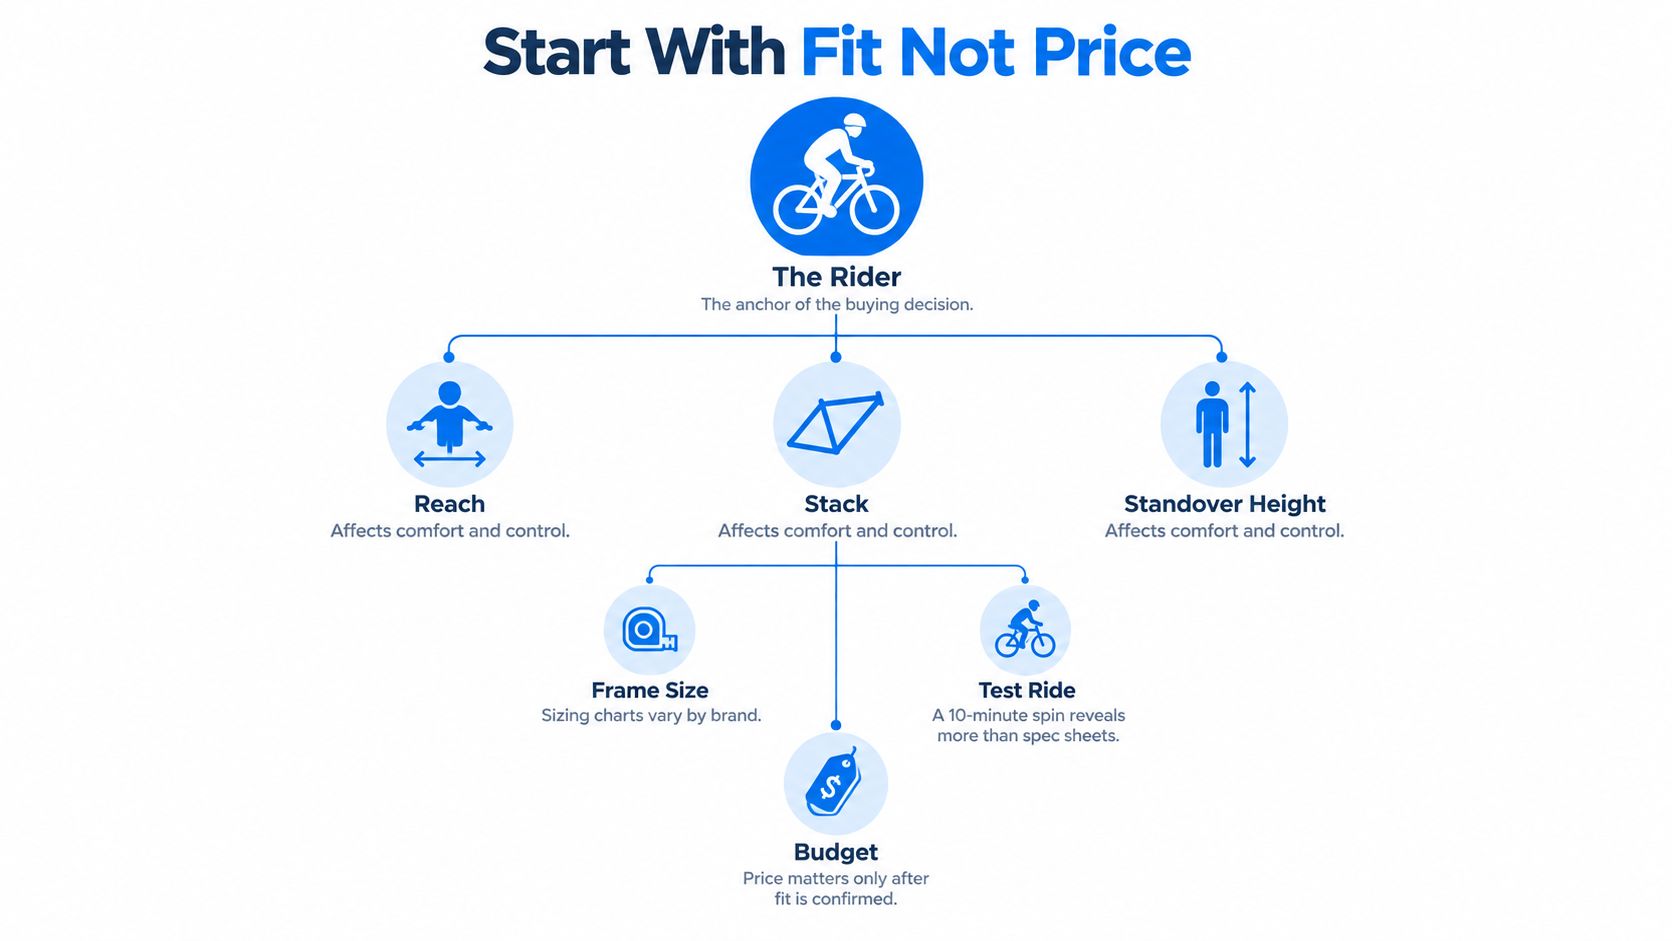
A discounted bike with an unreachable cockpit isn't good value. Neither is a frame that leaves you struggling to stand over it or requires adjustments beyond its usable limits. Set your spending ceiling early, but don't rank candidates by discount until their fit looks plausible.
Frame size and geometry deserve more attention than paintwork or component prestige. Riding position affects how you sit and reach the controls on every ride, but no frame geometry can promise to prevent discomfort or injury. Compare a bike's position and adjustment range with your needs, and seek qualified fitting advice if you have persistent pain.
Use this hierarchy to keep the rider, rather than the advertised saving, at the center of the comparison.
Build a Rider Baseline
Before opening more listings, record the information that will make them comparable:
Height and inseam: Use actual measurements rather than remembered clothing sizes. Treat height as an initial filter, not a final sizing answer.
Torso and arm length: Record these where you can measure consistently. They add useful context when your proportions differ from a chart's assumptions.
Flexibility and posture preference: Note whether you want a lower, stretched position or a less demanding posture. Don't choose an aspirational position you can't comfortably maintain.
Terrain and riding goals: Describe your normal routes, climbing, surface roughness, expected weekly mileage range, and luggage needs.
Budget band: Separate your purchase ceiling from the money available for inspection, servicing, delivery, and necessary adjustments.
Be honest about your current riding, not just the riding you hope to do. A first road bike for relaxed weekend routes is a different purchase from a bike intended for competitive riding. Likewise, occasional smooth tracks don't automatically justify an adventure-focused gravel frame.
Separate a Quick Baseline From an Advanced One
A quick baseline starts with height, bike type, and budget. That's enough to begin narrowing options, but it leaves uncertainty about proportions, flexibility, and cockpit position.
An advanced baseline adds inseam, current-bike geometry, known stack and reach, or fit-report details. Riders who already have that information can use the advanced fit-details entry rather than relying on height alone. Record what feels comfortable on your existing bike, not just the size printed on its frame.
Cycling UK's sizing guidance explains why seat-tube length has become less reliable as a sizing reference and why static measurements only approximate dynamic fit. Sloping top tubes, different proportions, and adjustment limits can make similarly labeled frames behave differently under the same rider.
Buying rule: Keep uncertain-fit bikes out of your value shortlist until you've resolved the uncertainty.
Standover is a separate check, not a substitute for cockpit assessment. Use the bike standover height guide to assess clearance and confidence when mounting, stopping, and dismounting. A frame can offer adequate clearance while still being too long or too low.
The purpose of collecting rider details is straightforward: compare each listing against your requirements, not merely against competing bikes. Brand, components, condition, and price become useful differentiators only after the frame offers a credible starting position.
Choose Between Road and Gravel
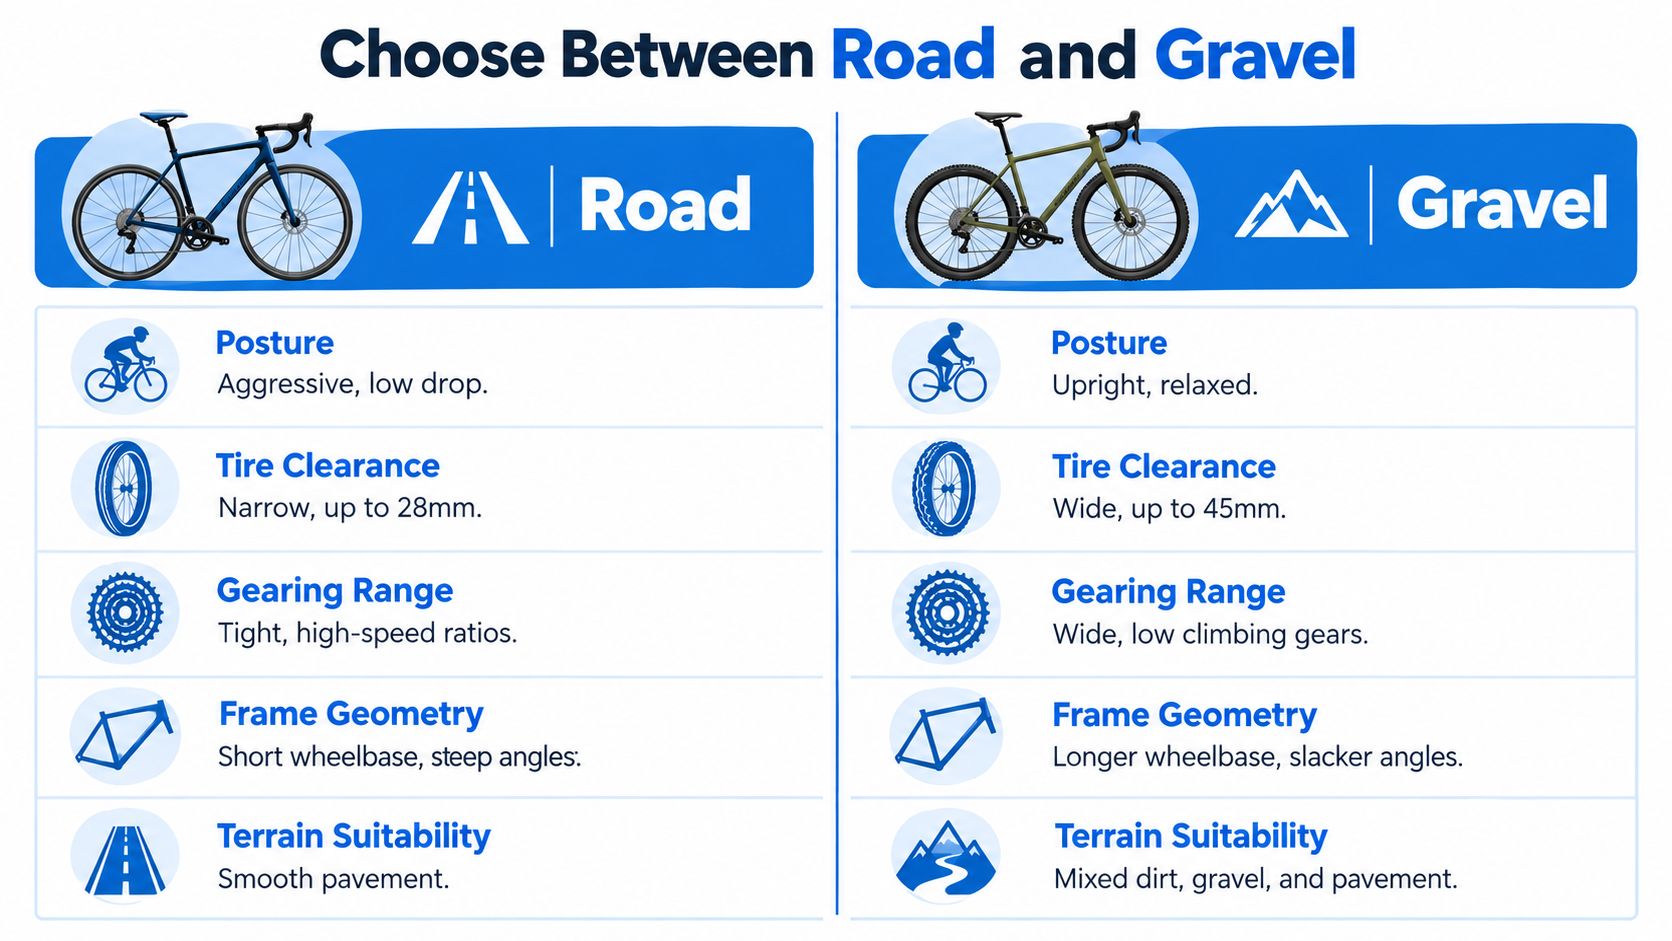
Road bikes prioritize pavement riding. Gravel bikes prioritize mixed-surface versatility. Buy for the routes you'll ride, rather than choosing whichever category has the most attractive listing.
Start with the surfaces you actually ride, then check whether a particular bike's position, tires, gearing, and mounting options suit those routes. Category labels narrow the search; they don't settle the choice.
Use the comparison below as a category overview, not a specification standard. Its posture descriptions and tire-clearance labels are illustrative, not universal limits. Check the exact manufacturer chart and clearance guidance.
Match the Design to the Route
For predominantly paved riding, start with road bikes. Compare their intended position and handling rather than assuming every road model demands an aggressive posture. Endurance-oriented options deserve consideration when sustained comfort matters more than a low front end.
For regular unpaved routes, start with gravel bikes and verify the details that make the particular model suitable:
Clearance: Confirm manufacturer-approved tire capacity for the exact model year.
Gearing: Check whether the installed gearing suits your climbs and intended load.
Luggage capability: Verify mounting provisions and permitted loads rather than assuming every gravel frame supports touring equipment.
Handling and position: Compare geometry and cockpit configuration, not category labels alone.
The linked video provides another visual reference for the category decision.
A gravel bike isn't a road bike with wider tires, and a more upright position isn't automatically a better fit. A technical review of gravel positioning notes the lack of directly tested gravel-specific target angles and injury outcomes. Treat positioning conventions as starting points, not proven prescriptions.
Once you've chosen a category, use the road bike size chart or gravel bike frame size chart to narrow candidates. Then compare their actual geometry.
Translate Baseline Numbers Into Geometry
A size label tells you where a manufacturer places a frame in its range. It doesn't tell you whether the contact points will suit you.
Stack is the vertical distance from the bottom bracket to the top of the head tube. Reach is the horizontal distance to that same reference point, as defined in BikeRadar's geometry guide. These measurements provide a more consistent frame comparison than height recommendations or size names alone.
Read the Frame and the Installed Cockpit Together
Start with stack and reach, then examine how the complete bike translates those measurements into your riding position. Stem length, handlebar shape, saddle position, and effective seat angle affect the space you experience.
Effective top-tube length helps contextualize seated fit. Head-tube angle and wheelbase provide handling context, while seat-tube length and seatpost exposure help you assess whether the required saddle position is achievable. Don't turn any individual measurement into a universal pass-or-fail rule.
Compare the complete bike, not just its category
| Starting category | Posture and geometry to check | Cockpit, clearance, and intended use |
|---|---|---|
| Race-oriented road | Compare stack, reach, and handling dimensions with a position you can sustain on paved rides. | Check the installed stem and bars, available adjustment, and approved tire clearance for your roads. |
| Endurance road | Check whether the actual front-end position suits longer paved rides; the label alone doesn't establish comfort. | Assess cockpit setup and approved tire clearance against your route and any intended luggage. |
| Gravel | Compare stack, reach, and handling with your position needs and the surfaces you ride. | Verify cockpit shape, approved tire clearance, gearing, and mounting provisions for the exact bike. |
These are questions to ask, not fixed category specifications. Use manufacturer geometry and clearance information for the exact model year and size; compare the installed cockpit before assuming any adjustment will work.
Compare Against a Known Position
A comfortable current bike is a useful reference, provided you record its setup as well as its frame dimensions. If you don't have a reliable reference, keep your fit confidence provisional and prioritize opportunities for an on-bike assessment.
Check adjustment limits: Verify saddle, stem, handlebar, and seatpost adjustment before assuming a change is possible.
Identify missing information: Ask for measurements or manufacturer documentation rather than filling gaps with assumptions.
Separate plausible from confirmed: A promising geometry chart supports further investigation, not a final fit verdict.
Use the bike geometry chart guide when a listing supplies unfamiliar fields. Your goal is a workable fit envelope, not matching an isolated number.
Inspect the Frame Before You Price It
Structural condition comes before negotiation. A worn chain belongs in a service estimate. An unexplained frame crack belongs in a decision to stop the purchase.
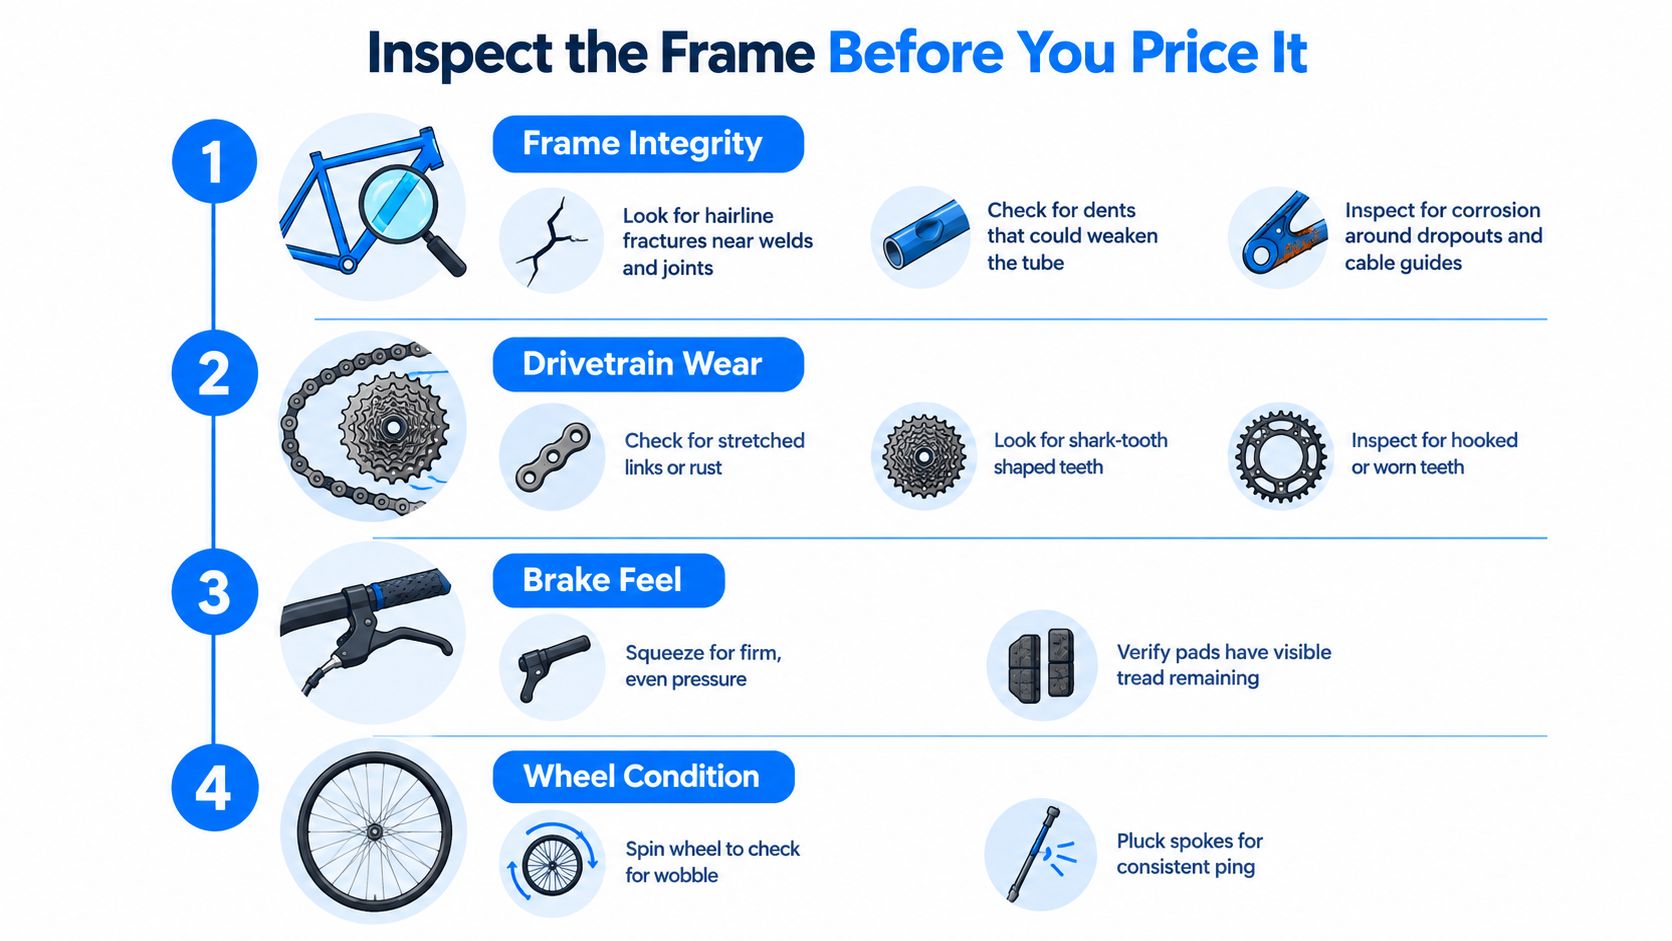
Begin in strong light with a clean enough frame to inspect properly. The following visual organizes the inspection, but its individual cues aren't diagnostic tests. A photograph, spoke sound, or apparently clean finish cannot establish mechanical safety.
Start With Structural Warning Signs
Inspect the fork, head tube, bottom-bracket area, chainstays, seat cluster, and joints. Look beyond obvious paint damage and ask the seller to explain dents, corrosion, repairs, or suspicious marks. Bicycling's used-bike inspection guidance identifies frame damage around stressed areas as a reason for particular concern.
Carbon requires special caution. Cannondale's owner-manual guidance identifies broken, splintered, or delaminated carbon, altered or soft areas, unexplained creaking, visible cracks, and white or milky discoloration as possible damage indicators. It warns against riding damaged carbon because frame failure can cause serious injury or death.
Don't negotiate around unexplained structural damage. Resolve it through qualified inspection or reject the bike.
Assess Wear and Immediate Work
Once the frame passes your preliminary screen, examine the working parts:
Drivetrain: Test every gear and have chain, cassette, and chainring wear assessed. Smooth shifting alone doesn't establish remaining service life.
Brakes: Check operation, lever travel, abnormal noise, and component condition.
Wheels and bearings: Check wheel trueness and excessive bearing play, then investigate movement or roughness.
Replacement requirements: Obtain realistic parts-and-labor estimates before deciding what the listing is worth.
This is a screening process, not a professional mechanical inspection. Ask a mechanic to assess anything you can't confidently evaluate, and agree who pays before arranging the appointment.
A seller who supplies detailed stress-area photographs and maintenance records gives you more to investigate. That transparency improves the evidence available; it doesn't certify the bike.
Build a Realistic Offer Range
The asking price is only part of the cost of getting a usable, appropriately configured bike. Estimate total ownership cost as the price you expect to pay plus necessary inspection, immediate service, parts, shipping, and transaction costs. Count each expense once.
Set your offer range against comparable bikes and documented condition. An evidenced repair cost may support a lower offer, but don't subtract the same repair again as a separate uncertainty allowance. If inspection costs are yours regardless of the sale, budget for them without automatically treating them as a defect in the bike.
Use Comparables Before Original Retail Price
An analysis of used road and gravel listings compared sampled asking-price data for 94 models with both new-retail and used-price data. In that sample, used asking prices averaged about 76% of new retail; asking prices for 2022 bikes averaged roughly 73% of those for 2025 equivalents, while 2020 bikes averaged about 64%. These cross-sectional comparisons are not verified completed sales, do not track identical bikes depreciating over time, and are not universal valuation rules.
Compare current alternatives with similar model years, builds, condition, and seller terms. Original retail price can provide background, but it shouldn't outweigh what you can buy now.
| Value factor | What to establish | Buying consequence |
|---|---|---|
| Immediate maintenance | Written parts-and-labor estimate | Reduce your offer or increase your ownership budget |
| Model year and build | Exact frame generation and installed components | Avoid comparing materially different bikes |
| Warranty | Written transfer eligibility and required documents | Don't pay for assumed coverage |
| Fit adjustments | Feasibility and likely expense | Reject an unsuitable frame rather than budgeting for a rescue |
| Missing evidence | Unresolved condition or listing details | Request supporting evidence or inspection; reject unresolved safety or identity concerns. |
Price Uncertainty Without Pretending It's Exact
Use comparable listings and documented condition to set an offer range. A written estimate for necessary repairs can inform an offer, but don't count the same work twice in your valuation or ownership budget. Missing evidence calls for questions or inspection, not an automatic discount. Unresolved structural safety, ownership, or identity concerns should stop the purchase rather than justify a lower price.
Hypothetical comparison: A discounted bike has uncertain fit and no service records; a higher-priced alternative fits plausibly and has clearer documentation. Inspection and necessary work could erase the first bike's apparent saving, so compare the evidence and total cost before choosing. Use the used bicycle value guide for a deeper pricing assessment.
Compare Listings Across Sources
A retailer listing, a used-bike specialist's listing, and a private marketplace advert can describe similar bicycles while offering different evidence and transaction terms. Compare the purchase conditions alongside the bike.
Across retailers, used-bike specialists, and private sellers, compare the documentation provided, access to an independent inspection, written return and warranty terms, and available payment protection. Confirm what each seller actually offers rather than assuming those protections come with a particular type of listing.
Build an Evidence Record
Save the listing details before contacting the seller. Distinguish seller assertions from information supported by manufacturer records, photographs, receipts, or inspection.
Identity and model year: Look for an exact model, frame size, year, and a plausible explanation of any rebuild.
Geometry and specification: Check whether the supplied chart belongs to that generation and whether the photographed components match the description.
Photo coverage: Request clear views of stress areas, wheels, drivetrain, and any disclosed damage.
Seller transparency: Assess whether answers are specific, consistent, and supported by relevant records.
Transaction terms: Read the actual inspection, return, shipping, warranty, and authentication policies where offered.
Don't assume a retailer includes thorough inspection or that a specialist's warranty covers everything. Equally, don't dismiss a private seller who provides strong documentation and permits independent assessment. Evaluate the evidence and terms, not just the source category.
Confidence is not certification: A complete listing makes a bike easier to evaluate. It doesn't prove fit, authenticity, or structural integrity.
Compare Missing Information Explicitly
General marketplaces may display inventory without interpreting geometry, model-year differences, condition, price context, or buyer confidence. That leaves you responsible for normalizing descriptions before comparing value.
Mark unavailable information as unknown, not acceptable. A polished photograph shouldn't cancel out missing crash history, and a detailed component list shouldn't distract from an unverified frame size.
Use the guide to comparing used-bike listings to organize competing options. Keep candidates with unresolved safety concerns outside the purchase shortlist, regardless of their apparent specification advantage.
Test Ride, Verify, and Decide With SYCLR
Before paying, reconcile the physical bike with the listing. Check model-year documentation, frame identifiers, size markings, and installed components, and ask the seller to explain discrepancies. Identifiers support an identity check; they aren't, by themselves, proof of ownership or authenticity.
Request the seller's current saddle height, stem length, handlebar details, and available adjustment information. Their body measurements and comfort claims don't establish that the setup will suit you.
Close the Purchase Carefully
Where possible, test the bike in the positions and conditions relevant to your riding. Check whether you can reach the controls comfortably, maintain a relaxed posture, and operate the brakes and gears without compensating for the cockpit.
Before payment: Resolve inspection findings and confirm the bike and included equipment in writing.
For remote purchases: Establish delivery responsibilities, payment protections, and any return rights before committing.
After delivery: Compare the received bike with the saved listing and arrange any agreed mechanical assessment before normal riding.
How SYCLR Helps
Use a fit-aware comparison platform alongside manufacturer charts, a professional fitter, and a qualified mechanic. It can organize road and gravel listings around rider details, available geometry, model-year context, price context, condition signals, and listing confidence.
That comparison supports shortlisting; it doesn't guarantee fit, safety, authenticity, condition, or fair value. Missing measurements and incomplete seller information remain reasons to investigate.
Frequently Asked Questions About Buying Road and Gravel Bikes
Should I Buy the Cheapest Bike That Looks Suitable?
No. Compare total ownership cost and evidence quality before treating the lowest asking price as the strongest option. A bargain claim isn't a substitute for a plausible fit.
Is Height Enough to Choose My Size?
Height is a starting point. Proportions, posture, geometry, and adjustment range determine whether a candidate deserves further consideration.
Is Gravel Automatically More Comfortable Than Road?
No. Choose around terrain and your usable riding position. Category labels don't establish personal comfort.
Should I Choose an Older Premium Bike Over a Newer Basic Bike?
Compare the actual builds, condition, serviceability, and purchase terms. Component prestige alone doesn't outweigh better documentation or more suitable geometry.
Can Detailed Photos Replace an Inspection?
No. Photos help identify questions and visible concerns, but they cannot establish complete mechanical condition or carbon integrity.
What Should I Do When Important Details Are Missing?
Ask for the evidence before committing. If the seller won't clarify identity, structural history, or inspection access, remove the listing from consideration.
Start with your height, bike type, and budget in the bike comparison app to shortlist road and gravel bikes using available fit, geometry, model-year, price, and listing information. Check promising bikes with the seller and arrange an inspection before committing.