
Bike Tire Clearance Explained: What Actually Fits
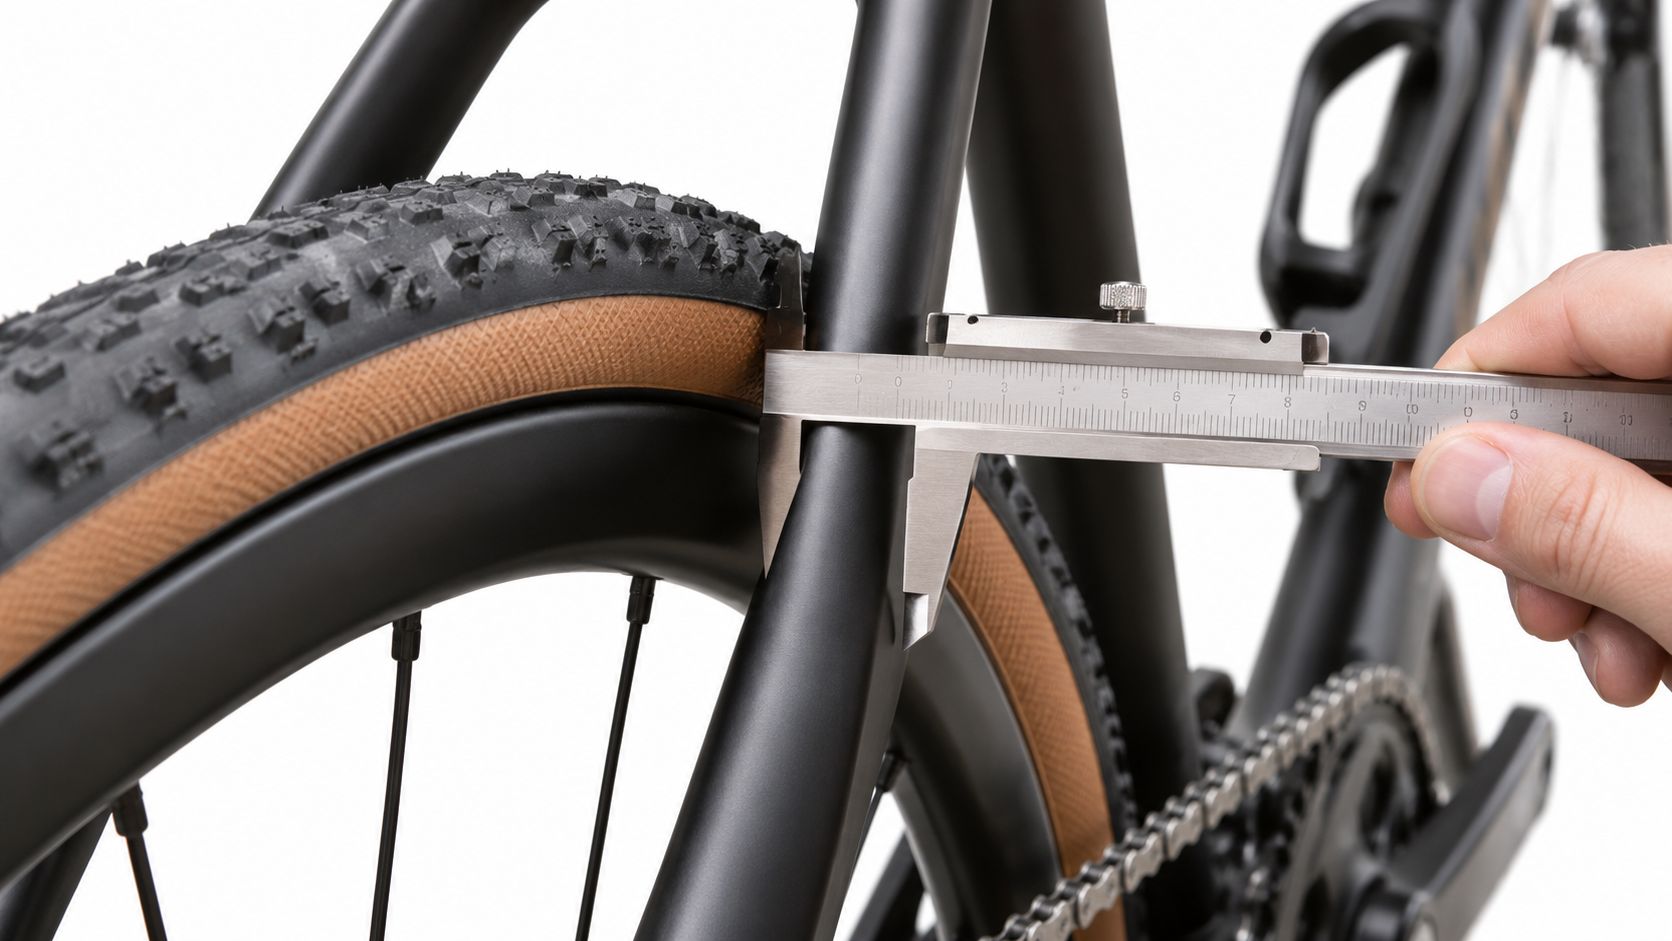
Manufacturer clearance limits come first. After that, the real question is whether your exact wheel and tire setup, once installed and inflated, leaves enough space at the frame, fork, brakes, fenders, and other nearby parts to match the bike maker's requirements. That is the difference between a nominal tire size on paper and a setup you can actually verify on the bike.
A lot of buyers run into trouble when a listed tire size is treated like proof of compatibility. A seller says the bike "fits 45 mm tires," or a frame chart lists a maximum size, but the bike in front of you has a different rim width, a different tire casing, or unclear front and rear limits. Clearance decisions work best when you move in order: manufacturer limits, mounted tire dimensions, frame and fork clearance, direct verification, then used-listing uncertainty.
Table of Contents
- Why Bike Tire Clearance Starts With Manufacturer Limits
- What Actually Changes Mounted Tire Size
- How to Verify Frame and Fork Clearance Correctly
- Real Riding Conditions Still Matter
- How to Evaluate Used Listings Without Guessing
- Making Better Listing Comparisons With SYCLR
Why Bike Tire Clearance Starts With Manufacturer Limits
A bike advertised for a certain tire size is not automatically compatible with every tire labeled that way. The first reference point should be the manufacturer's documentation for that exact bike, including model year when possible. Frame design, fork shape, brake configuration, axle standard, and wheel size all affect what the bike was designed to clear.
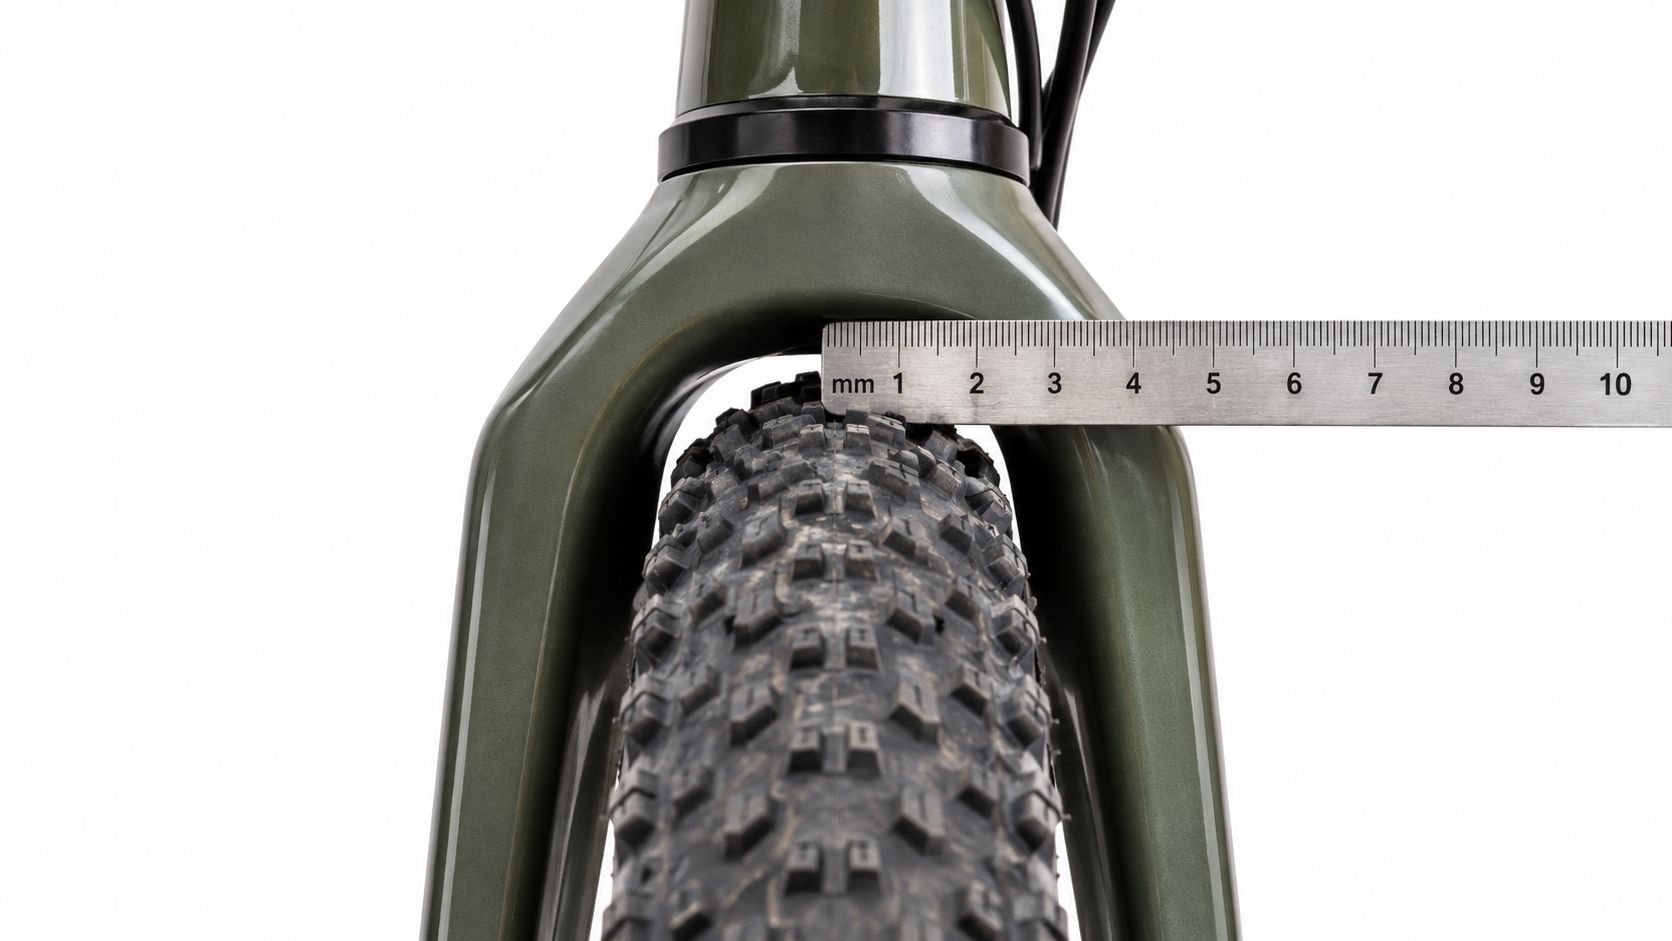
Published guidance also varies by brand, which is why one company's example should not be treated as a universal rule. Trek notes at least 4 mm clearance for road bikes and 6 mm for gravel bikes in its buyer guidance, while Cannondale discusses roughly 4 to 5 mm in its own materials. Those are manufacturer examples, not a single rule that applies to every bike. General brand guidance does not override the requirements in the exact bicycle's model-specific owner documentation. The practical takeaway is to follow the relevant bike maker's instructions for the exact model and then verify the installed setup at the front and rear, checking both side and top clearance. Trek road buyer's guide Cannondale tire clearance overview
A maximum tire claim is a starting point. Compatibility depends on the exact bike, exact wheel, exact tire, and the manufacturer's own requirements.
Published max tire size is only the starting point
Even when a frame chart lists a maximum tire size, that number usually assumes a particular wheel size and a compatible rim and tire combination. It does not replace direct measurement of the installed setup. Front and rear limits may also differ, and nearby parts such as brakes, fenders, or frame protection pieces can change what is actually usable.
That is why a fit-aware comparison should focus on the exact manufacturer, model, year, frame and fork specification, wheel size, and any stated front and rear tire limits. Broad category assumptions are less useful than model-specific documentation and direct verification.
What Actually Changes Mounted Tire Size
A tire labeled 40 mm does not always measure exactly 40 mm once mounted. Actual mounted dimensions can change with rim internal width, casing construction, tread profile, inflation pressure, and measurement conditions. That affects not only side clearance, but also overhead clearance at places like the fork crown and seatstay bridge.
Why the same labeled tire can measure differently
Schwalbe notes that tire dimensions can vary with rim width, pressure, and other factors, which is a useful reminder that a sidewall label is not the same thing as a confirmed mounted measurement. That does not create a universal tolerance for every brand or every setup, and it should not be used as a substitute for manufacturer compatibility checks. Tire and rim compatibility still need to be confirmed through the relevant manufacturer guidance. Schwalbe tire dimensions
In practice, buyers should assume that the following can change measured size:
| What can change the mounted tire size | Why it matters |
|---|---|
| Rim internal width | The same tire can measure differently on different rims |
| Casing construction | Two tires with the same label can have different real dimensions |
| Tread profile | Knobs or shoulder tread can change usable clearance |
| Inflation pressure | The tire shape can change at installed pressure |
| Measurement conditions | Brand method and workshop setup affect reported size |
Use the wheelset you plan to ride, not a generic example. On a used bike, that means the rim model and internal width matter alongside the frame claim, because the real question is whether that wheel and tire combination matches the bike maker's limits. For a more focused gravel example, see the gravel bike tire size guide.
How to Verify Frame and Fork Clearance Correctly
The right way to check clearance is with the exact wheel and tire setup installed, inflated, and confirmed compatible with the rim and bike manufacturer's guidance. Do not rely on a sidewall label alone, and do not assume that a photo of a mounted tire proves that the setup meets the bike maker's requirements.
Where to check clearance on the bike
Check the bike at the manufacturer's specified points and inspect both front and rear. Common areas include the chainstays, seatstay bridge, fork crown, fork blades, brake areas, and any location where fenders or other accessories may reduce space. Look for both side clearance and overhead clearance, and inspect around the tire circumference rather than checking only one spot.
Also confirm that the wheel is properly seated, the tire is properly installed and inflated, and that relevant components are accounted for. If the bike uses fenders, tight mudguards, unusual brake hardware, frame protection, or other nearby parts, those need to be part of the check as well.
A stationary measurement is useful for verification, but it cannot guarantee dynamic clearance in real riding. If the setup is close, undocumented, or unclear, the next step is manufacturer confirmation or review by a qualified mechanic.
Verification means checking the exact installed setup against the bike maker's requirements. It is not the same thing as proving that any labeled tire size is universally safe.
A practical verification sequence
| Step | What to verify | Why it matters |
|---|---|---|
| 1 | Exact bike make, model, and year | Manufacturer limits can change by version |
| 2 | Wheel size and rim model/internal width | Rim dimensions affect mounted tire size |
| 3 | Tire brand, model, and nominal size | Same labeled width does not guarantee same result |
| 4 | Tire and rim compatibility | The wheel and tire setup must be approved for use together |
| 5 | Proper installation and inflation | Clearance should be checked on the installed setup |
| 6 | Front and rear side and top clearance | Limits may differ at each end of the bike |
| 7 | Brake, fender, and component proximity | Nearby parts can reduce usable space |
| 8 | Manufacturer or mechanic review when unclear | Uncertain setups need qualified confirmation |
That sequence gives you a stronger answer than a listing description or a single tire label. It separates what is documented, what is measured, and what is still unverified.
Real Riding Conditions Still Matter
A bike can look acceptable in a clean workshop and still face tighter real-world conditions once mud, grit, debris, wheel movement, or accessories are involved. Those factors matter, but they do not create a universal dry-versus-wet clearance rule for every bike.
Mud, grit, fenders, and wheel movement
Bike Components recommends allowing room so mud, stones, or a slightly out-of-true wheel do not contact the frame or fork, which is a useful practical consideration when reviewing gravel-oriented setups and mixed-surface use. The important point is not to apply one generic threshold to every bike, but to recognize that debris, fenders, and normal wheel movement can all reduce usable space. Bike Components gravel tyre guide
When you compare setups, include the conditions you actually ride in:
Mud and grit can occupy space that looked open when clean.
Tread shape can carry debris through tighter passages.
Fenders can materially change what fits.
Wheel condition and movement can affect real clearance margins.
Front and rear may not have the same usable room.
If the setup is intended for accessories, poor weather, or mixed surfaces, those factors should be part of the verification process, not assumptions added afterward.
How to Evaluate Used Listings Without Guessing
Used-bike listings often leave out the details that matter most for clearance. A seller may show a sidewall label or write a maximum tire number without documenting the wheel, rim width, front and rear differences, or the actual mounted tire measurements. That does not automatically mean the listing is unsafe or dishonest. It means the setup is unverified until you have enough information to compare it with the bike maker's documentation.
What to ask for before you rely on a claim
Start with the exact bike identity and work outward from there. Ask for:
Exact model and year
Manufacturer maximum tire specification
Front and rear tire limits, if different
Wheel size
Rim model and internal width
Installed tire brand, model, and nominal size
Actual mounted tire measurements, when available
Photos of front and rear clearance points
Photos are useful screening evidence, but they are not proof of safe compatibility. A tire can look like it clears in one angle and still require verification against manufacturer guidance and the actual installed dimensions.
Use the full setup as your reference point, especially on used gravel bikes, where tire choice, wheel choice, and accessory setup vary a lot. Missing information should be treated as unverified, not automatically unsafe, fraudulent, or impossible.
A practical listing review looks like this:
| Listing detail | What it tells you | What it does not prove |
|---|---|---|
| Model and year | Which manufacturer documentation to check | Actual installed clearance |
| Wheel and rim details | Likely mounted tire dimensions | That every tire of that label will fit |
| Installed tire details | What is currently on the bike | That the setup meets manufacturer limits |
| Clearance photos | A first screening view | Verified compatibility |
| Seller completeness | Confidence level in the listing | Physical confirmation on the bike |
If key information is missing, the decision is not necessarily "no." It is simply less certain, which should affect how much follow-up verification you need before buying.
Making Better Listing Comparisons With SYCLR
A rider shopping for a used road or gravel bike does not just need tire-size claims. They need a way to compare listing quality, fit context, bike details, and uncertainty before spending time on a lead that may not match their needs.
SYCLR compares road and gravel listings using fit signals, geometry signals, model-year context, price context, listing quality, condition signals where available, and confidence signals.
SYCLR does not perform a professional bike fit, physically inspect bikes, authenticate listings, verify ownership or seller claims, or guarantee fit or condition.
That distinction matters here. Rider fit and component clearance are related buying questions, but they are not the same thing. A bike can look promising for rider fit while still needing separate confirmation on tire and wheel compatibility, front and rear limits, and frame or fork clearance for the exact setup you plan to use.
The useful part is not a promise of certainty. It is a better way to organize listings by what is documented, what is missing, and what still needs verification. If one bike looks attractive on price but has weak setup details, and another has stronger fit and listing signals, you can see that difference earlier in the process.
If you're comparing road or gravel listings right now, use SYCLR to start with height, bike type, and budget, then compare fit and geometry signals side by side. It's a practical way to shortlist better-fit bikes, check model-year and price context, and identify which listing details still need verification before a purchase.