
Between Two Bike Sizes: How to Pick the Right Frame
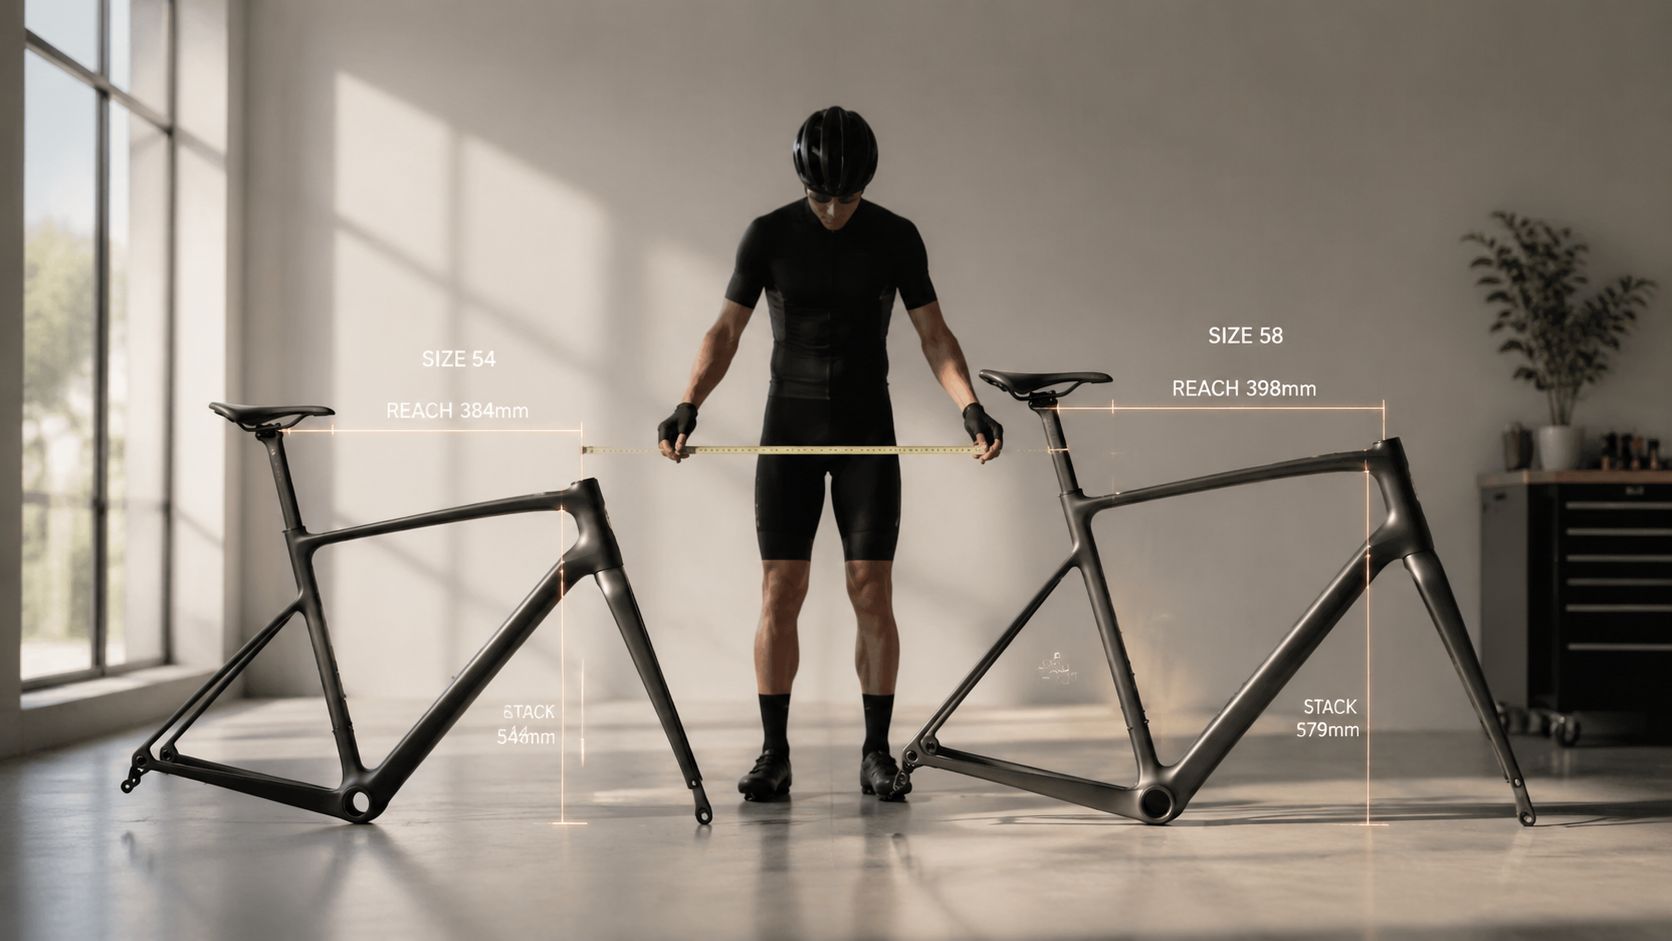
The most common advice for riders between two bike sizes is also the least dependable: "Just size down." That shortcut skips the part that matters most, the actual frame geometry and the position each size creates.
If you are deciding between two sizes, start with the frame that gives you the better geometry starting point. Then use your proportions, your current-bike position, and normal cockpit adjustments to judge whether that size can be refined into the position you want. Height can narrow the field, but it rarely settles a close sizing decision on its own.
Table of Contents
- Why Sizing Up or Down Is the Wrong First Question
- Stack and Reach as the Comparison Currency
- What Changing Sizes Actually Changes
- Using Your Current Bike as a Practical Reference
- Cockpit Adjustments Refine Fit, They Do Not Rescue It
- A Hypothetical Comparison of Two Adjacent Sizes
- When a Professional Fit Is Worth It
- Between Two Bike Sizes FAQs
Why Sizing Up or Down Is the Wrong First Question
"Should I size up or down?" sounds practical, but it assumes size labels mean the same thing across brands, categories, and model years. They do not. A 54, 56, or Medium can place the front end and cockpit in meaningfully different places depending on the bike.
That is why the first question is not whether to go smaller or larger. The first question is: which size puts you closer to the position you are actually trying to achieve?
A geometry-first decision is usually the cleanest path:
-
Pull the manufacturer's geometry chart for the exact model and exact model year.
-
Compare both candidate sizes side by side.
-
Prioritize stack and reach as the clearest frame-level signals.
-
Add context from effective top tube, standover, seat-height range, and stock cockpit dimensions.
-
Compare those numbers with a current bike that already fits well, if you have one.
-
Decide whether normal stem, spacer, bar, and saddle adjustments would refine the result.
This approach works better than following a blanket rule because it is built on the position each frame starts from, not the label on the seat tube.
Practical rule: Do not choose a size until you know what position that size creates.
Torso and arm proportions can help explain why two riders of the same height may prefer different cockpit positions, but they should not be used as a standalone rule for choosing the larger or smaller size. A rider who wants a more upright endurance position may care most about front-end height, while another rider may prioritize a lower starting point. Neither case justifies a universal size-up or size-down rule.
The decision becomes much clearer once the geometry chart is on the table. Before that, you are mostly comparing assumptions.
Stack and Reach as the Comparison Currency
Stack is the vertical distance from the bottom bracket center to the top center of the head tube. Reach is the horizontal distance between those same points. These numbers are useful because they describe the frame itself, rather than the parts bolted onto it. The definitions are explained in this stack and reach geometry guide.
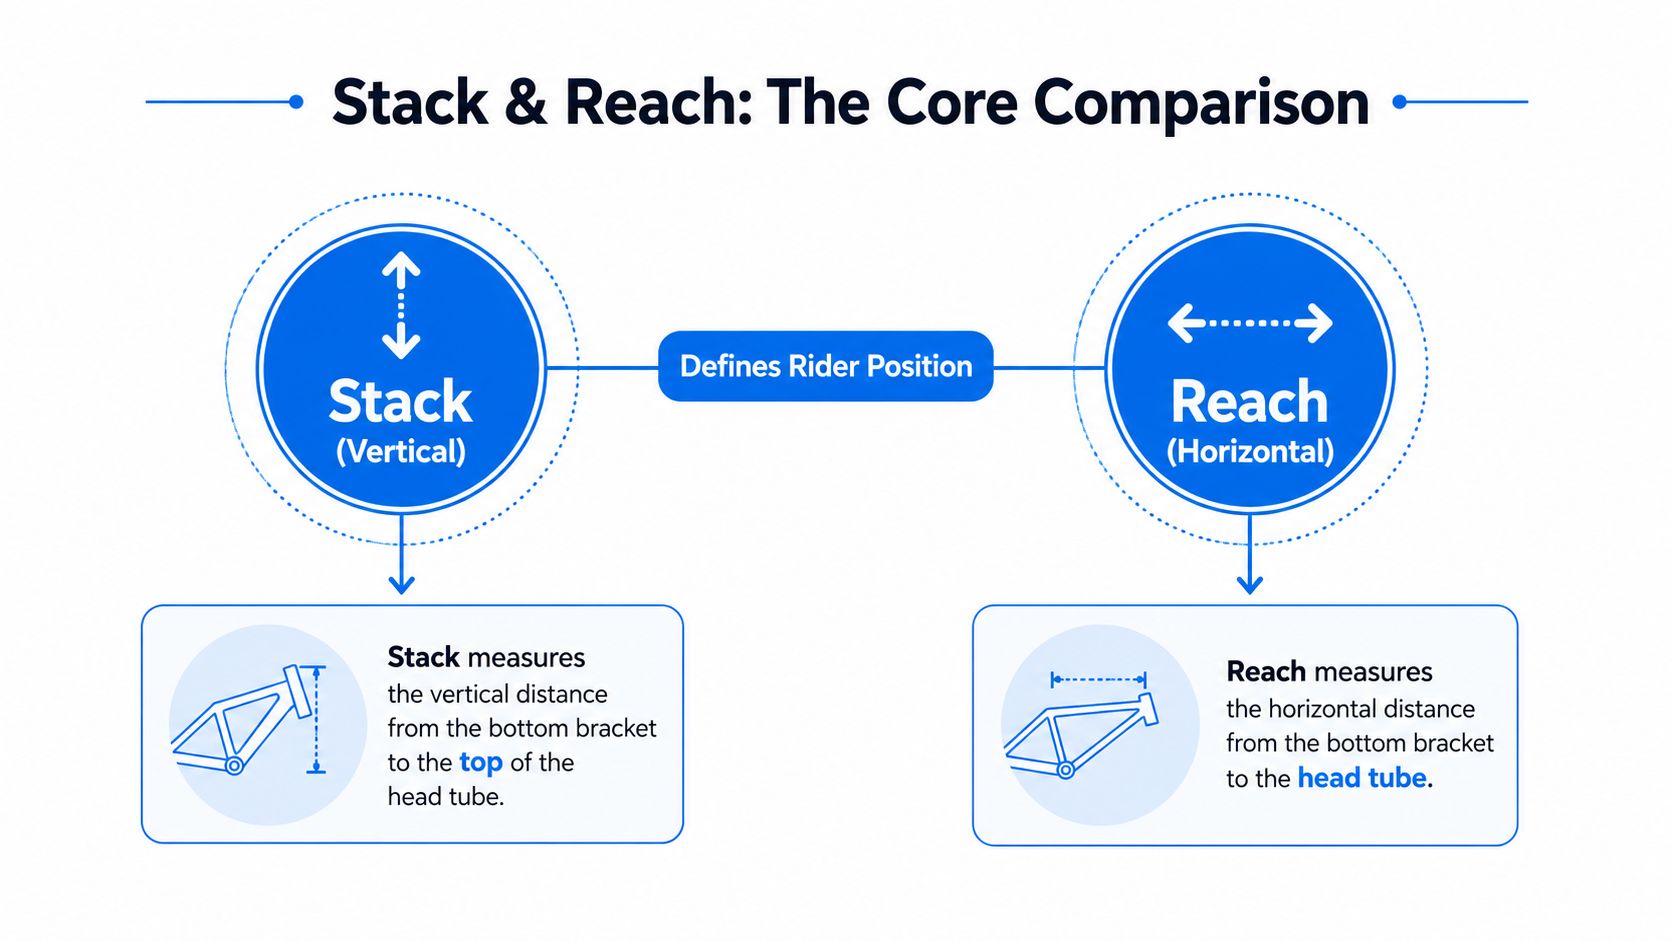
Stack and reach are the strongest starting signals when you are comparing two frames, but they are not a complete fit answer by themselves.
Reach gives you a strong frame-level read on cockpit demand, but it does not equal final hand position because the stem, handlebar, controls, and saddle setup still contribute. What reach does tell you clearly is where the head tube sits in relation to the bottom bracket.
Stack gives you a strong read on front-end height. It helps you judge whether the frame starts low, tall, or somewhere in between before spacers, stems, and handlebar shape enter the picture.
That is why stack and reach work so well as comparison currency. They let you compare frames consistently, but they still need supporting context from the rest of the bike and from your actual riding position.
How to read two geometry charts
Use the manufacturer's chart for the exact bike and exact model year whenever possible. Do not compare a generic brand sizing page with a different model and assume the labels translate cleanly.
Record these fields side by side:
-
Stack: The frame's vertical starting point for the front end.
-
Reach: The frame's horizontal cockpit demand.
-
Effective top tube: Helpful context for seated cockpit feel, though less consistent than reach across brands.
-
Head tube length: Adds context for how the frame builds front-end height.
-
Standover: Use it as a clearance check alongside inseam, not as the primary size-selection metric.
-
Seat-height range: Check whether your expected saddle height falls within the bike's intended adjustment range.
-
Manufacturer cockpit: Note the stock stem and handlebar dimensions, which can vary by size.
That last point matters more than many buyers realize. Two adjacent sizes may ship with different stem lengths, bar widths, or bar reach. If you ignore the stock cockpit, you can miss a meaningful part of how each bike is intended to fit.
Effective top tube, standover, and seat tube length add context, but they should not override stack and reach. Standover changes with top-tube shape and tire clearance. Seat-tube length often reflects design choices that do not directly describe handlebar height or cockpit length. Use them to complete the picture, not to replace it.
What Changing Sizes Actually Changes
Moving from one adjacent size to another changes more than the printed number on the frame. The larger option often shifts the bike's proportions, but the only reliable way to know how is to read the exact manufacturer chart for that exact bike.
Depending on the model, a change in size can affect:
-
Stack
-
Reach
-
Effective top tube
-
Head tube length
-
Standover
-
Seat-height range
-
Wheelbase and front-center
-
Stock stem and handlebar dimensions
Those changes matter because they alter the frame's starting position and, sometimes, the parts used to complete it. What they do not provide is a universal rule. There is no single adjacent-size geometry pattern that applies across all road, gravel, or hybrid bikes.
This is also why it is risky to treat a labeled size as a fit measurement. A 56 in one endurance bike may not place you remotely like a 56 in another brand's race bike, and a Medium gravel bike may ship with a different cockpit strategy from a Medium all-road bike from the same company.
What your body measurements add, and what they do not
Your body measurements matter, but they are best used as interpretive context, not automatic verdicts.
Inseam is most useful for:
-
Saddle-height range
-
Standover and clearance context
If standover is one of the constraints separating the two sizes, use SYCLR's bike standover height guide for the deeper explanation rather than turning standover into the deciding measurement here.
Torso and arm length are most useful for:
-
Interpreting cockpit demand
-
Understanding why two riders of the same height may prefer different reaches and front-end setups
That does not mean inseam decides whether you should size up or down. It does not mean longer arms automatically make the larger frame correct. These measurements help explain what may feel natural once you compare the real geometry and your actual riding position.
A good sizing decision uses body measurements as supporting evidence, not as a substitute for the chart.
Using Your Current Bike as a Practical Reference
If you already own a bike that fits well, it can be one of the most useful practical references for comparing two candidate sizes.
A height chart gives you a generic starting range. A well-fitting current bike gives you something far better: a position you already know works in the real world.
Start with the exact model, model year, and frame size of your current bike. Then compare:
-
Frame stack and reach
-
Effective top tube
-
Stem length and angle
-
Spacer height
-
Bar reach
-
Saddle position
-
Crank length, where relevant
Those details matter because riders do not experience a frame chart in isolation. They experience the full bike as it is set up.
For example, a candidate frame may look close on paper, but if it comes with a longer stock stem or a very different bar reach, the cockpit you actually feel on the road may land in a different place. Likewise, if your current bike fits because it uses a particular spacer arrangement or saddle position, that context belongs in the comparison.
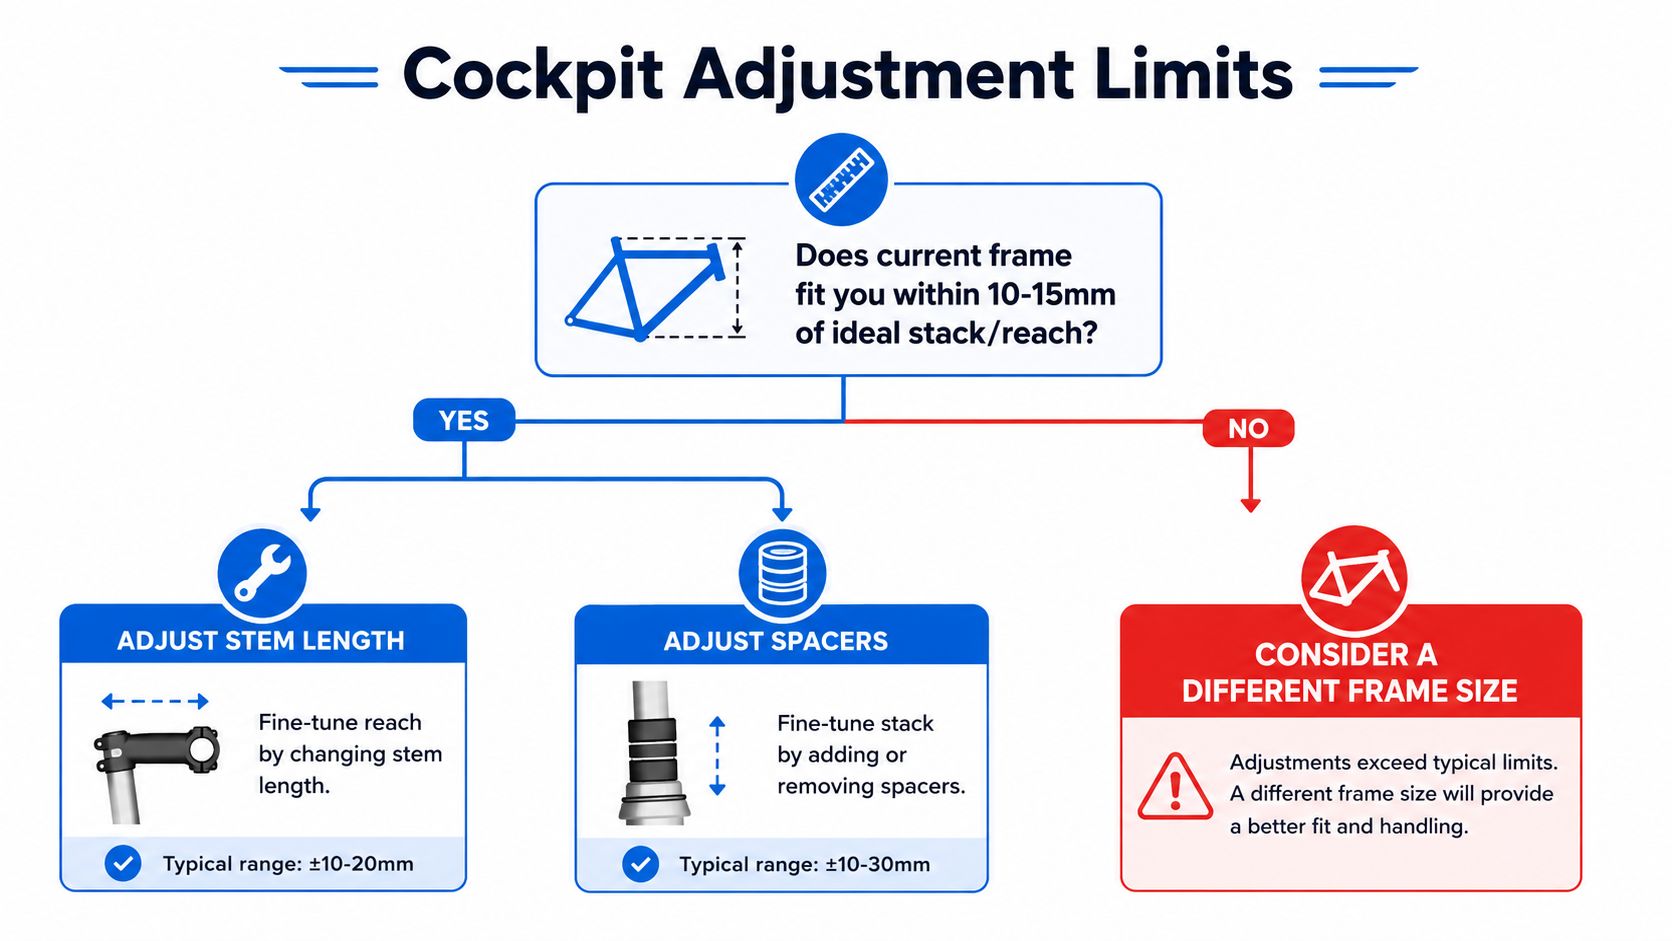
The question is not simply whether the new frame is bigger or smaller. The question is whether it gets you close to your known working position without forcing a chain of compensations.
Add ride feedback, not just measurements
Measurements matter, but so does your experience on the bike.
Write down what a normal ride feels like on your current setup:
-
Are you comfortable in your usual hand positions?
-
Does the front end feel naturally placed for the kind of riding you do?
-
Do you feel balanced between saddle, pedals, and bars?
-
Does the bike feel easy to settle into over longer rides?
This kind of feedback helps you interpret the numbers. A current bike may look close to a candidate frame on paper, yet feel different because the stem, bar reach, or saddle setup changes the final position.
Cockpit Adjustments Refine Fit, They Do Not Rescue It
Stem length, spacers, handlebars, and saddle setup are all useful tools. They can refine a plausible frame into a better final position.
What they should not do is rescue a clearly unsuitable frame.
A shorter or longer stem changes the distance from the steerer to the handlebar, but it does not change the frame's reach, front-center, or basic proportions. Spacers can lift the front end within the limits of the bike's design, but they do not create unlimited stack. A different handlebar can alter hand position through bar reach and drop, but that change should be treated as part of the overall cockpit setup rather than a substitute for choosing a workable frame. Saddle position affects your relationship to the bottom bracket and should be set for the rider's pedaling position rather than moved primarily to compensate for frame reach.
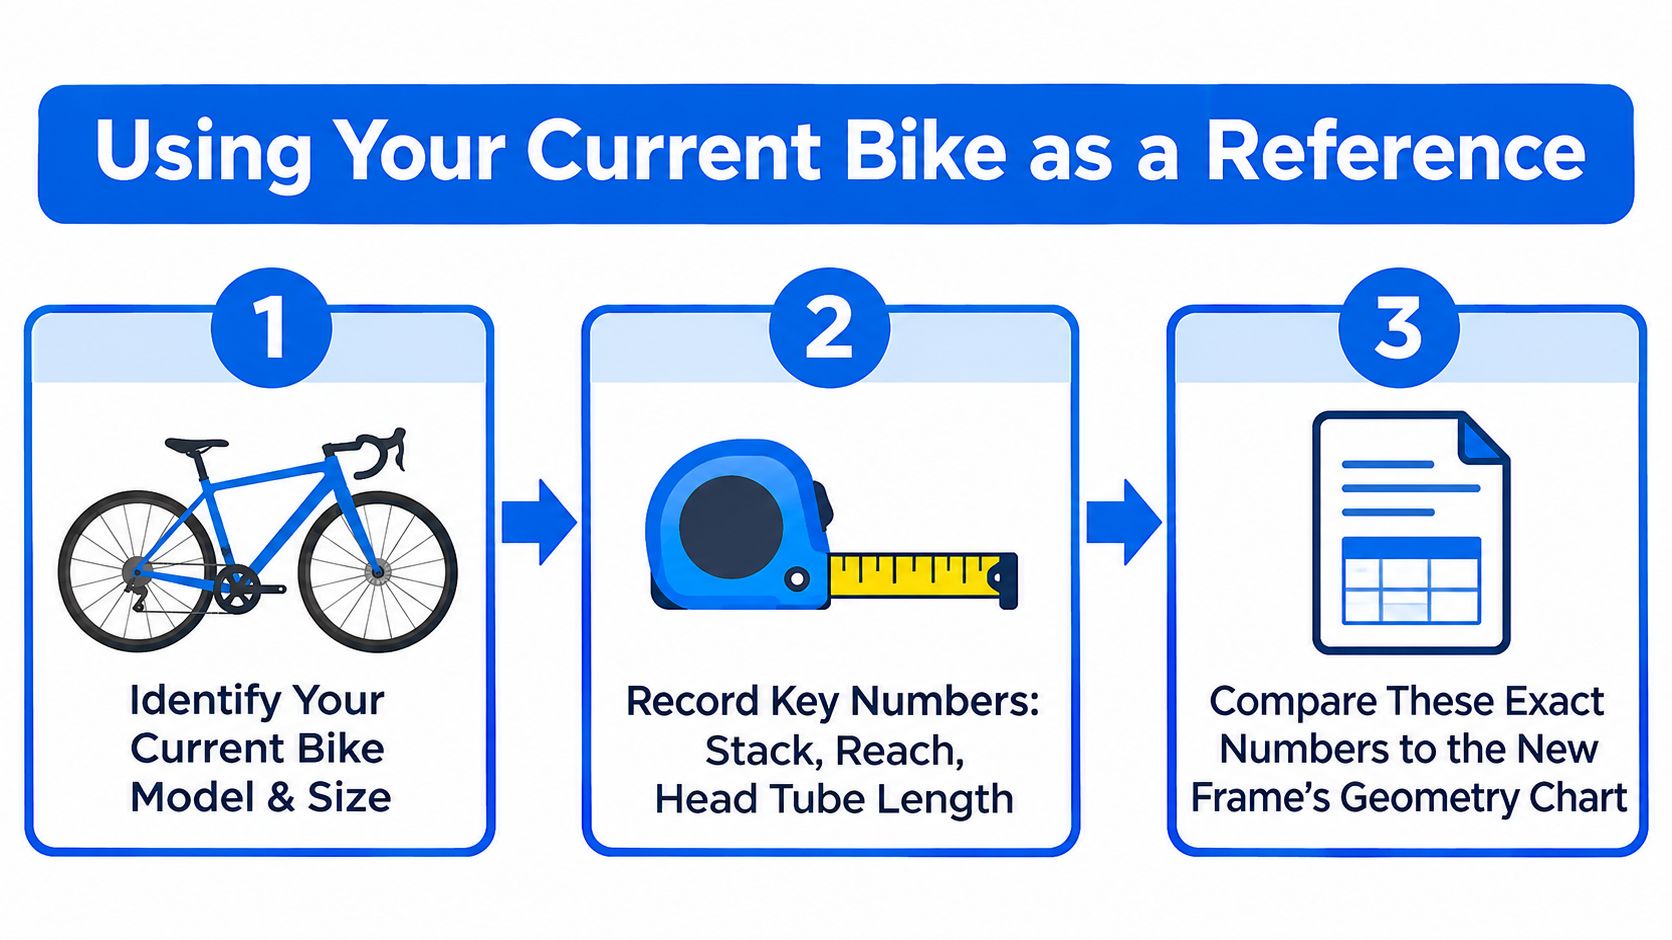
The goal is to start with the right frame and use components to fine-tune it, not to buy the wrong frame and hope components can rewrite it.
How to spot refinement versus rescue
A refinement makes modest cockpit adjustments to a frame that is already close to the intended position. A rescue relies on several compensating changes simply to make the frame workable.
Components can tune contact points. They cannot change the frame's underlying proportions.
If a candidate only works after several speculative changes, treat that as a warning. The better choice is usually the size that lands closer to your target position before those changes begin.
A Hypothetical Comparison of Two Adjacent Sizes
The example below is purely hypothetical. It is not a customer story, not a manufacturer chart, and not a SYCLR case study. Its only purpose is to show a clean method for comparing two plausible sizes.
Imagine a rider choosing between a size 56 and size 58 on an endurance road bike. The rider has a current bike that fits well and wants a similar all-day position.
| Illustrative Measurement | Hypothetical Current Bike | Hypothetical 56 | Hypothetical 58 |
| Stack | 585 mm | 582 mm | 596 mm |
| Reach | 387 mm | 386 mm | 393 mm |
| Effective top tube | 560 mm | 558 mm | 569 mm |
| Head tube length | 170 mm | 168 mm | 182 mm |
| Stock stem | 100 mm | 100 mm | 110 mm |
| Bar reach | 75 mm | 75 mm | 80 mm |
These numbers are intentionally fictional and are included only to demonstrate the comparison method. They should not be reused as sizing targets for another bike.
In this hypothetical, the size 56 sits very close to the rider's current bike in both stack and reach. The stock cockpit is also similar. That makes it easier to predict how the bike will feel with normal setup adjustments.
The size 58 offers a taller front end, but it also adds cockpit demand through both the frame and the stock cockpit. That does not make it wrong. It simply means the rider has to ask a sharper question: does that extra height help enough to justify the longer overall position?
In this hypothetical example, the size 56 is the closer geometry match to the rider's known reference. That makes it the lower-assumption starting point, but the conclusion belongs only to these fictional numbers, not to size 56 versus 58 in general.
If, however, the current bike has always felt a little low in front and slightly compact, the size 58 may deserve a closer look. The point is not that one size is universally better. The point is that the comparison becomes meaningful once you place the sizes against a known working position.
How to use the method on a real bike
On a real purchase, replace the hypothetical numbers above with the actual manufacturer-chart values for the exact model and model year you are considering.
Then follow this process:
-
Copy stack, reach, effective top tube, head tube length, standover, and stock cockpit dimensions for both sizes.
-
Add your current bike's frame numbers and contact-point setup.
-
Compare how each candidate differs from your known position in stack, reach, and final cockpit setup.
-
Ask whether ordinary cockpit adjustments refine the candidate or whether several compensations are required just to approach the target position.
This method keeps the example practical without pretending there is a universal formula.
When a Professional Fit Is Worth It
A professional fit is worth considering when the geometry comparison still leaves genuine uncertainty, or when your riding experience suggests your position needs a more careful evaluation than chart reading and test rides can provide.
Good reasons to consult a qualified bike fitter include:
-
Persistent discomfort
-
Repeated difficulty getting comfortable across more than one bike
-
Unresolved fit issues despite normal setup changes
-
A highly specific or aggressive target position that is difficult to reproduce confidently from geometry charts alone
-
A major bike purchase where you want more confidence before committing
Where appropriate, persistent discomfort should also be discussed with a qualified healthcare professional.
A fitter can help clarify which frame is the more workable starting point and whether your target position is realistic on a given bike. That is different from relying on a generic size chart or a one-line size-up or size-down rule.
SYCLR does not provide professional fitting, physically test bikes, perform component swaps, or guarantee fit. It helps riders compare road and gravel listings using fit signals, geometry signals, model-year context, price context, listing quality, condition signals where available, and confidence signals so they can narrow the field before a test ride, seller conversation, or professional fit.
If you already have fit details and want to evaluate listings against them, start here: SYCLR Advanced Fit
If you want to compare candidate bikes and identify the stronger geometry starting point, use SYCLR.
Between Two Bike Sizes FAQs
Should I size up or down if I am between sizes?
Do not start with a universal size-up or size-down rule. Compare the exact geometry of both sizes for the exact model and model year, then determine which one places you closer to your target position with ordinary cockpit adjustments.
Is stack or reach more important?
Reach helps compare horizontal frame demand, while stack helps compare front-end height. Use them together, then add the stock cockpit, current-bike reference, body proportions, and standover context before making the final decision.
Does inseam decide bike size?
No. Inseam is most useful for saddle-height range and standover context. It helps narrow the picture, but it should not be treated as an automatic size decision on its own.
Can a shorter stem fix a frame that is too large?
A shorter stem can refine the cockpit of a frame that is already within a workable range, but it does not change frame reach or the bike's underlying geometry. If several compensating changes are required, reconsider the frame size rather than treating the stem as a rescue tool.
Should I use my current bike as a sizing reference?
Yes, if it fits well. A current bike that already works for you is often the strongest practical reference available. Compare frame stack and reach, effective top tube, stem, spacers, bar reach, saddle position, and crank length where relevant.
When should I get a professional bike fit?
Consider a professional fit when the chart comparison remains ambiguous, when you keep struggling to find a comfortable position, or when you want more confidence before an expensive purchase. If discomfort persists, a qualified healthcare professional may also be appropriate.
If you are between two bike sizes, compare the actual geometry before following a generic size-up or size-down rule.
Use SYCLR to compare road and gravel listings using fit signals, geometry signals, model-year context, price context, listing quality, condition signals where available, and confidence signals. If you already know your current-bike geometry or professional fit coordinates, use Advanced Fit to make the comparison more specific.