
Tubeless vs Tubes for Gravel Bikes: Performance and Setup
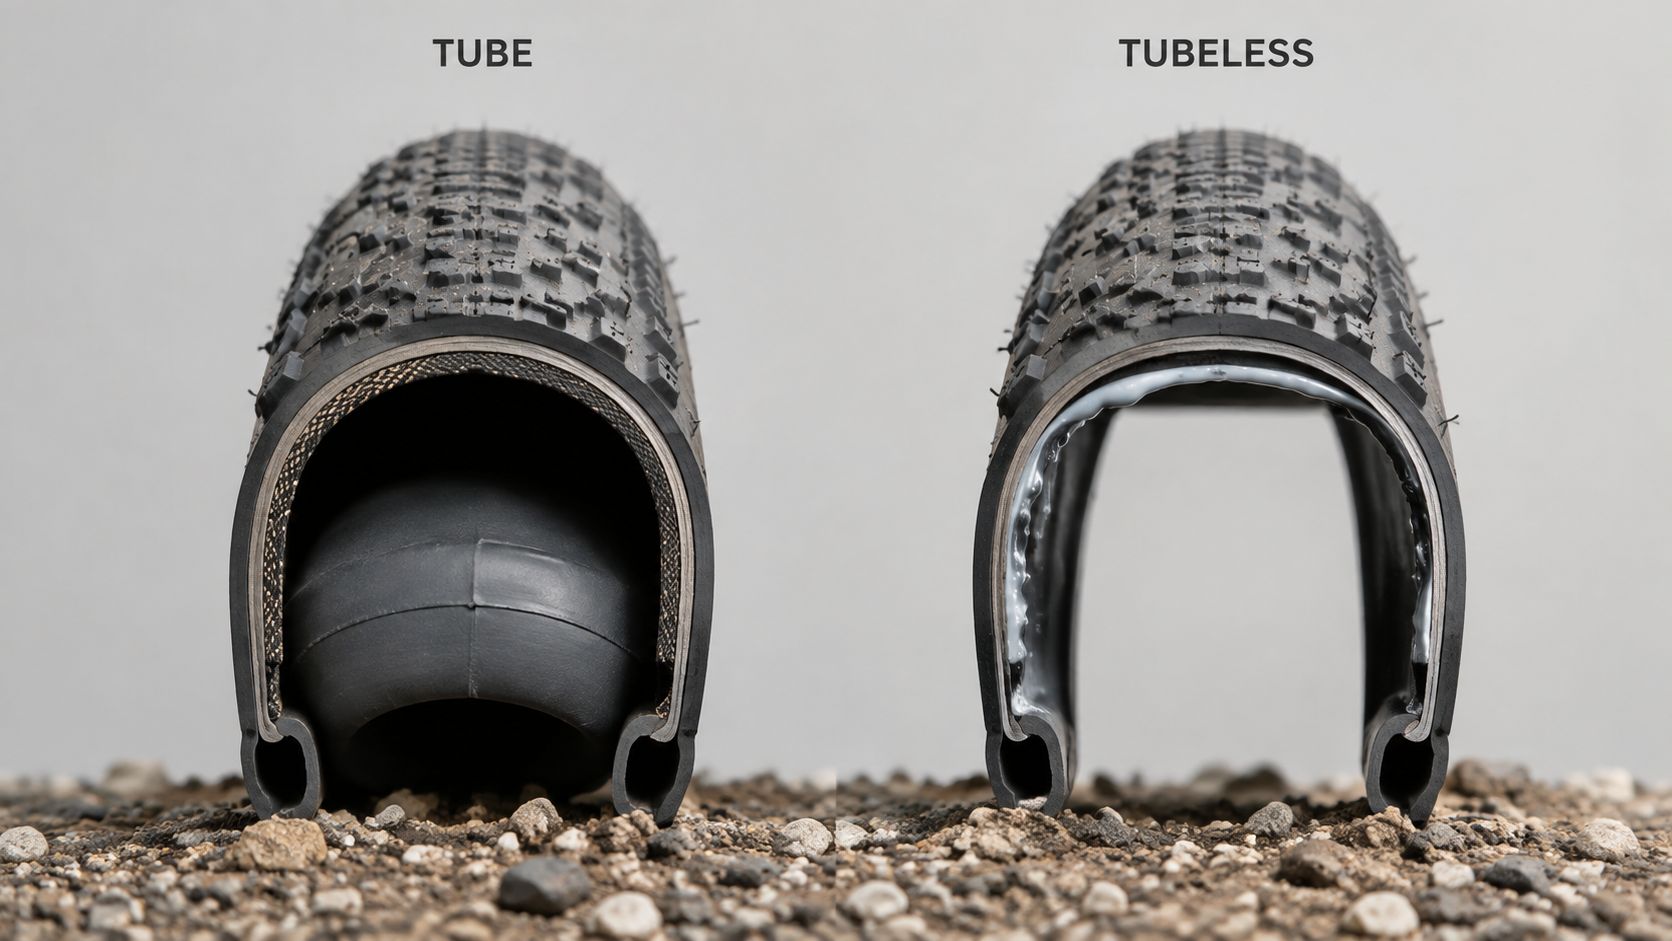
You're halfway through a gravel ride when the rear tire starts losing air. With tubes, the failure is usually obvious: stop, remove the wheel, open the tire, find the cause, and install a spare or patch. With tubeless, the same moment can end with a brief hiss and no stop at all, or it can turn into a plug repair, sealant mess, and a tire that still refuses to hold air.
That is the real tubeless vs tubes for gravel bikes decision. Tubeless can expand your usable setup window and change how a tire behaves at a given pressure, but it also adds compatibility checks and maintenance tasks. Tubes stay simpler, easier to diagnose, and easier to service in many roadside situations. Neither system is universally faster, grippier, more comfortable, or more puncture-resistant in every case. The result depends on the exact tire, tube material, casing, mounted width, pressure, rim, terrain, and total system weight.
| Factor | Tubeless | Tubes |
|---|---|---|
| Rolling resistance | Can test lower in some controlled setups, but outcome depends on tire, rim, pressure, casing, and comparison tube type | Varies significantly by tube material, including butyl, latex, and TPU |
| Low-pressure use | Removes the inner-tube pinch-flat mechanism | More limited by pinch-flat risk when pressure drops too far |
| Small punctures | Sealant may close some punctures while riding | Usually requires a tube repair or replacement |
| Larger damage | May still require a plug, tire boot, tube, or tire replacement | May require a patch, replacement tube, tire boot, or tire replacement |
| Installation | Requires an airtight tire-rim-valve system and exact compatibility | Straightforward if tire, tube, and rim sizes match |
| Ongoing upkeep | Sealant, valve, and sealing-system inspection are required | Minimal until a puncture or damaged tube appears |
| Best match | Riders willing to manage setup details and maintenance for rough-surface use | Riders prioritizing simplicity, broad compatibility, and straightforward repairs |
Table of Contents
- Why Tire Setup Matters More Than Most Gravel Riders Realize
- Rolling Resistance and Puncture Data Compared
- Puncture Protection and Ride Quality on Gravel Terrain
- Installation and Conversion Requirements
- The Hidden Maintenance Burden of Tubeless Systems
- Cost, Weight, and Rider Profile Recommendations
- How SYCLR Helps You Compare Better-Fit Gravel Bikes
- Common Questions About Gravel Tire Setups
Why Tire Setup Matters More Than Most Gravel Riders Realize
Gravel riding asks one tire setup to handle very different jobs. The same bike may roll across pavement, hardpack, washboard, loose corners, embedded rock, and wet dirt in a single ride. How the tire casing supports load, how the pressure interacts with the surface, and how the wheel system responds to impacts all shape the ride more than many buyers expect.
A tube setup can be entirely sensible on smoother mixed-surface routes. It is easy to understand, easy to inspect, and easy to fix. The tradeoff appears when impacts become more frequent and pressure choice gets tighter. Lower pressure may improve compliance, but if it goes too low for the tire, rim, load, and terrain, the inner tube becomes vulnerable to pinch flats.
Tubeless changes that failure mode. By removing the inner tube, it removes the inner-tube pinch-flat mechanism. It does not eliminate tire or rim impact damage. A hard enough strike can still damage the tire casing, cut the sidewall, burp air, dent the rim, or create a problem that sealant will not solve.
That is why the best choice is rarely ideological. It depends on how and where you ride, how often you ride, what wheels and tires you actually have, and how much maintenance friction you are willing to accept.
Practical rule: Choose the system you will set up correctly and maintain consistently.
The decision also begins before you pick tubeless or tubes. Frame clearance, rim width, approved tire widths, rider load, geometry, and intended terrain all influence whether a setup will work well. Pressure selection matters too, but there is no universal PSI or bar target that works for every rider and bike. For a deeper pressure-specific guide, use SYCLR's article on gravel bike tire pressure.
Rolling Resistance and Puncture Data Compared
Rolling-resistance claims around gravel tires are often overstated. Tubeless is not automatically lower resistance than every tube setup, and "tubes" is not one performance category. Butyl, latex, and TPU tubes can test differently, and the tire casing, tread, mounted width, rim shape, and pressure all change the outcome.
The most useful way to read controlled testing is as context, not a universal rule. The Bicycle Rolling Resistance gravel comparison shows that test results can differ materially between tubeless and tubed versions of the same tire under controlled conditions. It also shows why the comparison must be specific. A tubeless setup compared with a butyl tube does not answer what happens against latex or TPU, and a result on one tire model does not automatically transfer to another.
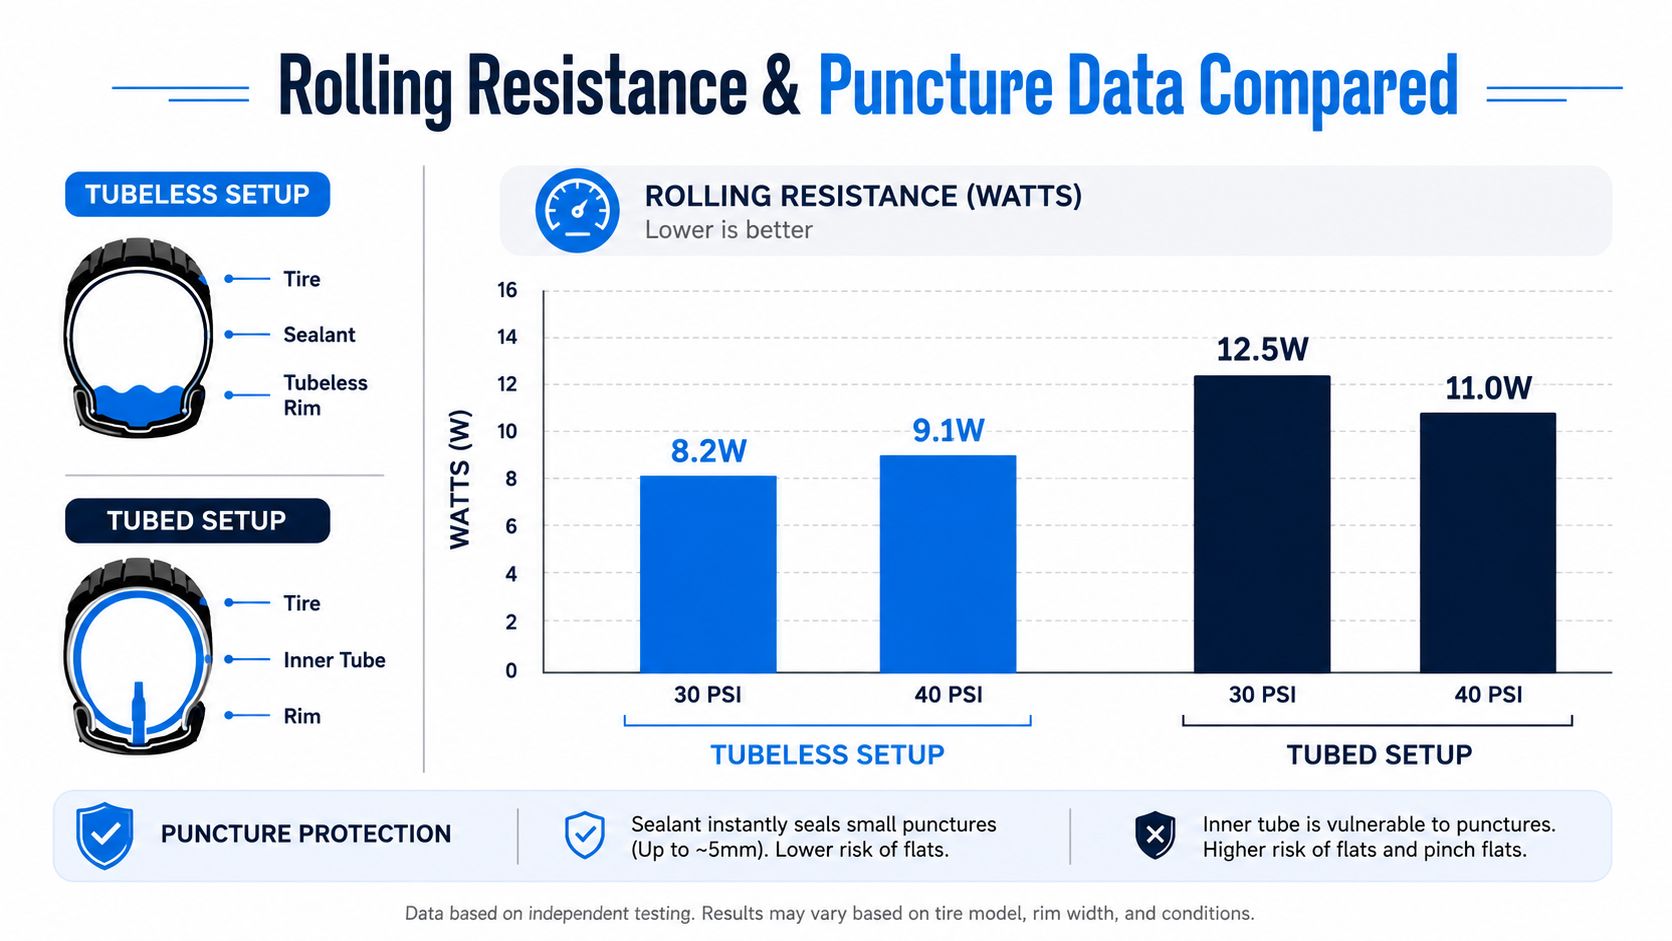
In practice, riders should treat rolling resistance as one input among several. The wheel and tire system that feels best on your routes may not be the one with the lowest lab figure, especially once rough surfaces, confidence in corners, puncture risk, and repair strategy matter. For most buyers, the better question is not "which system wins in general?" but "which exact tire, rim, pressure range, and repair method fit my riding?"
Puncture outcomes are similarly specific. Surface debris, casing thickness, pressure, rider weight, line choice, and weather all matter. Tubeless can prevent some ride-stopping flats because sealant may close some small punctures, but it is not a guarantee against punctures and does not make casing cuts or hard impacts disappear.
Puncture Protection and Ride Quality on Gravel Terrain
The most meaningful tubeless benefit for many gravel riders is not a guaranteed speed gain. It is the ability to run a setup without an inner tube, which changes puncture behavior and widens the range of pressures that may be practical for a given tire and route.
On rough gravel, that matters because pressure affects control, casing stability, and impact management. Remove the inner tube, and you remove one specific flat mechanism. You do not remove every source of air loss or wheel damage. A setup can still suffer bead issues, sidewall cuts, torn casings, tread punctures that do not seal, or rim damage after a hard hit.
That is also why comfort and traction should not be described as universal tubeless advantages. In some conditions, a tubeless setup at an appropriate pressure can feel calmer and more compliant. In others, the dominant factor may be the tire casing, tread, wheel width, or the exact pressure you choose. The system matters, but so does the rest of the package.
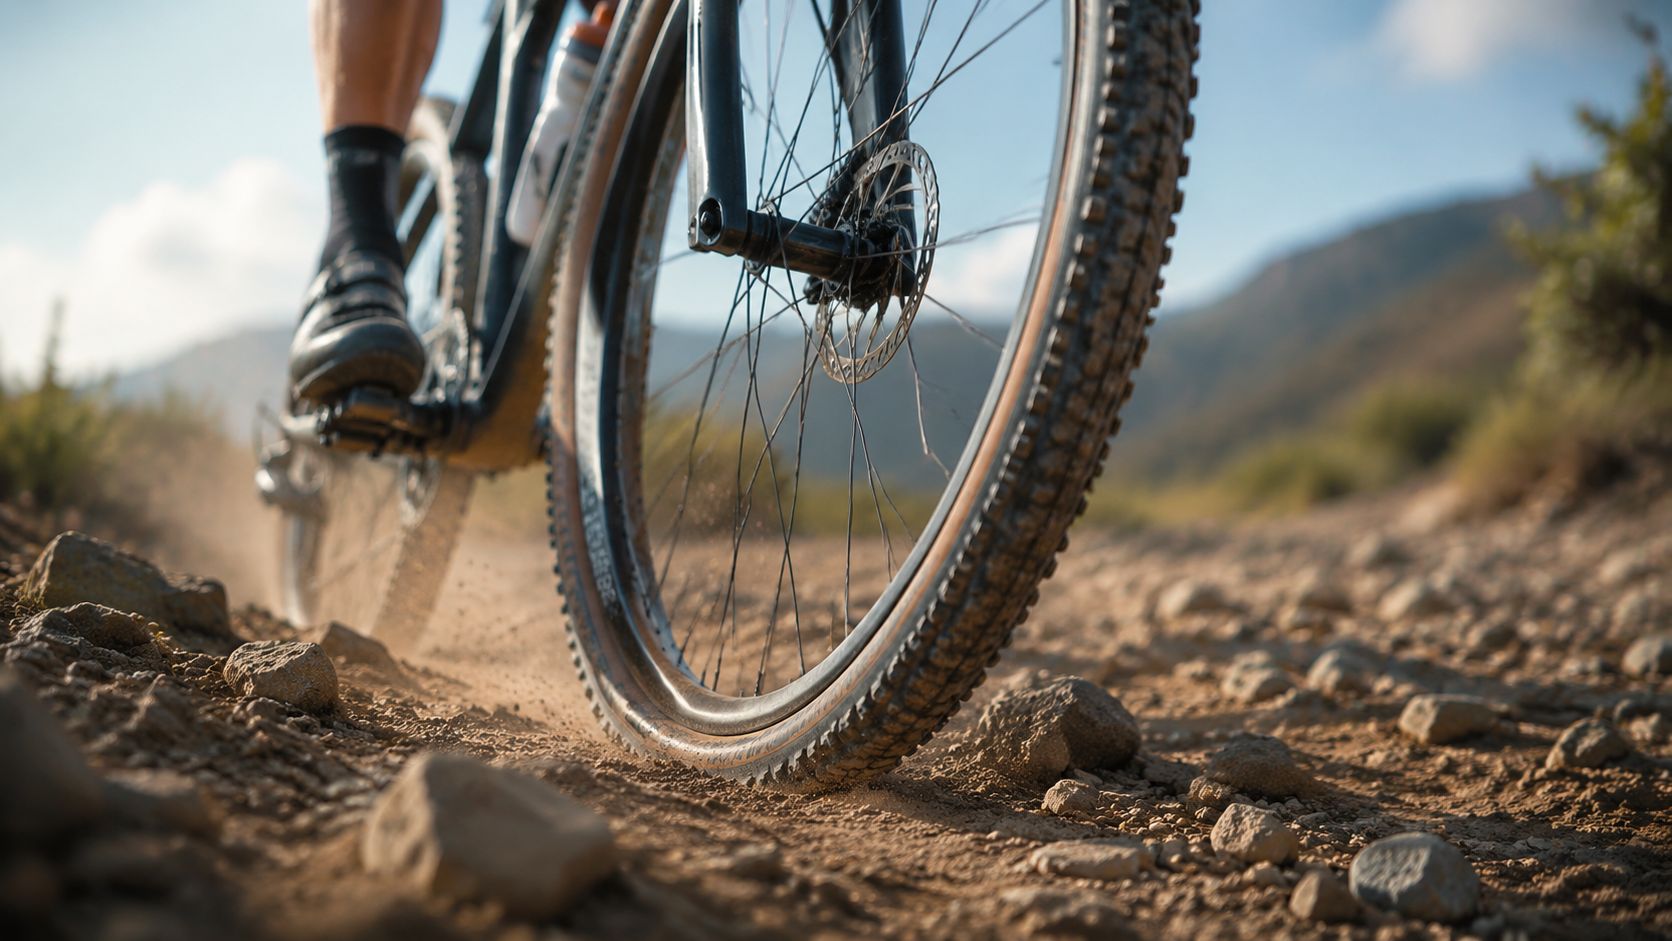
Sealant should be understood realistically. It may close some small punctures. Larger punctures may require a plug, tire boot, tube, or tire replacement depending on the damage. If the bead is compromised or the rim is damaged, the solution may be mechanical rather than chemical.
For that reason, experienced gravel riders usually carry a backup plan even when they strongly prefer tubeless. A plug kit, inflation device, tire levers, and a compatible spare tube remain sensible. Tubes still have an advantage here: when something goes wrong, the roadside decision tree is usually simpler.
Keep pressure decisions specific to your equipment and terrain. Avoid generic internet pressure charts that ignore rider mass, tire casing, rim width, and surface. If you want a deeper framework, see SYCLR's guide to gravel bike tire pressure.
Installation and Conversion Requirements
A basic tube setup is mechanically familiar. Match tire and rim sizes, inspect the rim bed or tape, fit the tube without pinching it during installation, and inflate. Most roadside repairs need only levers, a pump, and a spare tube or patch.
Tubeless demands more exact compatibility. The tire, rim, valve, rim bed, and inflation method all have to work as one airtight system. That does not mean every tubeless-ready wheel needs aftermarket tape, and it does not mean every installation needs a compressor. Some wheelsets arrive properly taped from the factory, and some tire-rim combinations seat with a standard track pump. Others are much less cooperative.
The key is to verify the exact system rather than relying on category labels.
For hooked and hookless setups, confirm all of the following before conversion or purchase:
the tire is explicitly approved for the rim type
the rim is explicitly approved for tubeless use
the tire width falls within the rim maker's permitted range
the rim internal width matches the tire maker's guidance
the manufacturer's pressure limits are being followed
Use manufacturer instructions and ETRTO-supported guidance where available. Do not assume that "tubeless-ready" means every tire and rim combination is manufacturer-approved. Verify the exact tire, rim, supported width, and pressure limits before use.
| Requirement | Tubeless Setup | Tube Setup |
|---|---|---|
| Rim | Exact tubeless compatibility must be verified | Correct size and safe condition required |
| Tire | Exact tire-rim approval matters, especially on hookless systems | Correct size and intended use matter |
| Air retention | Tire, rim bed, valve, and sealant must work as one system | Inner tube retains the air |
| Consumables | May include sealant, valves, and possibly tape, depending on wheelset | Tubes and, where needed, rim tape |
| Inflation | Depends on tire-rim fit, may work with a track pump or may need more air volume | Standard pump is usually sufficient |
| Trail repair | Plug kit, inflation device, and backup tube are sensible | Spare tube, levers, and pump are standard |
| Ongoing work | Periodic inspection of sealant and sealing components | Minimal until a puncture occurs |
Before converting a used bike, identify the exact rim and tire models. Check the tire sidewall, wheelset documentation, manufacturer compatibility charts, and current condition. Look closely at the valve area, bead seat, rim tape if present, and any signs of air leakage or dried sealant buildup.
Keep size and clearance checks brief but strict. A tire that technically mounts is still the wrong choice if it exceeds approved width, runs too close to the frame, or lacks mud clearance for your routes. Use SYCLR's related guides on gravel bike tire size and gravel bike tire clearance when narrowing options.
The Hidden Maintenance Burden of Tubeless Systems
Tubeless can reduce some roadside interruptions, but it replaces them with workshop attention. Sealant dries out over time, valves can clog, rim tape can fail, and a bike that sat unused for months may look ready while the system inside the tire is no longer reliable.
The right maintenance interval is not universal. It depends on the sealant product, climate, storage conditions, riding frequency, tire volume, and manufacturer instructions. Some riders need to inspect and refresh sealant sooner because of heat and dry storage. Others can go longer. The correct approach is simple: follow the sealant and wheel manufacturer's guidance, then adjust based on what you actually see inside the tire.
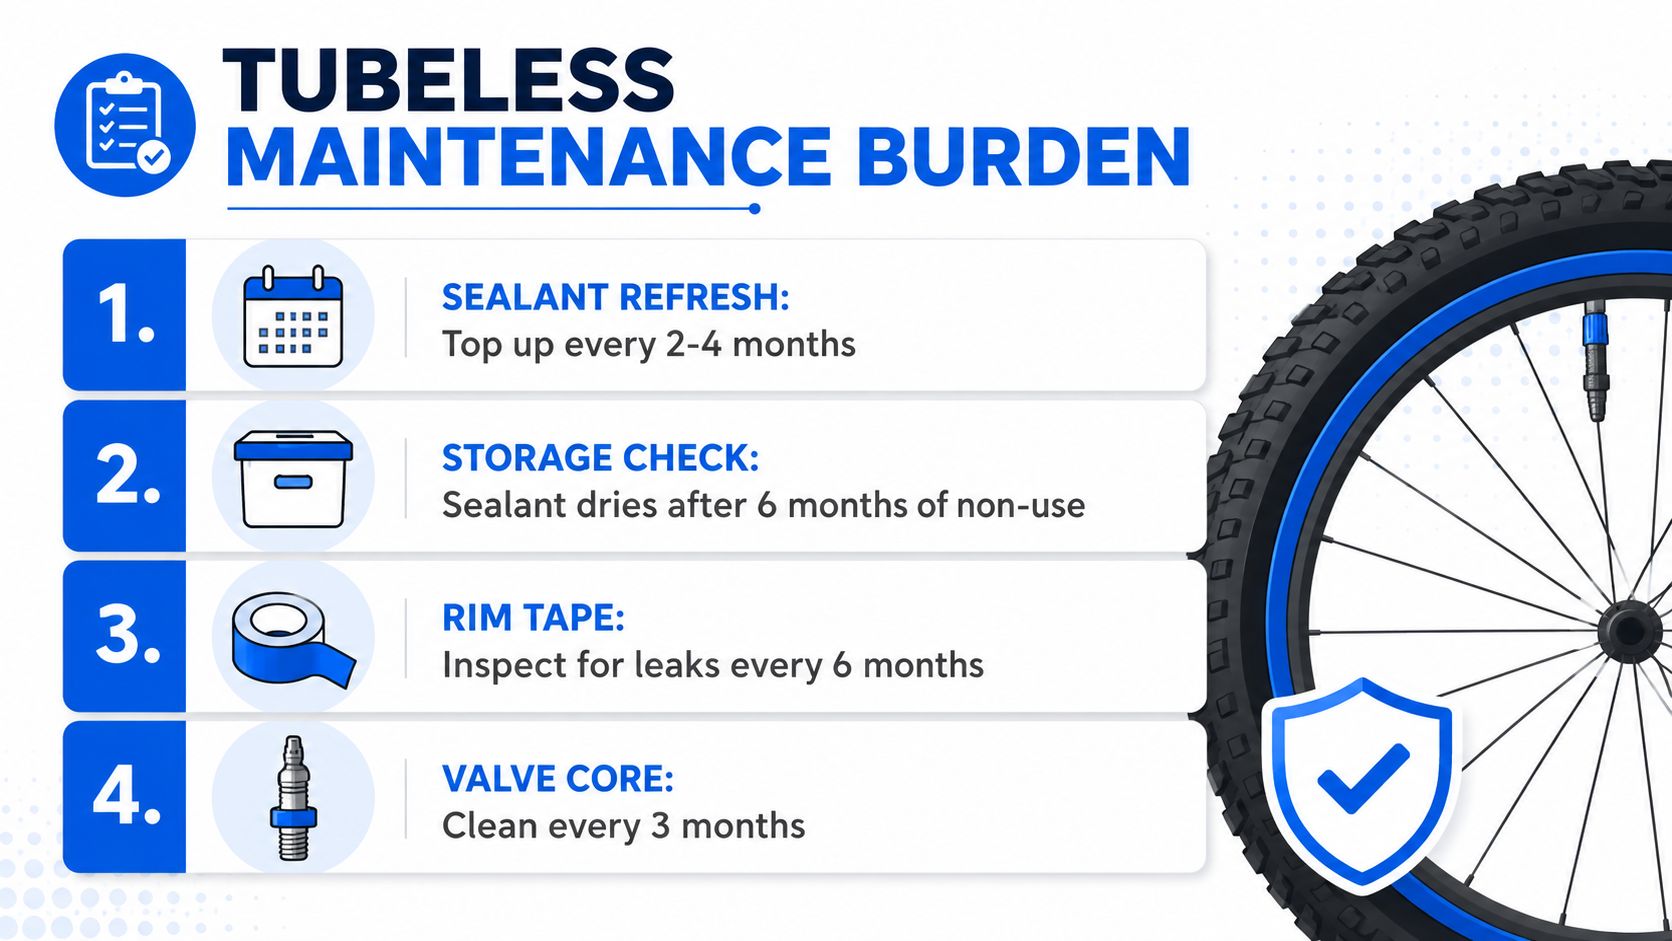
A practical routine usually includes:
Before longer rides: check pressure, inspect the tread and sidewalls, and confirm the valve is not leaking
At product-specific service intervals: inspect the sealant condition and refresh it according to manufacturer instructions
During tire changes: inspect the bead, rim bed, tape or rim strip, and valve interface
After storage: verify the tire still holds air and physically confirm the sealant is still usable before a big ride
Tubes have a simpler maintenance pattern. You monitor pressure, inspect for wear, and replace or patch the tube after a puncture. For occasional riders, travelers, or anyone who wants the fewest moving parts in the system, that simplicity remains a legitimate advantage.
Tubeless can be highly effective, but only when the compatibility and maintenance details are handled properly.
Cost, Weight, and Rider Profile Recommendations
Cost starts with what your current bike already supports. If your wheels and tires are already approved for tubeless use, conversion may be modest. If they are not, the decision can quickly become a wheel-and-tire replacement project rather than a small parts upgrade.
Weight comparisons are often oversimplified. A meaningful comparison includes the tire, tube or sealant, valve, tape or rim strip, casing choice, and sometimes added repair gear carried on rides. A light TPU tube setup, for example, is not the same thing as a heavier butyl setup, and neither should be compared against an incomplete tubeless parts list.
That is why rider profile matters more than blanket claims.
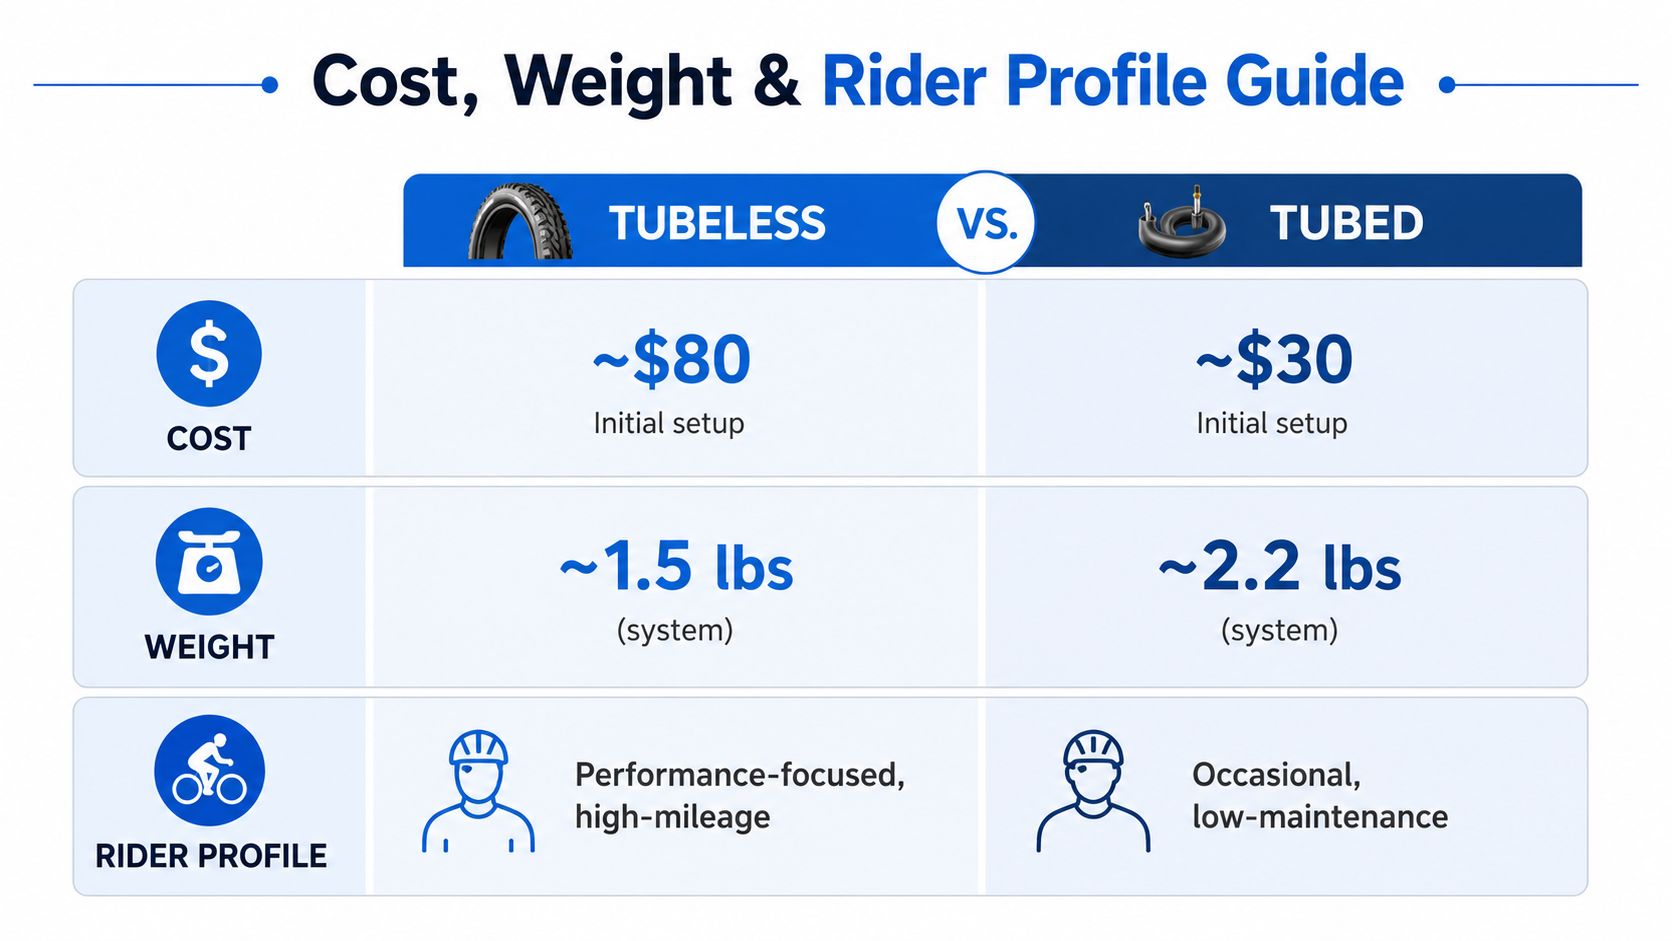
Match the setup to the rider
High-mileage gravel rider: Tubeless may be worth considering when rough surfaces, long rides, and frequent puncture exposure make the added setup and maintenance worthwhile. But the choice still depends on the exact tire, rim, pressure strategy, and willingness to maintain the system.
Weekend explorer: Either setup can be right. Tubeless may be worthwhile if your routes regularly include sharp rock, washboard, or debris and you do not mind sealant upkeep. Tubes remain practical if you value fast troubleshooting and uncomplicated storage.
Budget-conscious used-bike buyer: Verify the actual wheelset and tire specification before paying extra for a tubeless claim. Listing language is often loose, and a bike may need additional parts or may not support the exact tire-rim combination you want.
Rider storing the bike in hot or dry conditions: Tubeless can still be appropriate, but sealant condition may require more frequent inspection depending on the product and environment.
Keep width and pressure decisions specific. Wider is not automatically better, and lower is not automatically faster or more comfortable. Those outcomes depend on the full system. If you are comparing complete bikes, fit and frame suitability still outrank tire setup. A bike that fits well with a straightforward tube setup can be a better purchase than a poorly fitting bike that happens to be tubeless-ready.
How SYCLR Helps You Compare Better-Fit Gravel Bikes
Tire setup is only one part of a smart gravel-bike purchase. Before deciding how you want the tires to hold air, make sure the bike itself makes sense for your body, terrain, and budget. Frame size, geometry, tire clearance, model year, wheel specification, and seller transparency all matter.
SYCLR helps riders compare road and gravel listings using fit signals, geometry signals, model-year context, price context, listing quality, condition signals where available, and confidence signals. You can start with height, bike type, and budget, then narrow candidates using the listing details that actually affect ownership. Riders who already know their current-bike geometry or fit-report details can use the advanced fit details entry to make the comparison more specific.
When reviewing a bike that is advertised as tubeless-ready, inspect the listing carefully. Look for exact wheel and tire models, clear photos of the wheels, valve area, tread condition, and any signs of neglected sealant or impact damage. If those details are missing, treat the setup as unverified until the seller provides proof.
Use the SYCLR app to compare bike candidates, then confirm whether their fit, geometry, tire clearance, and wheel compatibility support the tire system you actually want to run.
Common Questions About Gravel Tire Setups
Can I run a tube in a tubeless-ready tire?
Often, yes, but confirm the tire and rim manufacturer's guidance for the exact combination. A tube can be a normal setup choice or a roadside backup, but the tire, rim, tube size, and manufacturer guidance still need to be checked for the exact combination.
What should I carry after a tubeless puncture won't seal?
Carry a plug kit, inflation device, tire levers, and a compatible spare tube. Depending on the damage, you may also need a tire boot or, in severe cases, a replacement tire.
Are tubeless-ready rims standard on modern gravel bikes?
Many newer gravel bikes use tubeless-ready wheels, but not all do, and the label alone is not enough. Verify the exact rim model, tire approval, supported widths, and pressure limits before assuming a safe tubeless setup.
Do tire inserts replace tubeless sealant?
No. Inserts and sealant solve different problems. If you are considering both, check the tire, rim, insert, and sealant manufacturer's instructions to make sure the full system is approved.
Is tubeless worth it for occasional gravel riding?
It can be, especially on rough or debris-heavy routes, but it is not automatic. Occasional riders who value easy storage, simple maintenance, and predictable roadside repairs may still prefer tubes.
Should I choose tubeless for a used gravel bike?
Choose the bike for fit, geometry, clearance, condition, and listing confidence first. Then verify whether the existing wheels and tires are actually approved for the tubeless setup you want.
Use the SYCLR app to compare road and gravel listings using fit signals, geometry signals, model-year context, price context, listing quality, condition signals where available, and confidence signals. Start with the bikes that plausibly match your fit and use case, then confirm whether their tire clearance, rim specification, and tire compatibility support the tubeless or tube setup you want.