
How to Check Drivetrain Wear on a Used Bike
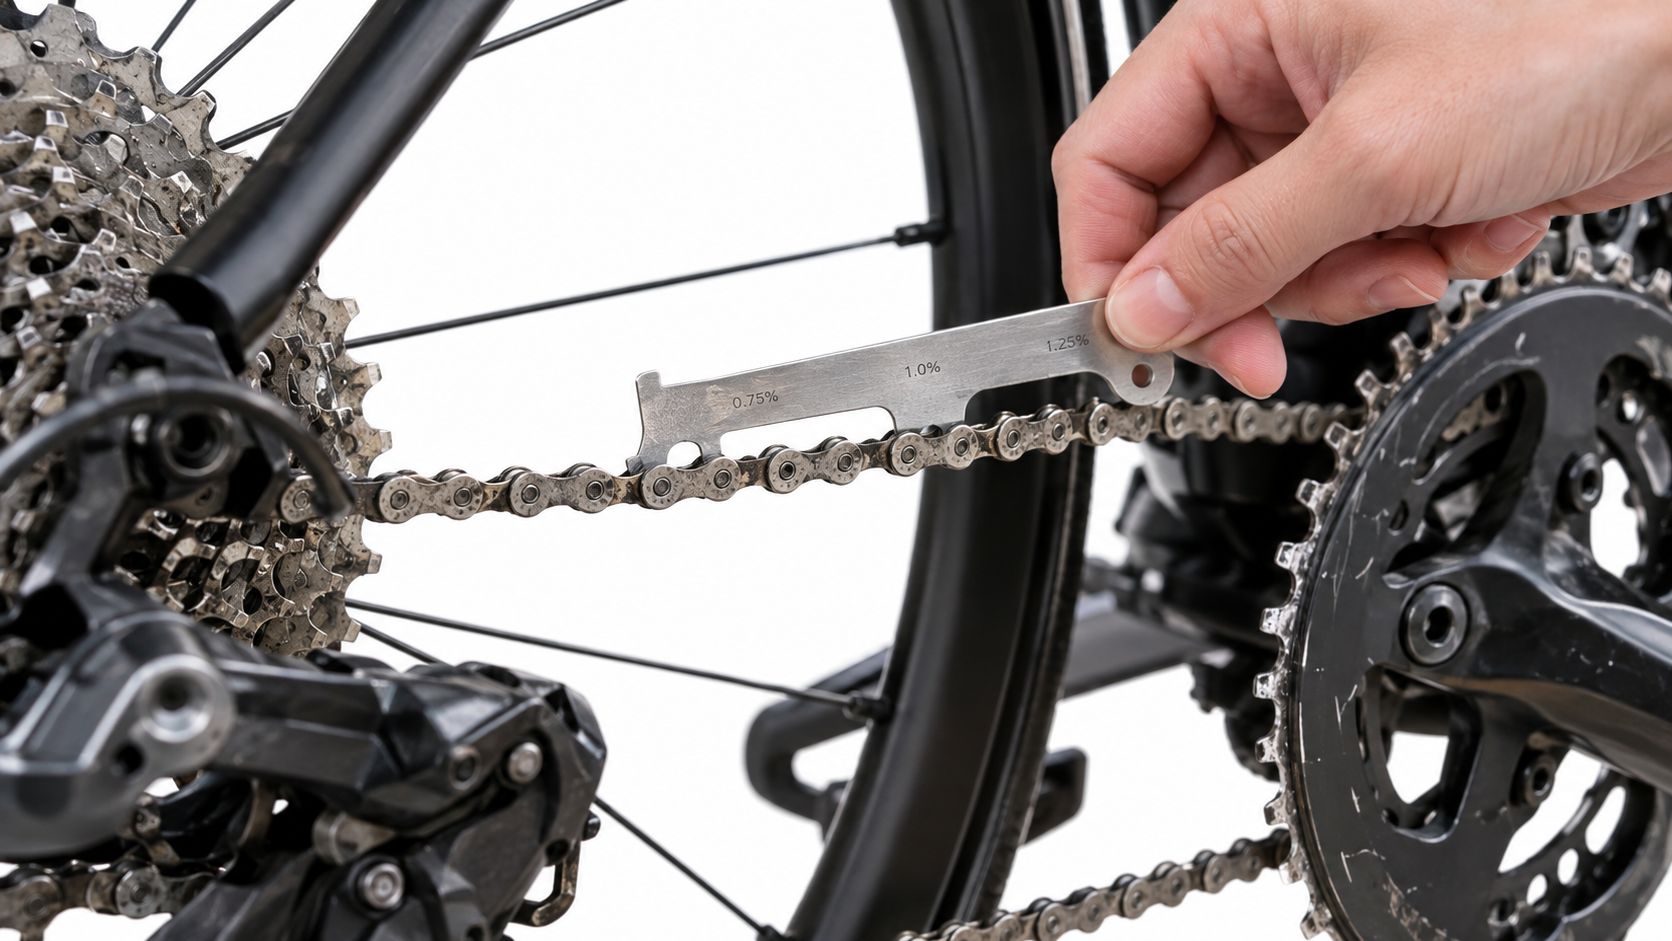
You're viewing a used road or gravel bike that looks clean, shifts well on the stand, and seems fairly priced. The risk is that a worn chain may be accompanied by cassette or chainring wear, turning a routine chain replacement into a larger repair. To check drivetrain wear on a used bike, measure chain wear correctly, inspect cassette and chainring engagement carefully, test shifting under riding load, and translate what you find into a realistic ownership decision before negotiating.
A plausible frame and fit candidate still comes first. Mechanical condition matters, but a well-priced drivetrain on a bike with unsuitable geometry is rarely a good purchase.
Table of Contents
- Pre-Viewing Checks and Initial Seller Questions
- Measuring Chain Wear Accurately
- Inspecting the Cassette and Chainrings Under Load
- Translating Findings into Repair Uncertainty and Negotiation
- How SYCLR Helps You Shortlist Better-Fit Bikes
- Common Drivetrain Inspection Questions Answered
Pre-Viewing Checks and Initial Seller Questions
Before travelling to see the bike, establish what the seller knows about its drivetrain. A listing photo with a clean chain and polished cassette tells you very little. Conversely, heavy grime can obscure worn rollers, corrosion, hooked teeth, and seized links.
Start by asking for clear, close-up photographs of the chain, cassette, chainrings, rear derailleur, and jockey wheels. Ask whether the chain has been replaced recently, whether the cassette was replaced at the same time, and whether the seller has measured chain wear with a gauge. A new chain fitted to an old cassette can shift acceptably at first but skip under torque if the sprocket teeth have already worn to match the previous chain.
Ask these questions before arranging a viewing:
Drivetrain history: When were the chain, cassette, and chainrings last replaced?
Riding conditions: Has the bike mainly been used in dry road conditions, wet weather, muddy gravel, or winter grit?
Maintenance: Was the chain cleaned and lubricated regularly, or only before it was listed?
Symptoms: Has the bike skipped, dropped the chain, suffered chain suck, or shifted noisily?
Recent parts: Were any drivetrain components changed after a crash or shortly before sale?
Inspection evidence: Can the seller provide a photograph of the chain-checker reading and identify the tool used?
Treat vague answers as uncertainty, not proof of a fault. A seller who says the chain is “fine” may mean it looks clean, while a useful answer identifies the measurement method, drivetrain speed, and recent replacement history.
A bike with differing apparent wear across drivetrain parts deserves closer questioning. For example, a visibly new chain alongside an older-looking cassette may indicate components were replaced at different times and require closer testing. Use the broader used bike inspection checklist to assess the frame, wheels, brakes, bearings, and seller transparency as well.
Measuring Chain Wear Accurately
A chain reading can change the price of a used bike more than a few cosmetic scratches. It shows measurable wear and helps estimate whether you are buying a routine consumable replacement or inheriting uncertainty about the cassette and chainrings. So-called chain ‘stretch’ is primarily wear at the chain’s articulating bearing surfaces, which increases effective pitch; the side plates themselves are not literally stretching in normal use.
For a ruler check, align one chain rivet with zero and measure to a rivet 24 pitches away; an unworn chain spans nominally 12 inches. This is the standard reference distance for checking elongation with a ruler. General guidance from Park Tool's chain replacement guidance is to replace 5- to 10-speed chains at or before 0.75% wear and 11- to 13-speed chains at or before 0.5% wear, with manufacturer-specific guidance taking priority.
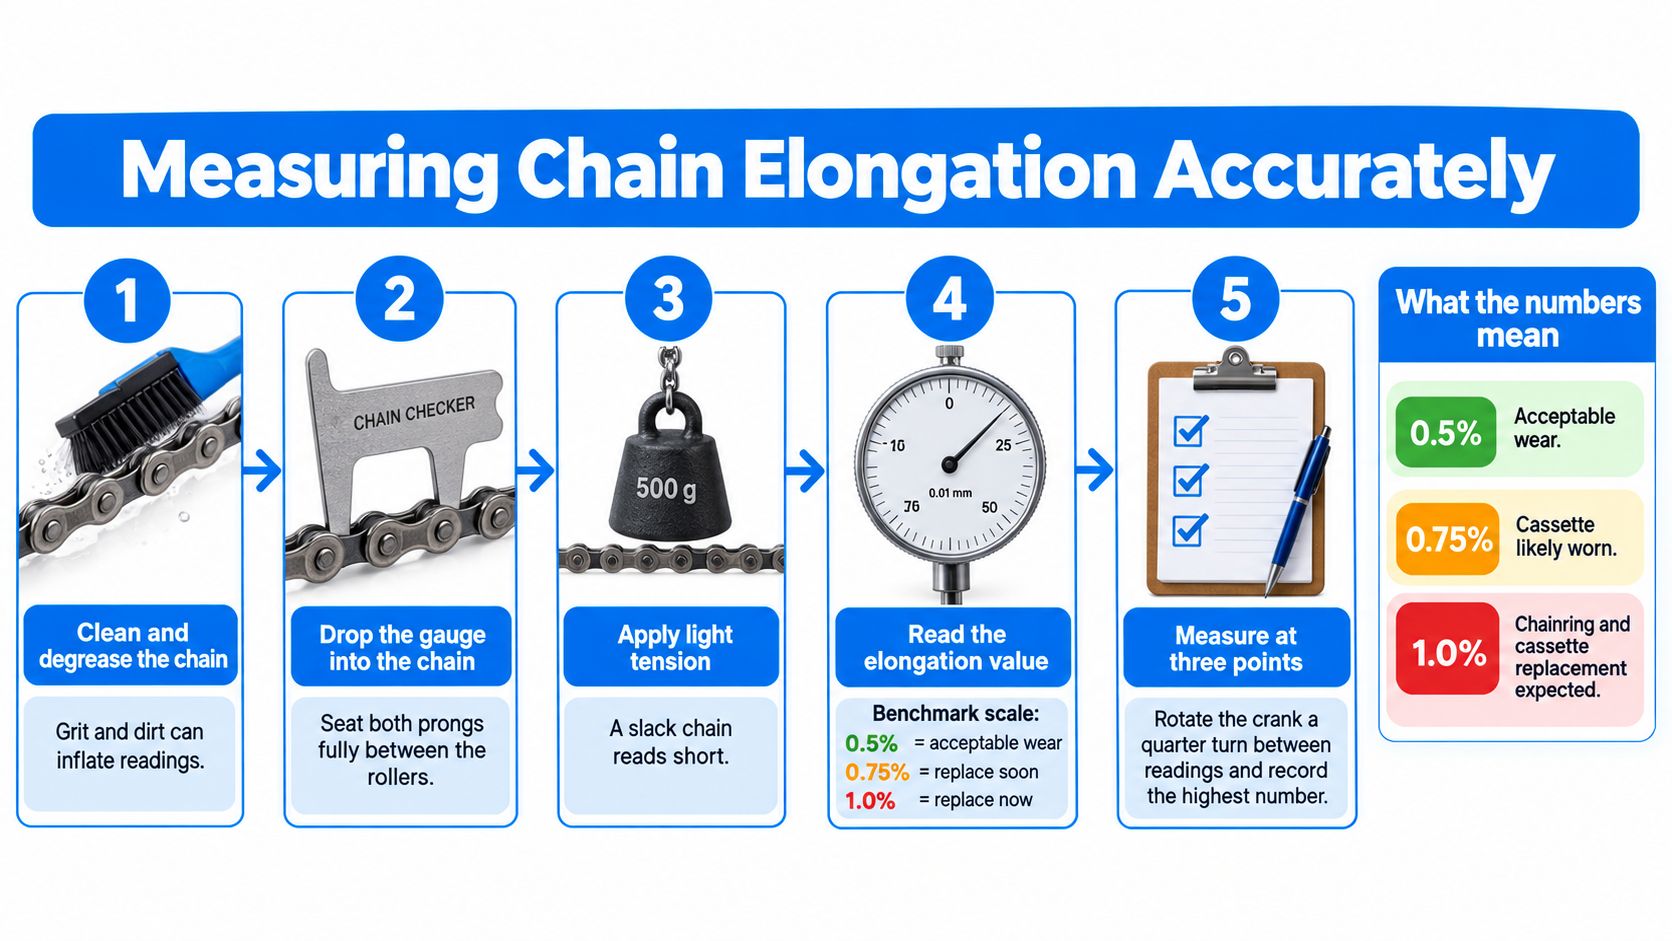
Using a chain checker
Clean enough of the chain to expose the rollers and side plates, then measure several sections rather than relying on a single reading. Wear can vary along the chain, so one favorable section can make an otherwise worn chain look better than it is.
Do not assume every chain checker works the same way. Follow the exact checker manufacturer's instructions and verify that the tool is compatible with the chain you are measuring. Some modern chains require a compatible checker, and different gauges reference wear differently. If the tool provides drivetrain-specific thresholds, interpret the reading accordingly.
As a general rule, use the drivetrain-appropriate threshold rather than one universal number. Park Tool's broad guidance is 0.75% for 5- to 10-speed systems and 0.5% for 11- to 13-speed systems, but the chain manufacturer's recommendation takes priority whenever it is available.
Cross-checking a borderline result
Use a steel ruler when the gauge reading is close to its limit or when you want to confirm an uncertain result. For a ruler check, align one chain rivet with zero and measure to a rivet 24 pitches away; an unworn chain spans nominally 12 inches. As wear increases at the articulating surfaces, that distance grows slightly beyond nominal.
Treat a borderline result as a sign to inspect carefully, not as a reason to choose the most optimistic interpretation. Clean the chain, confirm the gauge instructions, and repeat the measurement at several locations. If the applicable threshold is reached, budget for a chain replacement according to the manufacturer's guidance. A clean, lubricated chain can still be worn enough to affect engagement with the cassette and chainrings.
Inspecting the Cassette and Chainrings Under Load
A chain-wear reading does not diagnose the whole drivetrain. Once you've measured the chain, inspect how the cassette and chainrings engage with it. Neglected chain wear can turn a relatively minor consumable into a cassette replacement, and sometimes a chainring replacement as well, but those parts need their own evaluation.
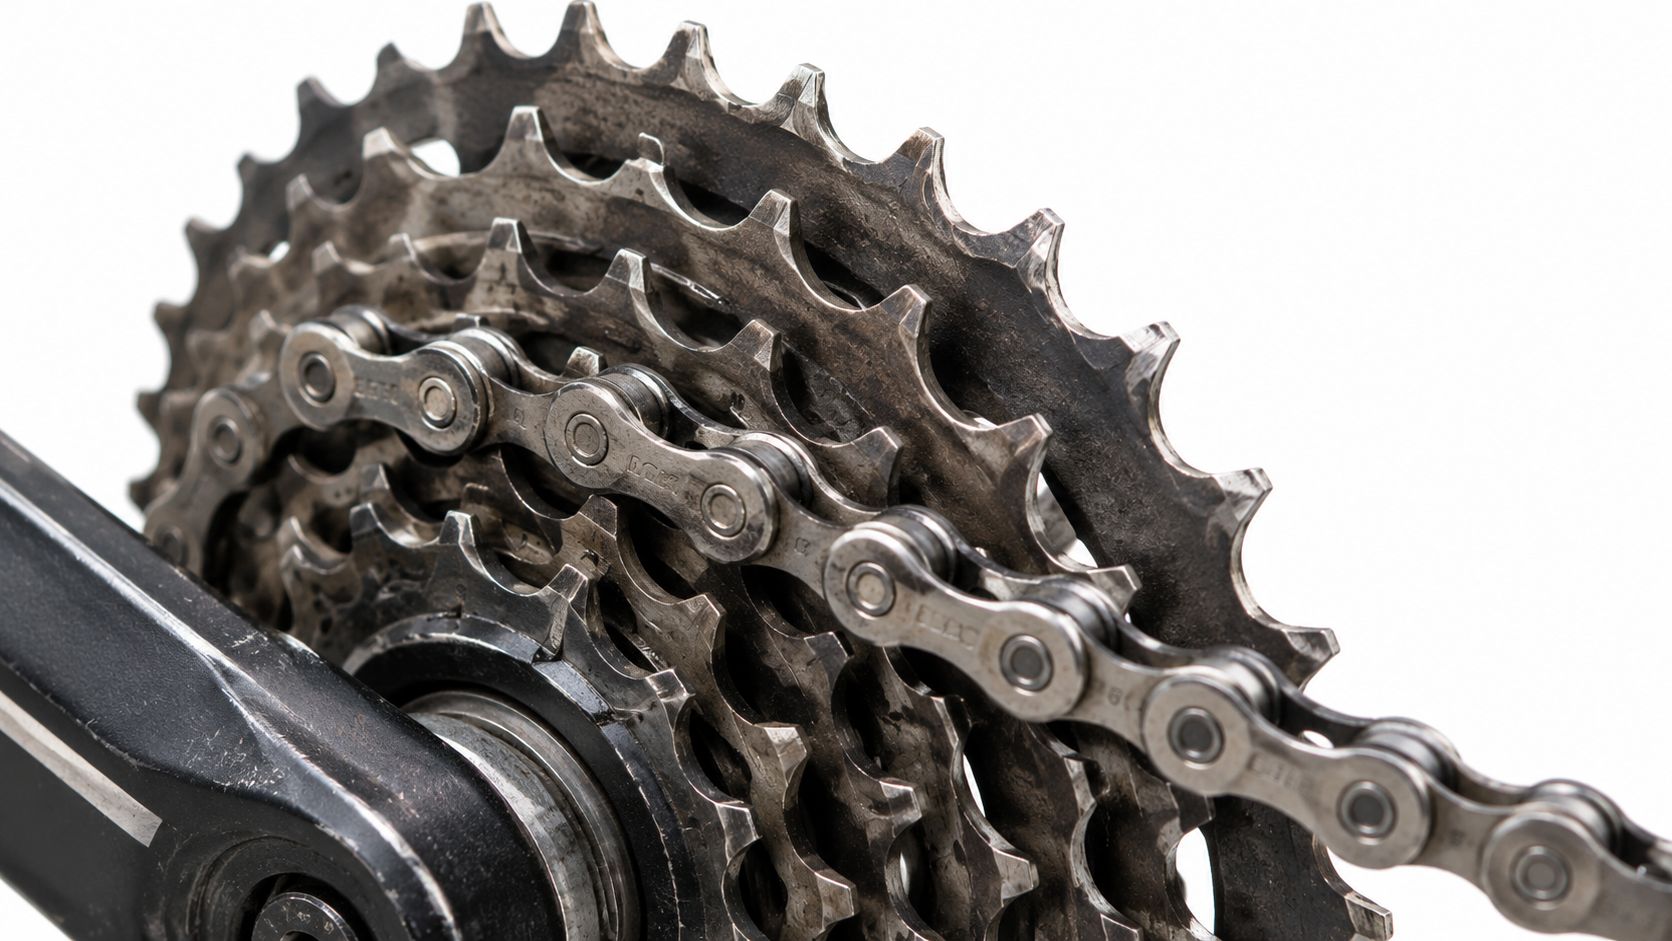
Reading tooth profiles carefully
Shift across the cassette while slowly turning the cranks. Look at every sprocket, not only the largest or most visible one. Frequently used cogs may show more wear than rarely used sprockets, but visual inspection is supporting evidence only.
Do not diagnose wear from tooth shape alone. Modern cassette sprockets and chainrings may intentionally use ramps, shortened teeth, asymmetric profiles, and other shaping to improve shifting. Compare suspect teeth with adjacent sprockets, the matching ring, or reference images from the manufacturer when possible.
Watch for patterns such as:
Hooked or swept teeth that differ noticeably from neighboring teeth
Uneven profiles that are inconsistent within the same sprocket or ring
Damaged or missing teeth
Polishing, burrs, or deformation around the load faces of the teeth
These signs justify closer inspection, but they do not confirm wear by themselves. Evaluate them alongside chain measurement, chain engagement, and shifting performance.
Inspect both chainrings from the side and during front shifts. Also check the rear derailleur jockey wheels for pointed teeth, lateral play, seized bearings, or a bent cage.
Testing under riding torque
A cassette can look acceptable while unloaded and still misbehave when you apply force. During a test ride, shift through the full cassette and both chainrings. Apply firm seated torque in several gears, especially the smaller rear sprockets and the cogs that appear most used.
Skipping, jumping, hesitation, chain suck, or noisy indexed shifting means the drivetrain needs diagnosis before purchase. Those symptoms do not automatically prove cassette wear. Indexing, cable friction, hanger alignment, stiff links, chain and cassette compatibility, freehub issues, and derailleur problems can produce similar behavior.
Check whether the fault is concentrated in one or a few sprockets or appears across the range. A problem concentrated in one or a few sprockets justifies closer cassette inspection but does not diagnose wear by itself. Inconsistent shifting across several gears may point more strongly toward setup, alignment, chain condition, compatibility, or derailleur issues. British Cycling's drivetrain guidance also warns that continued use at severe wear levels can rapidly damage cassette and chainring teeth.
Translating Findings into Repair Uncertainty and Negotiation
A chain checker gives you one mechanical signal. Your job as a buyer is to translate that signal into risk, repair uncertainty, and an offer that reflects the bike's true cost.
Start by identifying the drivetrain speed and component tier. A replacement chain, cassette, and chainrings can differ substantially in price depending on the system, brand, availability, and labour market. Do not pretend you can calculate an exact repair bill from a photograph. Instead, separate the likely scenarios:
| Finding | What it means for the buyer |
|---|---|
| Chain wear is below the applicable replacement threshold | Continue the full drivetrain inspection. A chain reading alone does not confirm cassette or chainring condition. |
| Chain wear is at or beyond the applicable replacement threshold | Budget for chain replacement according to manufacturer guidance. Cassette and chainrings remain separate inspection questions. |
| A replacement or newer chain skips under load | Possible chain and cassette mismatch, setup issue, compatibility problem, or another drivetrain fault. Diagnose before valuing the repair scope. |
| Multiple wear signs and shifting problems appear together | The repair scope is uncertain. Obtain a specific parts and labour estimate before deciding what the bike is worth to you. |
The table is a negotiation framework, not an invoice. Parts and labour vary by country, drivetrain tier, and workshop. The important distinction is between evidence you have measured directly and repair conclusions that still need diagnosis.
State the evidence calmly: “The chain is at the replacement point for this drivetrain, and there is still an unresolved skipping issue under load. I need to price in the uncertainty around the drivetrain.” That is stronger than making a broad claim that the whole system is definitely worn out.
A realistic offer should account for comparable condition, mechanical risk, fit uncertainty, and listing uncertainty. The used bicycle value guide is useful for keeping that broader context separate from the drivetrain calculation.
Practical rule: Treat chain wear, cassette behavior, and shifting symptoms as related clues, not as interchangeable proof.
How SYCLR Helps You Shortlist Better-Fit Bikes
Mechanical inspection is most useful after the exact bike has already passed an initial fit and geometry screen.
SYCLR compares road and gravel listings using fit signals, geometry signals, model-year context, price context, listing quality, condition signals where available, and confidence signals.
You can start with height, bike type, and budget, then compare more specific fit and geometry details when the listing provides enough information. The bike stack and reach guide provides deeper context for those measurements.
SYCLR does not perform a professional bike fit, physically inspect bikes, authenticate listings, verify ownership or seller claims, or guarantee fit or condition. It organizes listing information so you can decide which bikes deserve closer in-person evaluation.
Common Drivetrain Inspection Questions Answered
Is mileage a reliable way to judge chain wear?
No. Odometer distance is only background information. Wear varies with rain, dirt, lubrication, riding style, gear choice, rider torque, and maintenance history. A bike with modest claimed use can have a badly worn chain if it was ridden in contamination and neglected, while a heavily used bike may have a healthier drivetrain if its owner replaced consumables consistently.
Measured chain wear combined with tooth inspection and a loaded shifting test is more useful than mileage or seller confidence.
Can a clean chain still be worn?
Yes. Cleaning removes grime, not wear at the chain's articulating surfaces. A polished chain can measure beyond the relevant threshold and can already have affected cassette or chainring engagement.
Clean the chain before measuring because grit can interfere with careful inspection, but do not treat appearance as a condition verdict.
Will a new chain work with an old cassette?
Sometimes, but you should not assume it will. If the old chain has worn beyond the recommended limit, the cassette teeth may have worn with it. A new chain can then skip under load even if shifting on a work stand appears acceptable.
Test the bike under firm seated force across several sprockets. If it skips, treat the problem as a drivetrain diagnosis question rather than assuming adjustment alone will solve it.
What if the chain-checker reading is inconsistent?
Repeat the test on a clean section, verify that the gauge is being used exactly as its manufacturer intended, and measure in more than one location. Check the chain's speed and the manufacturer's stated threshold before interpreting the result.
An inconsistent result means more uncertainty, not a free pass. Confirm the reading with a ruler if needed and keep cassette and chainring condition as separate questions.
Can poor shifting prove the cassette is worn?
No. Poor indexing, cable friction, a bent derailleur hanger, a stiff chain link, compatibility problems, and derailleur issues can produce similar symptoms. A cassette becomes more suspicious when shifting problems appear under load and visual inspection also raises concern, but neither sign alone proves the diagnosis.
Use the ride test and visual inspection together. Park Tool's CC-4 chain-checker information also makes clear that a chain reading alone doesn't prove the cassette, chainrings, derailleur, or shifting system are healthy.
Should a worn chain end the purchase?
Not automatically. A chain at its replacement point can still be a manageable ownership cost if the rest of the bike fits your needs and the drivetrain findings are clearly understood. The harder cases are the ones with unresolved skipping, uncertain cassette condition, visibly damaged or deformed teeth, or several mechanical concerns at once.
The final decision should combine drivetrain uncertainty with fit, geometry, frame condition, listing confidence, and seller transparency.
Use SYCLR to compare road and gravel listings using fit signals, geometry signals, model-year context, price context, listing quality, condition signals where available, and confidence signals. Start with height, bike type, and budget, then inspect drivetrain condition separately before purchase.