
Bike Rim Width Tire Compatibility Explained
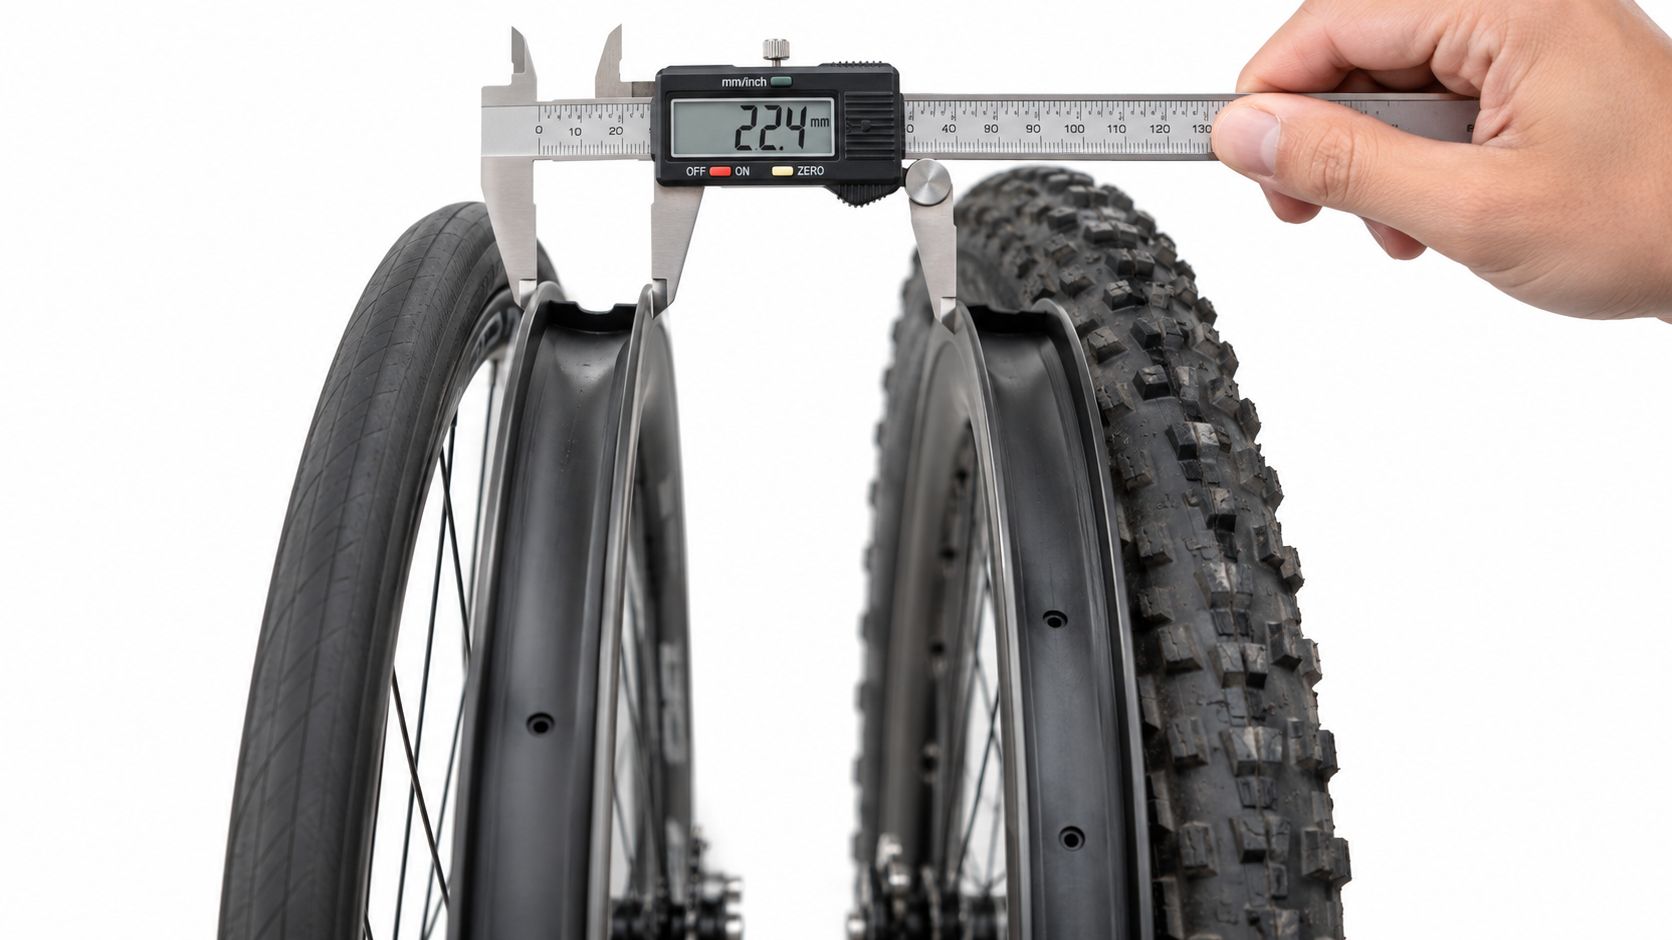
A tire swap starts with two measurements: the wheel's bead-seat diameter and the rim's internal width. Both matter, but neither proves that a particular tire is approved for a particular wheel. Tire and rim guidance, bead and rim design, installation instructions, and pressure limits complete the compatibility check.
Table of Contents
- Why Rim Width and Tire Compatibility Trip Up Riders
- Internal Rim Width and What Buyers Should Measure
- How Rim Choice Changes the Tire You Ride
- A Tire and Rim Compatibility Checklist
- Tubeless, Clincher, and Hookless Rim Implications
- Pressure, Handling, and Clearance Consequences
- A Buyer's Tire and Rim Compatibility Check
- How SYCLR Helps You Compare Listings
Why Rim Width and Tire Compatibility Trip Up Riders
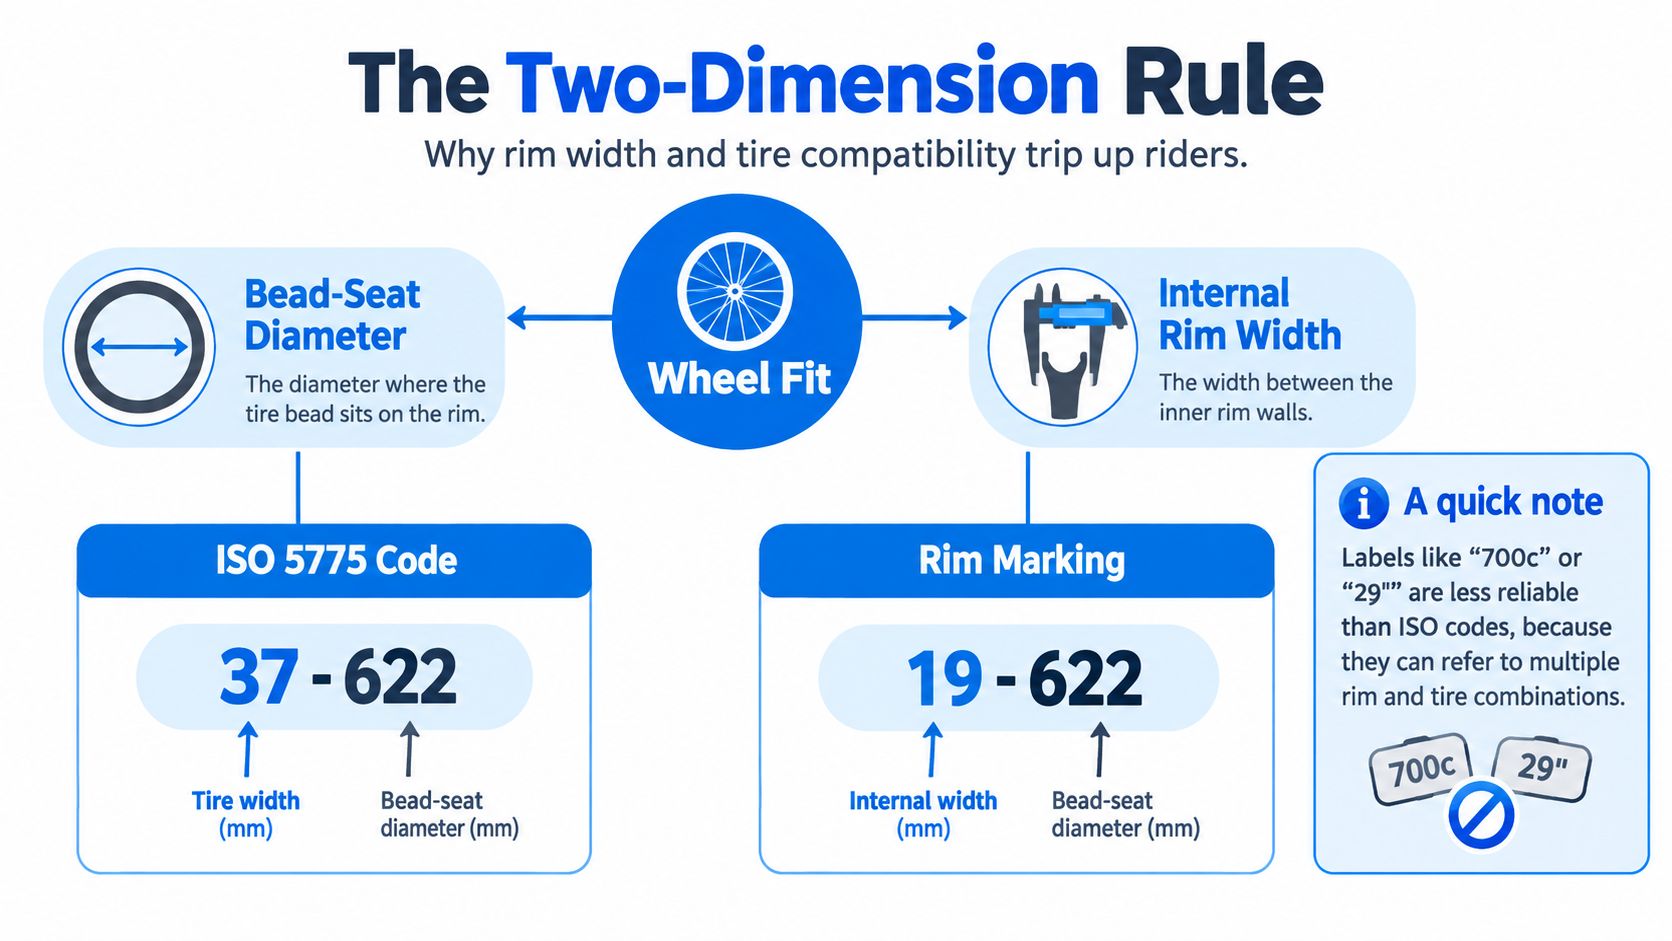
Think of bead-seat diameter and internal rim width as the two starting dimensions, not a complete compatibility test. An ISO tire marking such as 37-622 gives a nominal tire width of 37 mm and a 622 mm bead-seat diameter. The tire's diameter must match the rim's; then its width must fall within the applicable tire and rim makers' guidance. You must also check tire type and bead approval, rim design, installation requirements, pressure limits, and clearance on the bike.
Why the name on the tire can mislead you
A familiar size name may not identify the bead-seat diameter. Historical 28 inch labels have been used for 635 mm and 622 mm tires; 20 inch can mean 406 mm or 451 mm. Check the ISO/ETRTO marking on the tire and the wheel instead of relying on an inch label or a listing title.
Practical rule: matching size names are not a substitute for matching bead-seat diameters and checking the approved tire/rim combination.
Internal Rim Width and What Buyers Should Measure
Internal rim width is measured inside the rim at the tire bead-retaining surfaces, not across its outside profile. WTB explains where to measure inner rim width and uses names such as i25 to indicate a 25 mm inner width. External width, especially on a flared or deep rim, is not interchangeable with that measurement.
How to read the rim marking
In a rim dimension such as 19-622, 19 mm identifies the internal width and 622 mm the bead-seat diameter. Ask for the wheel or rim maker's specification, check the rim marking, or measure at the appropriate inner bead-seat location with calipers. Identify the exact rim model as well: dimensions alone do not tell you whether its tire and pressure requirements are met.
Record the inner width and the bead-seat diameter, then check the maker's instructions for that rim.
How Rim Choice Changes the Tire You Ride
A tire's printed width is nominal, not a guarantee of its installed width. In Schwalbe's tire-dimension examples, a nominal 28 mm tire measures about 27 mm on a 17C reference rim, 28 mm on 19C, 29 mm on 21C, and 30 mm on 23C under Schwalbe's stated measurement conditions. WTB's Exposure 30 example measures 30 mm on a 19 mm inner rim and 32 mm on a 23 mm inner rim. These are attributed examples for particular tires and setups, not a conversion formula or a prediction for another tire.
Why mounted width varies
The rim and tire combination can change casing profile and measured width. The result depends on the specific tire, rim, inflation and measurement conditions; it does not guarantee a particular cornering feel or final width. If clearance is tight, measure the installed tire rather than extrapolating from another maker's example. For a separate guide to clearance checks, see bike tire clearance.
A Tire and Rim Compatibility Checklist
There is no single approved tire-width range for every rim with the same internal width. Use the exact tire and rim models when consulting their manufacturers' guidance. Where general compatibility charts and product-specific instructions differ, follow the requirements of the exact tire and rim manufacturers; if approval remains unclear, seek confirmation before installation.
| Check | Why it matters | Evidence needed |
|---|---|---|
| ETRTO bead-seat diameter | Tire and rim diameters must match for the bead to seat correctly. | Tire size marking and rim or wheel marking/specification. |
| Internal rim width | Width is a starting input for the applicable fit guidance, not an approval on its own. | Rim model specification or a correctly located inner-width measurement. |
| Approved tire/rim width range | Either maker may restrict the combination. | Current guidance for the exact tire and rim models, including WTB's tire/rim fit chart or Schwalbe's tire and rim combination guidance where applicable. |
| Hooked or hookless system | Bead type, tire approval, and installation requirements can differ. | Rim design and explicit tire and rim maker approval for the proposed setup. |
| Pressure limits | A tire's sidewall maximum may exceed a rim, wheel, or system limit. | The applicable tire, rim/wheel, and system specifications, including any hookless or tire-width restriction. |
| Frame and fork clearance | A tire approved for the rim may still not fit the bicycle. | Bike maker's guidance and a check of the installed tire on the actual bike. |
How to use manufacturer charts
Start with the WTB tire/rim fit chart or Schwalbe tire/rim guidance when those makers' products are involved. Then read the instructions for both exact products. A general chart cannot override a model-specific restriction, and an approved width pairing does not waive bead, installation, or pressure requirements.
Tubeless, Clincher, and Hookless Rim Implications
A hooked rim has bead hooks; a hookless rim has straight-side bead walls. Neither description alone approves every tire in a broad category. Check that both tire and rim manufacturers approve the exact combination, including the intended installation method. A generic tubeless ready label by itself is not sufficient evidence for a particular hookless wheel.
Schwalbe's hookless guidance specifies its eligible tire markings and notes that its approved hookless-compatible TLE/TLR tires may be used with an inner tube as well as tubeless, subject to the applicable rim and tire instructions. That does not mean a tube makes an otherwise unapproved tire suitable for a hookless rim. For setup differences, see tubeless vs tubes for gravel bikes.
Why this matters on a used bike
A tire being mounted and inflated is not proof that its bead and the rim are approved together. Request the tire and rim make and model, identify whether the rim is hooked or hookless, and consult both makers' compatibility and installation documentation. If the seller cannot supply the details, record the combination as unverified until you can identify the components and check the instructions.
Pressure, Handling, and Clearance Consequences
Use the lowest applicable maximum pressure from the tire, rim or wheel, and any relevant system specification. Include restrictions tied to hookless use or tire width. The maximum printed on a tire never overrides a lower rim or wheel limit. Approved combinations and pressure limits are prerequisites; choosing a riding pressure is a separate question covered in road bike tire pressure guidance.
Rim width can affect mounted width, tire profile, and casing support, but the handling result depends on the complete setup. Avoid treating a wider rim as a guaranteed handling upgrade or a narrower rim as proof of a specific failure mode.
What buyers should verify before they assume a tire will work
Confirm the diameter first, then internal width and both makers' approval for the exact tire/rim pairing. Check bead and rim design, permitted installation method, and the lowest applicable pressure maximum. Finally, verify frame and fork clearance separately on the bike. Clearance is not established by a tire/rim compatibility chart; see the dedicated bike tire clearance guide for that check.
A Buyer's Tire and Rim Compatibility Check
For a used listing, ask for the exact wheel and rim model, ETRTO rim dimensions, tire make, model, and size, whether the rim is hooked or hookless, the applicable pressure limits, and links or photos of the makers' compatibility documentation. These details let you check what is installed without assuming that a listed tire size proves approval.
A quick verification flow
Match bead-seat diameters: Compare tire and rim ISO/ETRTO markings.
Identify internal width: Use the exact rim specification or measure at the inner bead-seat location.
Check both manufacturers: Confirm that the tire/rim width pairing and bead design are approved.
Confirm installation and pressure: Follow the applicable tube or tubeless instructions and the lowest relevant maximum pressure.
Check the bike separately: Verify installed-tire clearance at the frame and fork.
Missing information means unverified, not automatically incompatible. Ask for the model numbers or photos before deciding whether a listing meets your requirements.
How SYCLR Helps You Compare Listings
SYCLR compares road and gravel listings using fit signals, geometry signals, model-year context, price context, listing quality, condition signals where available, and confidence signals.
SYCLR does not perform a professional bike fit, physically inspect bikes, authenticate listings, verify ownership or seller claims, or guarantee fit or condition.
Use fit details in SYCLR if you want to compare the available fit and geometry signals alongside listings. Check tire/rim approvals, wheel specifications, pressure limits, and clearance independently using the component makers' documentation and the actual bike.