
How to Identify a Bike Model from Photos
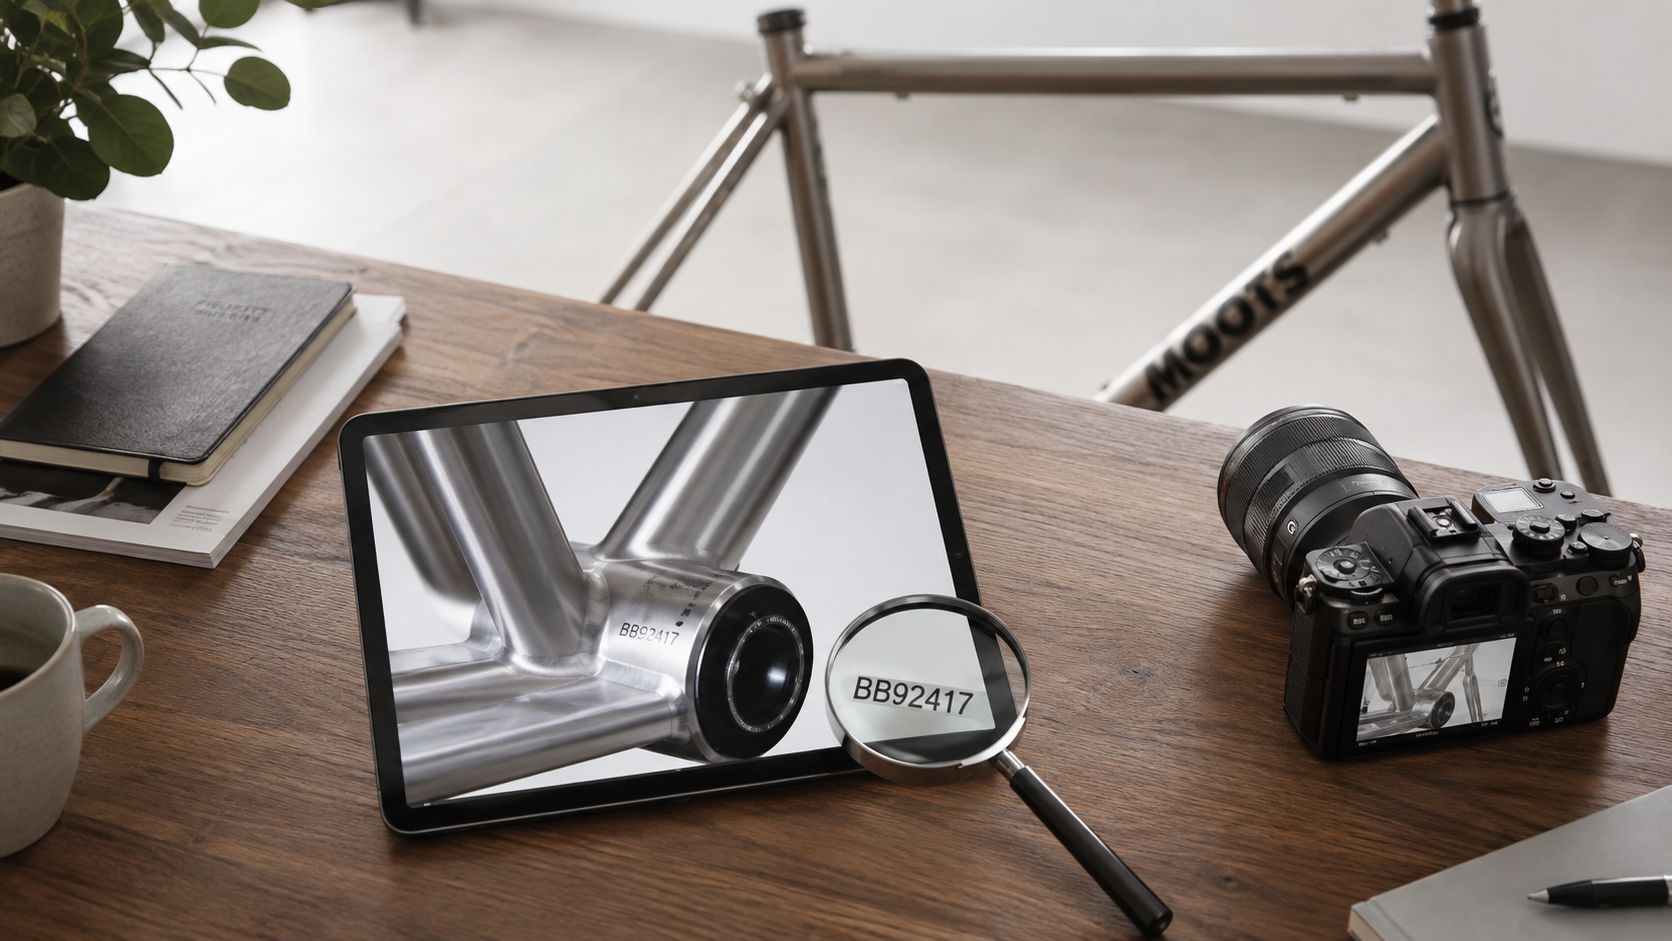
You've found a used road or gravel bike listing that looks promising, but the seller has only posted a few distant photos, the decals are hard to read, and the model name is missing or vague. Before you compare prices or shortlist the listing, establish what the bike most likely is. How to identify a bike model from photos is a process of narrowing from category to likely brand and model family, then testing candidate models against better evidence.
The goal is practical, not absolute. Photos can often help you identify a likely brand, a model family, and sometimes a candidate generation or year range. They cannot reliably prove exact geometry from perspective, confirm that every part is original, verify ownership, or replace an in-person inspection. The best workflow is simple: collect the right photos, use structural clues to narrow candidates, use components as supporting evidence, and verify the result against manufacturer pages or catalogs.
Table of Contents
- What You Can Realistically Learn From Bike Photos
- The Photo Checklist to Request First
- Use Structural Clues to Narrow the Model Family
- Serial Numbers, Size Labels, and Other Identity Marks
- Reverse Image Search and Catalog Verification
- When Identification Gets Hard and AI Helps
- Confidence Checklist Before You Message the Seller
- Keep Fit, Condition, and Value in Their Proper Place
- Bike Model Identification From Photos FAQs
What You Can Realistically Learn From Bike Photos
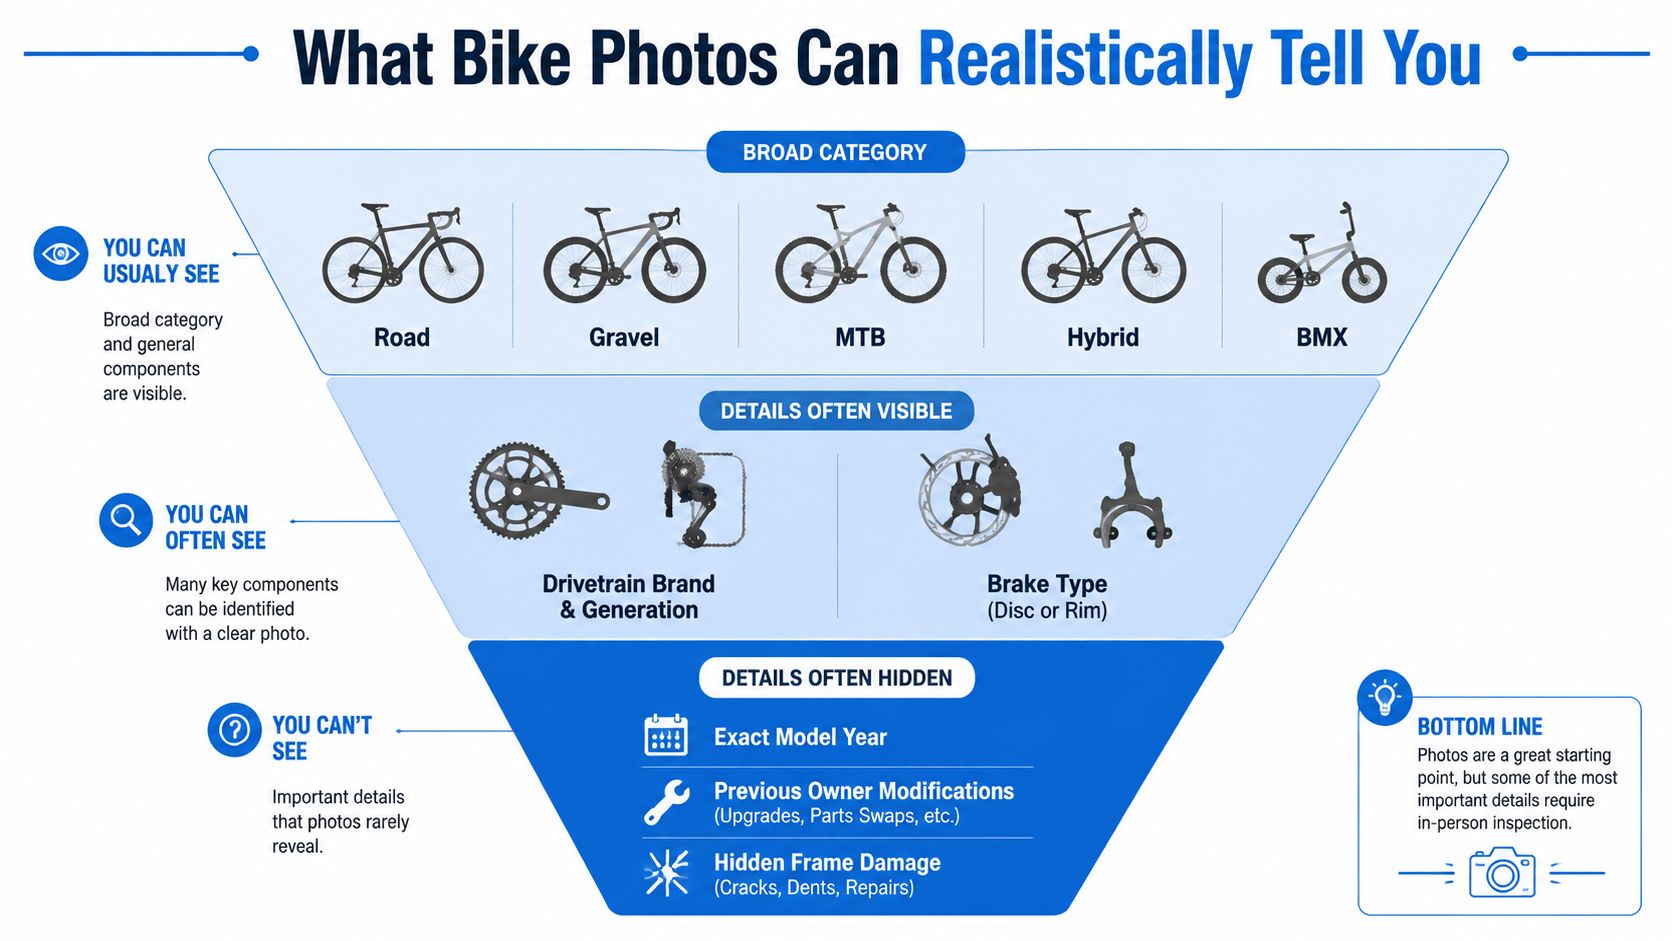
A used-bike listing often gives you enough information to form a useful working identification, but not enough to prove every detail. Clear images can often narrow the bike to a broad category such as road, gravel, mountain, hybrid, or BMX, although closely related categories can overlap visually. They may also reveal a likely brand, a model family, brake type, drivetrain family, wheel format, and visible frame features that point toward a candidate model or generation.
Exact identification is harder. Paint can change. Decals can be replaced. Forks, wheels, cranksets, drivetrains, and brakes can be swapped. Some brands also reused similar graphics across adjacent models. That is why photo-based identification should treat structural clues as stronger than branding alone, and verification as a separate step.
Use a confidence funnel
Work from broad evidence toward narrower claims:
Category: road, gravel, MTB, hybrid, or BMX.
Brand: badge, downtube branding, and recognizable frame construction.
Model family: frame silhouette, tube shaping, junction details, routing, fork, and dropouts.
Candidate model or generation: visible spec clues, graphics, and manufacturer reference matches.
Year range and specification: supporting evidence only, checked against stronger references.
That order matters. A wrong early assumption can send every later search in the wrong direction. A photo-based workflow should combine branding, frame structure, visible component markings, and manufacturer references instead of relying on one clue in isolation.
Treat the listing itself as evidence. A clear full-bike view, useful close-ups, and readable labels increase confidence. Missing views do not automatically mean a seller is hiding something, but they do limit what you can claim from the photos. Before treating a likely model match as a buying decision, review broader used-bike red flags.
The Photo Checklist to Request First
The fastest way to improve identification is to ask for the right photos. One distant drive-side image is rarely enough. Request a small set of specific images that lets you separate broad category, likely brand, and model-family clues.
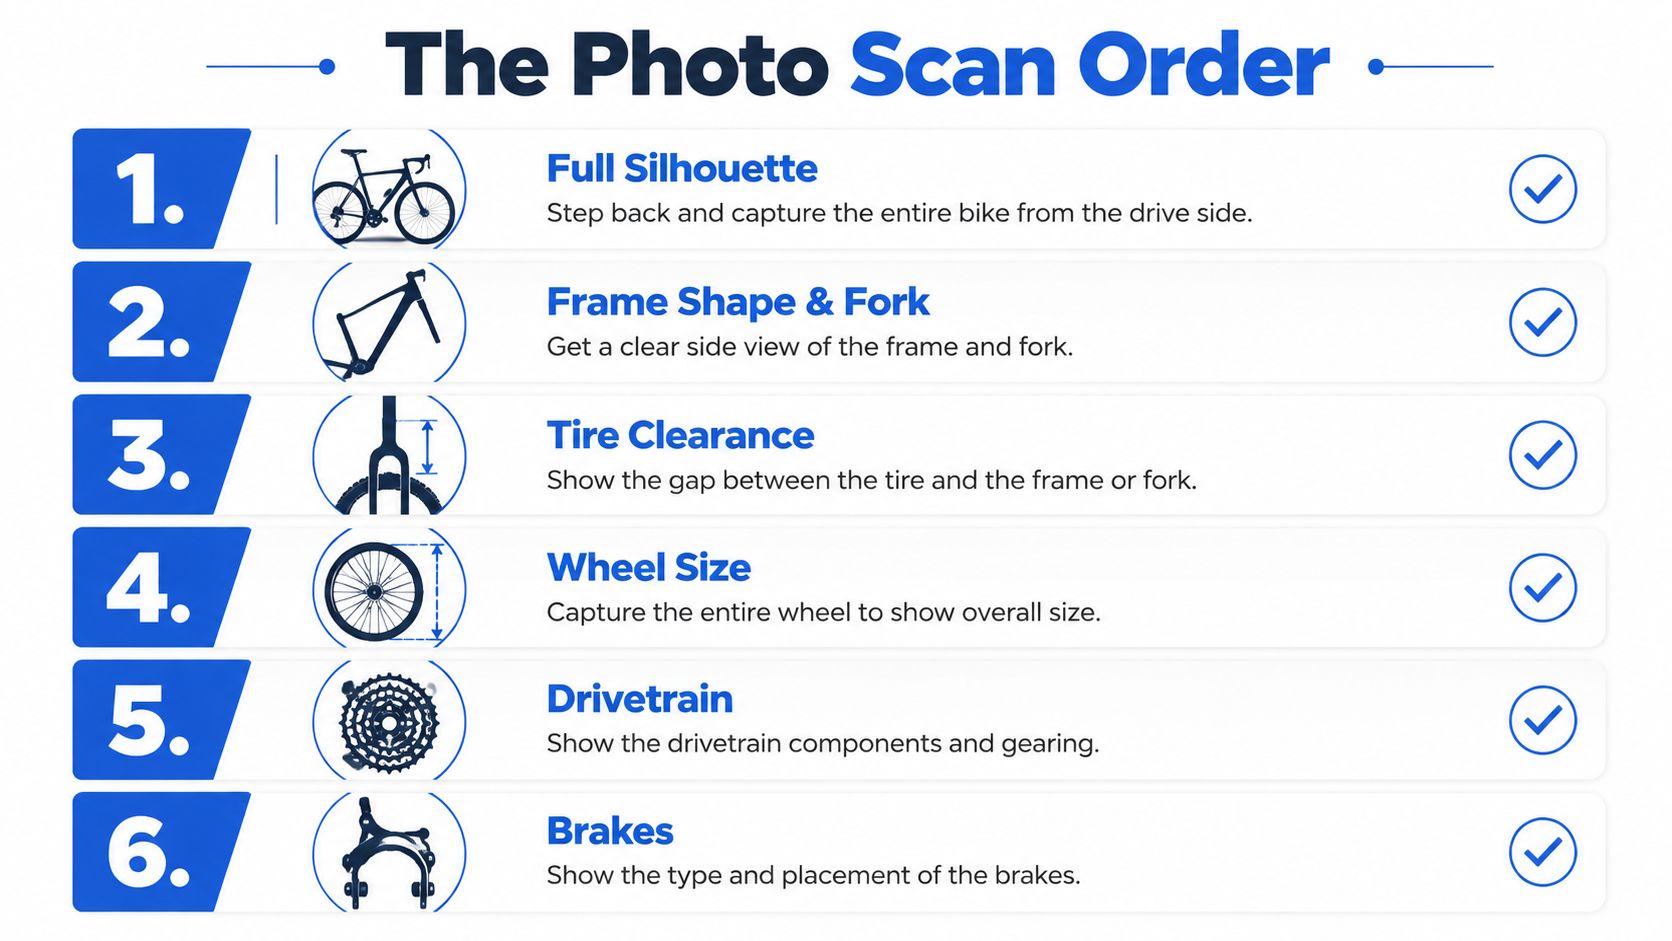
Start with the whole bike
Ask for both of these first:
Full drive-side photo
Full non-drive-side photo
Together, those images show the bike's overall silhouette, fork style, brake layout, cable routing direction, tyre clearance, dropout style, and key frame details that may be hidden from only one side. They can also reveal details worth investigating, such as a fork, drivetrain, or other component that does not match the candidate's published original specification.
Use these photos to narrow the search path. A race road frame, endurance road frame, gravel bike, and cyclocross bike can overlap visually, but they often differ in clearance, junction design, routing, axle style, and fork shape. What you should not do is estimate precise geometry from photo perspective. Angles, lens distortion, and camera height can all mislead.
Then request the close-ups that narrow candidates
Ask the seller for close-ups of:
Head badge or head tube branding
Downtube branding and any model name on the top tube or seat tube
Frame junctions, especially the head tube, seat cluster, bottom bracket area, and chainstay junctions
Fork and dropouts
Bottom-bracket and serial area
Drivetrain model markings on the rear derailleur, crank, shifters, or brakes
Any readable size or model labels
Each photo answers a different question. Branding may suggest the make. Junction shapes and routing can narrow the frame family. Fork crown design, dropout shape, and axle standard can separate one generation from another. Component model codes can help you identify a visible groupset era or trim level, but they still do not prove the frame identity.
Lighting matters. Ask for neutral light, straight-on close-ups, and images sharp enough to read stamps or decals. Reflections, deep shadows, and dramatic angles hide exactly the details you need.
Practical rule: logos suggest, structure narrows, manufacturer references verify.
Use Structural Clues to Narrow the Model Family
Once you have basic photos, focus on structural details that are generally harder to alter than paint or decals. Paint and decals are easy to alter. Frame construction usually is not.
Frame details matter more than paint
Look for clues such as:
Tube shaping: round, aero, flattened, dropped, kinked, or hydroformed sections
Frame junctions: how the top tube, down tube, seat tube, stays, and head tube meet
Cable routing: external, internal, partially internal, or bar/stem-integrated routing
Brake format: rim, flat-mount disc, post-mount disc
Axle and dropout style: quick release, thru-axle, horizontal, replaceable hanger layout
Fork details: crown shape, blade profile, mounts, and axle format
Clearance signals: visible room at the fork, chainstays, and seatstays
Seat cluster design: clamp style, integrated wedge, dropped stays, or proprietary shaping
These features help narrow a likely model family even when the decals are unreadable or replaced. They are especially useful when a brand sold several bikes with similar paint but different intended use.
Use structure to narrow candidates, not to overclaim. A photo may strongly suggest a family of bikes, but it rarely proves an exact model on its own. Do not infer exact stack, reach, angles, or tube lengths from a listing photo. Once you have a candidate model and size, use the manufacturer's geometry chart instead.
Components support the case, they do not prove it
Visible components can help, particularly when branding is weak. Start with manufacturer model codes where they are readable. Readable model numbers on derailleurs, shifters, cranksets, brakes, hubs, or other components can help identify the current build and determine whether it is broadly consistent with a candidate model or generation.
Use that evidence carefully:
Component identity can support a candidate model or generation
Component date or era cannot prove frame identity
A mixed build is common on used bikes
For older bikes, historical component databases can help identify legacy parts when manufacturer documentation is incomplete. Treat those sources as supporting references, not proof of the frame model.
Serial Numbers, Size Labels, and Other Identity Marks
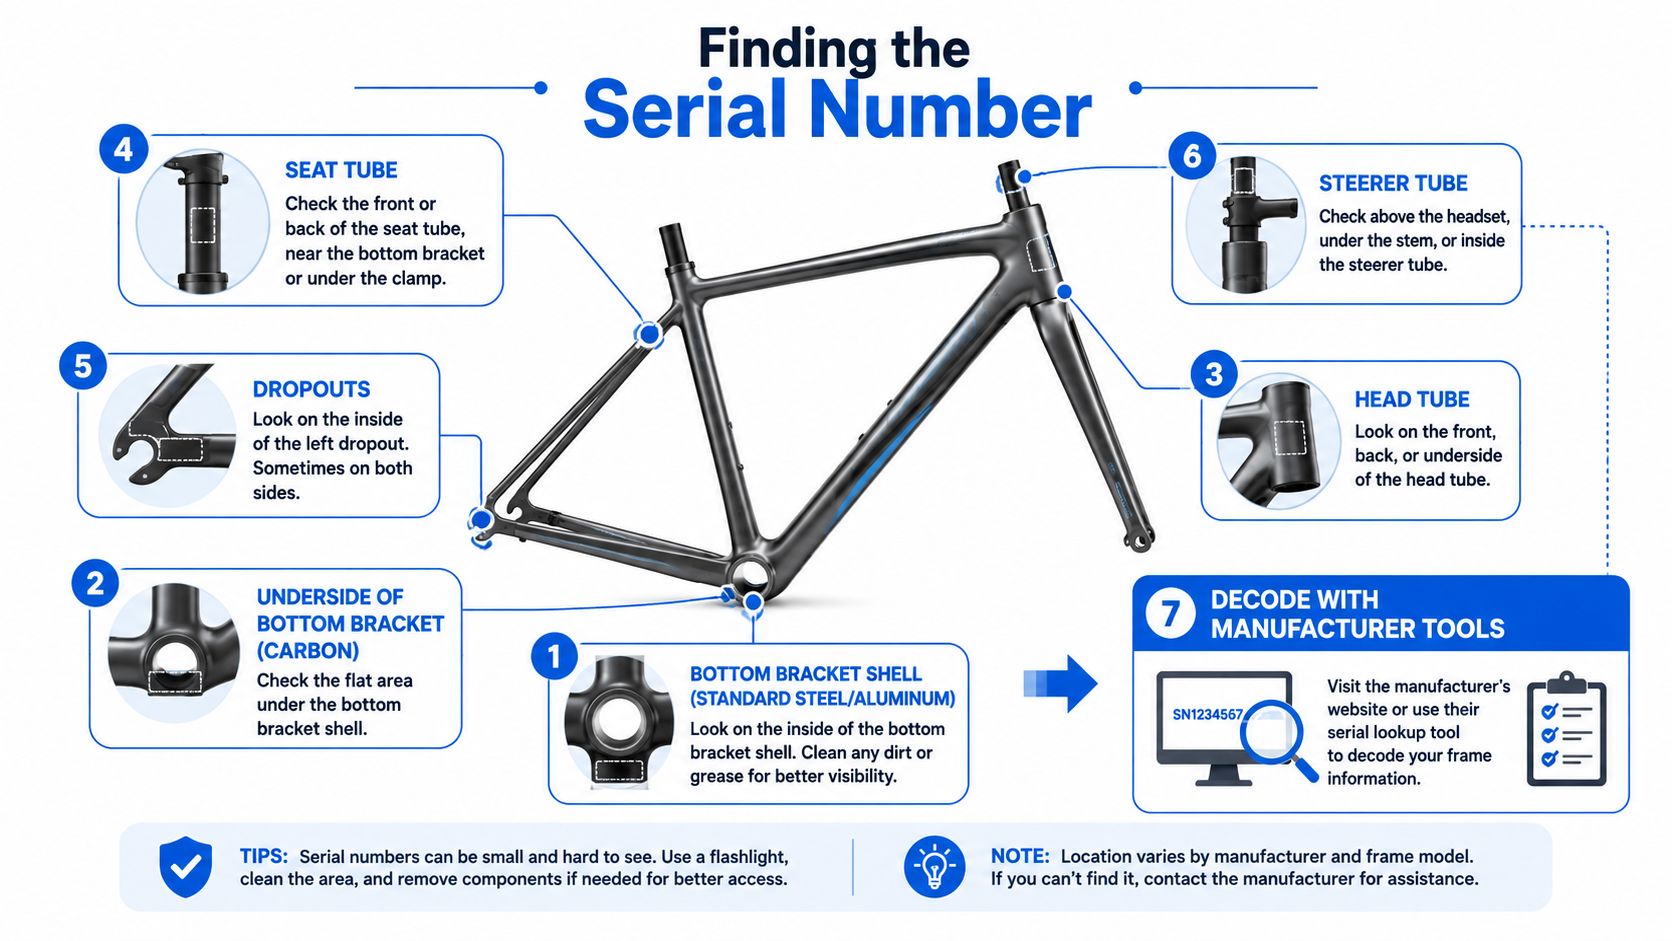
Serial guidance should stay simple. A serial number can be important context, but there is no universal decoder that reliably turns a frame serial into a make, model, and year across brands.
Use serials for context, not a universal decode
Common serial locations include the bottom-bracket area, head tube, seat tube, dropout, or another manufacturer-specific location. Photographing the surrounding frame area helps you connect the marking to the actual frame shown in the listing.
A serial may help with brand-specific records, warranty paperwork, or stolen-bike checks. But do not treat a serial as a universal model decoder.
Bike Index is useful for registration, serial-match, and theft-status context. It is not a general model-identification or model-year verification system. A registry result does not authenticate the bike or prove ownership, and the absence of a match does not establish anything about legitimacy.
If you need deeper model-year research, use this guide to identifying a bike's model year.
Readable size or model labels can be useful supporting evidence, especially when their placement and wording agree with manufacturer documentation.
Reverse Image Search and Catalog Verification
Reverse image search is most useful when you stop thinking of it as a magic answer engine. Its real value is helping you surface candidate matches quickly.
Crop, compare, then verify against manufacturer references
Use a crop-and-compare method:
Crop one distinctive detail at a time. Good crops include the head badge, seat cluster, fork crown, dropout, cable-entry point, or a unique decal.
Search with a clean image. Avoid screenshots full of marketplace text, furniture, or multiple bikes.
Compare recurring candidates. If the same model family keeps appearing, that is a useful lead.
Verify the candidate against manufacturer pages, catalogs, or official product documentation. This should be the strongest reference step before treating a visual match as credible.
The last step matters most. Once you have a candidate, compare it against manufacturer archive pages, catalog PDFs, geometry/spec pages, or official product images. Check:
Frame construction and tube shapes
Fork shape and brake format
Routing layout and dropout design
Model-name placement and graphics
Published component spec, where relevant
Any visible size or trim labels
A component mismatch does not automatically disqualify the frame match because parts may have been replaced.
Forum threads and enthusiast posts can still help with obscure bikes, but treat them as supporting leads until the structural details line up with stronger references.
Once you have a candidate model, use the manufacturer's geometry chart to compare the correct size. For terminology, see SYCLR's bike geometry chart. Do not derive precise geometry from listing photos.
When Identification Gets Hard and AI Helps
Some bikes stay ambiguous even after careful photo review. Repaints, replacement decals, mixed builds, and near-identical model revisions can all make exact identification difficult.
Use AI as a lead generator, not a verifier
AI vision tools can be useful when used for the right task. They may help suggest:
A likely brand
A likely model family
A visible component family
Useful search terms for manual research
What they do poorly is the step many buyers care about most: exact verification. AI systems can overconfidently invent a precise model from partial evidence, especially when the branding is blurry or multiple models share similar paint and frame shapes.
Use AI output as a lead, not verification. If an AI tool suggests a model, test that suggestion against the bike's structural details and then against manufacturer references.
| Evidence source | What it does well | Where it falls short |
|---|---|---|
| AI vision tool | Suggests likely brands, model families, visible components, and search terms | Can overstate confidence and invent exact models |
| Manufacturer page or catalog | Verifies published frame details, graphics, and original build context | May omit regional variants, limited runs, or undocumented revisions |
| Historical component database | Helps identify older visible parts | Supports component research, not frame proof |
| Human enthusiast knowledge | Useful for obscure frames and odd branding | Still limited by poor photos and memory |
When the evidence stays mixed, it is better to state a likely brand and model family, plus a candidate generation or year range, than to force an exact answer.
Confidence Checklist Before You Message the Seller
Good identification work separates what is likely from what is verified. Instead of collapsing everything into one answer, evaluate each layer of confidence independently.
| Question | Higher confidence | Lower confidence |
|---|---|---|
| Brand confidence | Badge, branding, and frame details agree | Branding is unclear or decals appear replaced |
| Model-family confidence | Frame proportions, routing, junctions, fork, and dropout details align with a known family | Several similar models share the same basic frame look |
| Exact-model confidence | Official references align with frame details and visible labels | Photos are incomplete, repaint is possible, or spec differs heavily |
| Year-range confidence | Manufacturer references, frame details, graphics, and visible specification context support the same generation or period | Parts are mixed or the frame appears between revisions |
| Size confidence | Readable size marking or reliable seller measurements that can be compared with the manufacturer's size/geometry chart | Seller gives only a rough size claim |
| Specification confidence | Visible model codes match the candidate build context | Components are swapped or photos are too soft to read |
Raise or lower confidence deliberately
Increase confidence when the seller provides:
clear drive-side and non-drive-side photos
readable branding and model labels
close-ups of frame junctions, fork, and dropouts
a legible serial-area photo
readable component model codes
a candidate that matches manufacturer references closely
Lower confidence when:
photos are distant, dark, or blurry
decals look replaced or the frame appears repainted
the fork or components seem inconsistent with the frame family
visible details conflict with the claimed model
the seller cannot provide requested close-ups
Before you message the seller, write down what you believe, what evidence supports it, and what remains unverified. That keeps a plausible photo match from turning into an assumption.
Useful questions include:
“Could you send full drive-side and non-drive-side photos?”
“Could you send a clear photo of the head badge, downtube branding, and any model label?”
“Can you photograph the head tube, bottom bracket area, seat cluster, fork, and dropouts?”
“Could you send a sharp photo of the complete serial area?”
“Can you send close-ups of the rear derailleur, shifters, crank, and brakes so the model markings are readable?”
“What size is marked on the frame, and can you photograph that label?”
Keep Fit, Condition, and Value in Their Proper Place
Photo identification is only one part of a buying decision. Once you have a likely brand, model family, and candidate generation, you can move into the next questions without blending them into this process.
Keep those topics separate:
For deeper year research, use how to tell what year a bike is
For listing and seller concerns, review used-bike red flags
For inspection steps, use the used bike checklist
For market pricing, see used bicycle value
For geometry terminology, use the bike geometry chart
For fit fundamentals, read the bike fit guide
That separation matters. No photo gives you exact geometry. No serial number alone universally identifies the model. No component date proves the frame year. No registry result proves ownership. No AI result counts as verification.
Bike Model Identification From Photos FAQs
Can I identify a bike model from just one side photo?
Sometimes a single clear side photo can suggest a likely brand or broad model family, but confidence is limited. A full drive-side and non-drive-side view, plus close-ups of branding, frame junctions, fork, dropouts, and the serial area, makes identification much more reliable.
What photos should I ask a seller to send?
Ask for full drive-side and non-drive-side photos, head badge or head tube branding, downtube branding, frame junctions, fork and dropouts, bottom-bracket and serial area, drivetrain model markings, and any readable size or model labels.
Can a serial number tell me the exact model?
Not reliably across brands. Some manufacturers have patterns or records that help, but there is no universal serial decoder for exact bike identification. A serial can provide manufacturer-specific, registration, and theft-status context, but it is not a guaranteed exact-model identifier.
Do component dates prove the frame year?
No. Components are supporting evidence only. They can help you understand whether a build looks period-consistent, but component identity or date does not prove the frame identity or exact frame year.
Is reverse image search enough to verify the bike?
No. Reverse image search is best for finding candidates. The verification step is comparing those candidates against manufacturer pages, catalogs, and official reference material.
Can AI identify the exact bike model from a photo?
AI can suggest plausible brands, model families, visible components, or useful search terms, but it can also produce confident false matches. Treat its output as a lead to verify against manufacturer references, not as proof of the bike's identity.
to compare road and gravel listings using fit signals, geometry signals, model-year context, price context, listing quality, condition signals where available, and confidence signals. SYCLR does not authenticate bikes, verify ownership, inspect condition, or guarantee model identity, so keep any uncertain identification clearly labeled while you evaluate the listing.