
What Size Gravel Bike Do I Need? A Fit-Aware Sizing Guide

The right gravel bike size depends on height, inseam, standover, stack, reach, your riding style, and the actual geometry of the bike you are considering. A size chart can narrow the range, but stack and reach help you choose between real bikes.
That is why this question gets confusing so quickly. You look at two bikes that both say 54cm or Medium, both are described as gravel bikes, and both seem close enough on paper. Then one feels tall and calm, the other feels long and demanding, and suddenly the label stops helping.
For most riders, the useful question is not just, “Am I a Small, Medium, or Large?” It is, “Which actual gravel bike gives me the right standover, front-end height, cockpit length, and handling feel for the terrain I ride?” That is the decision process that matters, especially if you are buying used, comparing listings across brands, or sitting between sizes.
Table of Contents
Your Direct Answer to Gravel Bike Sizing
If you are asking what size gravel bike you need, start with height to narrow the range, use inseam to check standover, and finish with stack and reach to choose between actual bikes.
That order matters because gravel sizing is not standardized. One of the clearest problems in bike shopping is that two frames with the same label can fit very differently. According to MyVeloFit’s bike sizing analysis, two bikes labeled 54cm can have drastically different stack and reach numbers, and the same rider can end up in a different labeled size depending on the brand. That is why generic charts help only at the start.
A gravel bike also is not sized the same way you would judge a pure road race bike. Gravel bikes typically use slacker geometry and longer wheelbases than road bikes, and they often have tire clearance from 40mm up to 2.1 inches (53mm) or more for mixed-surface riding, as outlined by BikeRadar’s gravel sizing guide. That changes how the bike handles, how high the front end sits, and how much stability you get when the surface gets rough.
Practical rule: Use a size chart to create a shortlist. Use geometry to make the actual decision.
If you want a quick starting point, many riders around 5’3″ to 5’6″ begin near a Small, riders around 5’6″ to 5’10” begin near a Medium, and riders around 5’10” to 6’1″ begin near a Large. Those are rough starting ranges, not conclusions.
If you want chart-style detail after that first filter, SYCLR’s Gravel Bike Frame Size Chart is the better place to compare broader size ranges. This article is about how to choose between real bikes once you have a starting range.
If you want to start sorting real bikes instead of guessing from labels, start with your height, bike type, and budget so you can shortlist better-fit gravel bikes before you buy.
Start With Your Body Key Sizing Measurements
Your body gives you the first useful boundaries. For gravel bikes, the two measurements that matter most at the start are height and inseam.
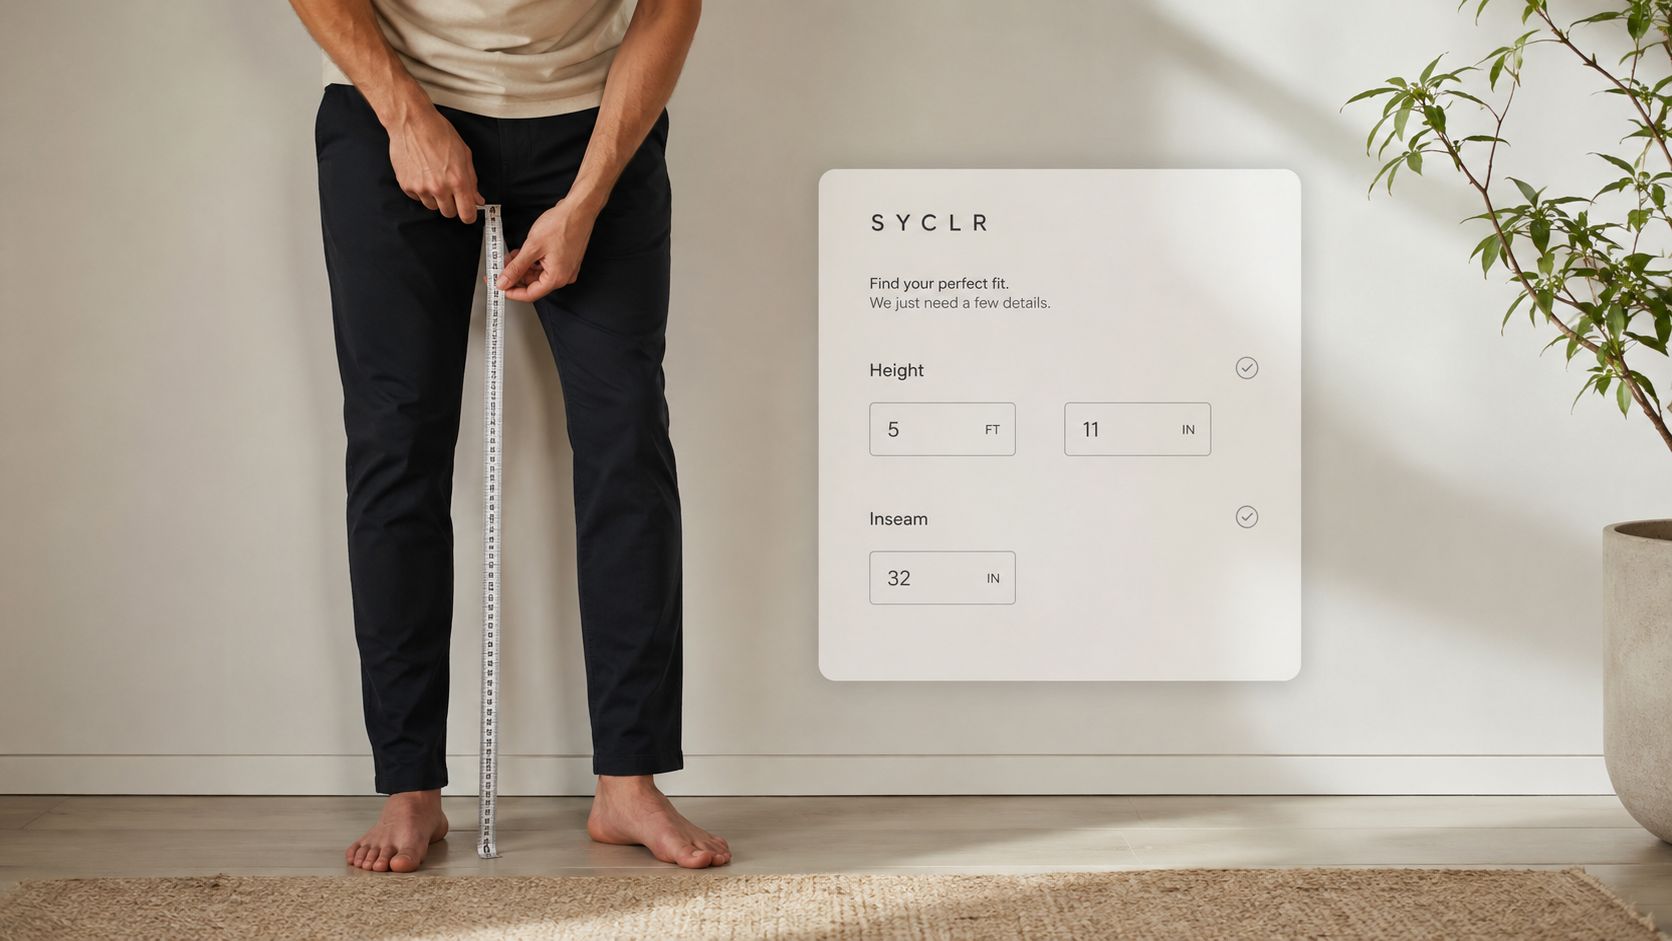
Height is the first filter
Height is still the simplest way to cut down the field. Brands usually build their first recommendation around it, and that is fine as a first pass.
Polygon’s gravel sizing guide says height is the primary starting point, but it has to be paired with inseam to determine standover clearance and frame size. The same guide notes that its size L gravel bike is designed for riders between 175-188 cm, and it recommends measuring inseam with a wall, a book, and a tape measure, with the book pressed upward like a saddle before measuring from floor to book edge. You can see that method in Polygon’s gravel bike sizing guide.
Height gets you into the right neighborhood. It does not tell you whether the top tube is too high, whether the cockpit is too long, or whether a used listing from another brand will fit the same way.
Inseam decides whether a bike is actually workable
On gravel, standover clearance matters more than many riders expect because you are more likely to stop, dab, or dismount on uneven ground. A bike can look right by height and still be wrong once you straddle it.
Use this quick method at home:
-
Stand barefoot against a wall.
-
Place a book between your legs and pull it upward like a saddle.
-
Measure from the floor to the top edge of the book.
-
Use that inseam number when checking standover.
A safe gravel setup should leave enough room between your body and the top tube when you stand flat-footed over the bike. If you want a deeper explanation of how to think about that clearance when comparing bikes, see SYCLR’s guide to bike standover height.
Do not use saddle height as proof that a frame fits. You can raise or lower a saddle a lot. You cannot fix bad standover or a frame that is fundamentally too long with one easy adjustment.
Two riders can share the same height and still need different gravel sizes because torso and leg proportions change the result. That is where the simple chart starts to break down, and where geometry starts doing the primary work.
Decoding Gravel Bike Geometry Stack and Reach
Once you have narrowed the size range, geometry takes over. For gravel bikes, the two numbers I would check first are stack and reach.
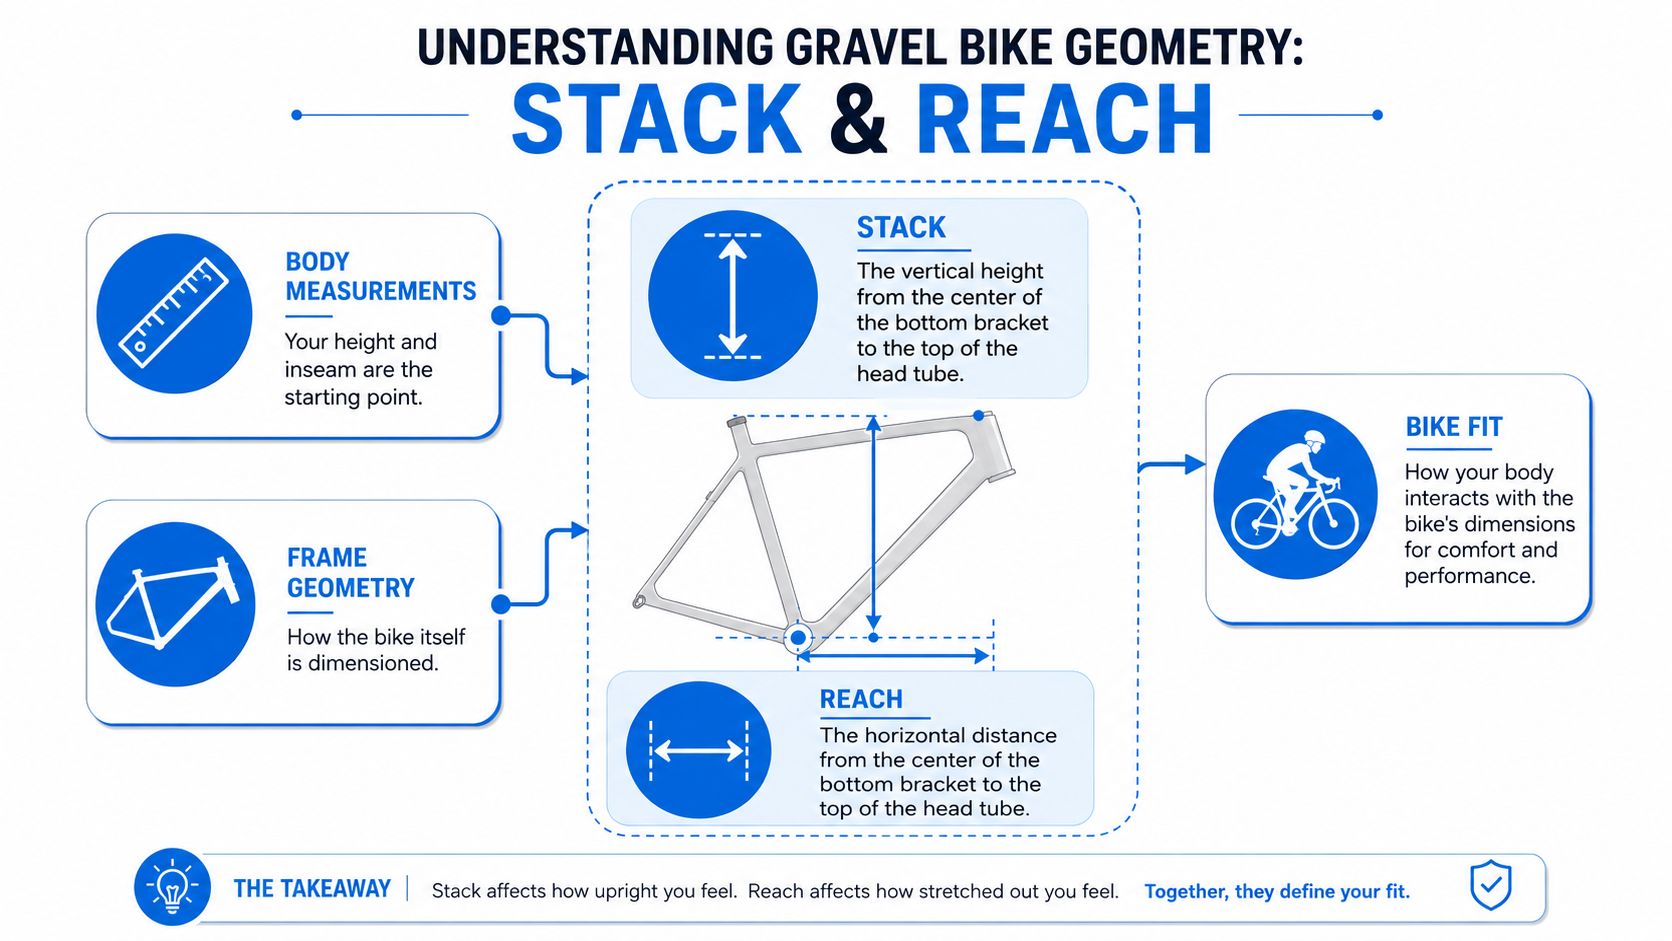
What stack and reach actually mean
Think of the front of the frame as a simple box.
-
Stack is the box’s height. It is the vertical distance from the bottom bracket to the top of the head tube.
-
Reach is the box’s length. It is the horizontal distance from the bottom bracket to the top of the head tube.
A higher stack usually means a more upright front end. That often feels better for long gravel rides, rough surfaces, and riders who want more control without a big stem drop.
A longer reach usually means a longer cockpit. That can feel faster and more planted on smoother terrain, but it can also make a bike feel stretched if the rest of the setup does not suit you.
Quick geometry check:
-
Compare stack to understand front-end height.
-
Compare reach to understand cockpit length.
-
Compare standover to confirm clearance.
-
Compare wheelbase and head angle if you care about stability versus quick handling.
-
Compare intended use: race gravel, all-road, adventure, or loaded riding.
Why size labels fail
The label on the seat tube does not give you enough information. As noted in this breakdown of bike sizing data from MyVeloFit, gravel bike frame sizing is not standardized across brands, so two bikes labeled 54cm can have drastically different stack and reach measurements. That is why height alone is not enough, and why comparing actual geometry numbers is the reliable move.
If you are comparing listings and want a cleaner explanation of how these numbers interact, SYCLR’s article on bike stack and reach is worth keeping open in another tab.
A Medium is not a fit description. It is a label. Stack and reach are the fit signals.
A useful supporting metric
Effective top tube can still be useful, especially on older listings where stack and reach are missing. It gives another clue about cockpit length, but it should be read alongside stack, reach, stem length, seat tube angle, and the bike’s intended use. For modern geometry comparisons, stack and reach are usually the cleaner starting point.
The Between Sizes Dilemma How to Choose
Most buyers face a common challenge. You are on the line between two sizes, both seem plausible, and the internet gives you conflicting advice. See more on the between-sizes dilemma, worked through step by step.
The short version is simple. A smaller frame may favor agility and easier standover. A larger frame may favor stability and a taller front end. The better choice depends on stack, reach, standover, terrain, and the position you can comfortably hold.
When the smaller frame may make more sense
A smaller gravel frame is often the better starting point if you want a bike that feels easy to place, quick to steer, and less cumbersome on loose or technical terrain.
Canyon’s gravel sizing guidance is useful because it shows how moving between adjacent sizes can change stack, reach, and handling feel. Even small changes on paper can affect whether the bike feels more responsive or more stable, as explained in Canyon’s gravel bike size guidance.
A smaller frame is often easier to tune with normal fit adjustments if you are close between sizes. Stem length, spacer height, hood position, and saddle setback can refine a close match. They should not be used to rescue a clearly wrong frame.
When the larger frame may make more sense
A larger frame can be the better call when you want a calmer bike at speed, a more naturally higher front end, or a less aggressive posture for long gravel miles.
That said, larger only works if the reach stays reasonable and standover is still acceptable. A bike that feels stable on a geometry chart can still become awkward if the cockpit gets too long or the top tube gets too high for your inseam.
Choosing Between Gravel Bike Sizes
| Priority | Size Down (Smaller Frame) | Size Up (Larger Frame) |
|---|---|---|
| Handling feel | Often more agile, quicker response | Often more stable, calmer at speed |
| Loose or technical terrain | Often the better option | Can feel slower to react |
| Long steady gravel efforts | Can work well if front end can be raised enough | Often suits riders wanting a relaxed, planted feel |
| Front-end height | Lower starting point, may need spacers or setup changes | Taller starting point, often easier to achieve an upright posture |
| Cockpit length | Shorter base reach | Longer base reach |
| Who usually prefers it | Riders prioritizing responsiveness and control | Riders prioritizing stability and long-distance comfort |
If you are between sizes, do not ask which frame is “correct” in the abstract. Ask which one gives the better starting geometry for the way you actually ride.
A Practical Example Race vs Adventure Geometry
Used-bike buyers run into this constantly. Two listings say Medium. Both are gravel bikes. Both fit the budget. One is a strong match. The other is not.

Two Medium gravel bikes that won’t feel the same
Take a rider who would normally shortlist a Medium. They compare two used bikes.
Bike A is a race-oriented gravel bike. It has a lower stack, a longer reach, a steeper overall stance, and a more aggressive front end. On smoother dirt and mixed road surfaces, it may feel quick and efficient. On rougher gravel, long descents, or tired late-ride handling, it may feel demanding.
Bike B is an adventure-oriented gravel bike. It has a taller stack, a more manageable reach, and a geometry package built for stability and all-day comfort. That bike may feel less sharp on fast paved sections, but better on rough surfaces, longer rides, and loaded riding.
The listing label will not tell you any of that. The geometry chart will.
Why your road bike does not transfer cleanly
A lot of road riders assume they can take their road size, apply it directly to gravel, and be done. That usually misses the actual handling requirement of the category.
As discussed in this analysis of road fit versus gravel fit, many riders prefer a gravel position that is slightly shorter, taller, or more stable than their road position because gravel terrain asks for control, comfort, and confidence when the surface changes. But the right answer depends on the rider, terrain, and bike category.
If you want a chart-style starting point before doing a deeper comparison, SYCLR’s gravel bike frame size chart can help narrow your first range. If you want broader sizing context, the bike size calculator and the bike fit guide are better tools than guessing from a seller’s title alone.
How SYCLR Helps You Compare by Fit
Geometry is useful. Shopping with geometry is tedious.
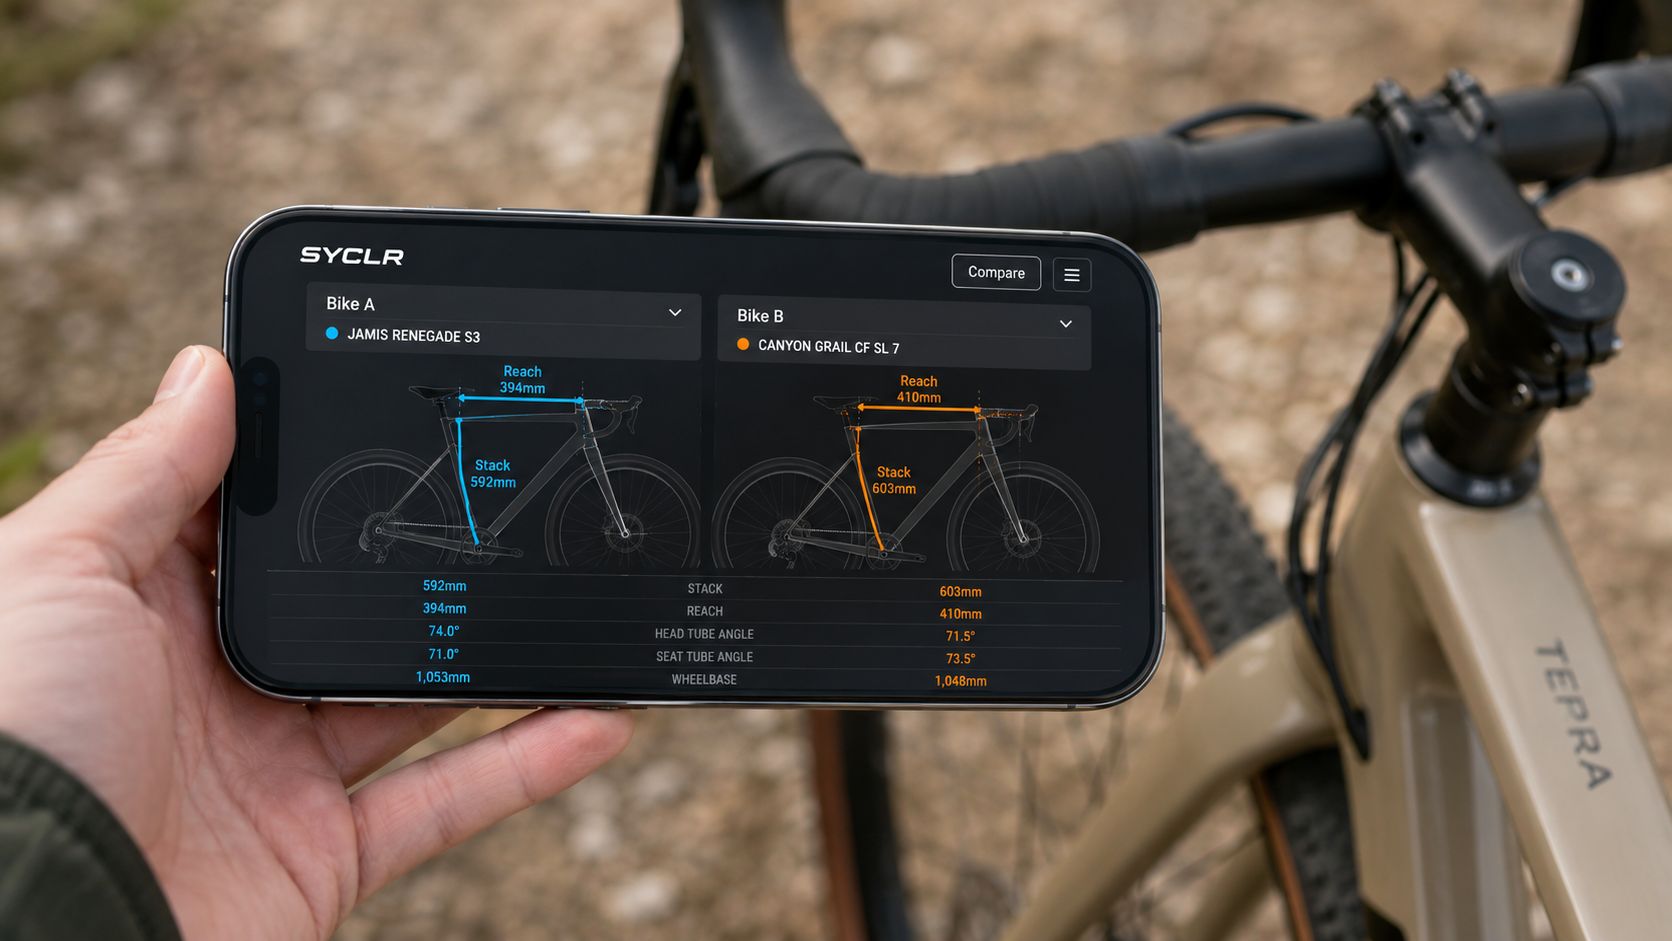
Where the shopping process usually breaks down
Most riders do not struggle with one bike. They struggle with comparing many bikes across many listings.
One seller gives only the frame label. Another includes a geometry chart but not the model year. A retailer listing has better spec detail but does not help you interpret whether the bike is likely to feel tall, long, compact, or stable. General marketplaces show inventory, but they usually do not interpret fit, geometry, price context, or buyer confidence.
That is where a decision-support tool is more useful than a plain listing feed.
How SYCLR helps
SYCLR is built for riders who want to compare road and gravel bikes with more context. Instead of relying on size labels alone, you can use fit-aware recommendations, geometry signals, price context, and confidence signals to reduce guesswork and shortlist better-fit options.
If you are still early in the process, compare gravel bike listings with SYCLR and start with your height, bike type, and budget. If you already know your current bike geometry or fit report numbers, use your fit details to improve your recommendations.
For a broader foundation before you compare listings, SYCLR’s bike fit guide is a good place to sharpen the basics.
Frequently Asked Questions About Gravel Bike Sizing
Can I size a gravel bike by height alone?
No. Height is a good starting point, but it is not enough for a confident recommendation. Inseam helps determine standover, and stack and reach help compare actual bikes. Two riders of the same height can still need different frames because their proportions and riding goals differ.
How much standover clearance do I need on a gravel bike?
A common starting point is about 2.5-5cm (1-2 inches) of clearance between your body and the top tube when standing over the bike. Cannondale’s gravel sizing guidance treats that clearance as important for safe dismounting on uneven terrain in its gravel bike sizing article. Exact comfort will vary by rider and frame shape, but standover should feel confidently manageable, not marginal.
Should I choose the smaller gravel bike if I’m between sizes?
Often, the smaller option is appealing if you want easier standover, quicker handling, and a bike that feels easier to move around on loose terrain. But not always. If the larger frame gives you the stack and stability you want without excessive reach, it may be the better choice.
Can I use my road bike size as my gravel bike size?
Not reliably. Road size can be a useful reference point, but gravel bikes vary a lot by category and geometry. Many riders end up preferring a different fit feel once surfaces get rougher and handling demands increase.
What if a used bike listing does not show stack and reach?
Ask the seller for the exact model year and full model name. Then find the official geometry chart. If you still cannot verify the geometry, treat the listing with caution, especially if you are close between sizes. Effective top tube can help as a backup clue, but it is not a full substitute.
What adjustments can refine a close gravel bike fit?
Small changes like stem length, spacer height, saddle height, saddle setback, handlebar width, and hood position can refine a close fit. They should not be used to force a frame that is clearly too large or too long.
What is the best way to compare two gravel bikes with the same size label?
Compare stack, reach, standover, and the bike’s intended use. A race-oriented Medium and an adventure-oriented Medium can fit and handle very differently even though the label matches.
If you are shopping now and want to reduce guesswork before contacting sellers, use SYCLR to compare listings by fit, price, and confidence signals. You can start with your height, bike type, and budget, or if you already know your geometry numbers, use them to improve your recommendations.
If you are trying to answer “What size gravel bike do I need?” while comparing real listings, start with your height, bike type, and budget in the SYCLR app. SYCLR helps you shortlist better-fit road and gravel bikes using rider details, geometry signals, listing comparison, price context, and confidence signals so you can make a more informed buying decision.